What is the name of the technique of plasticine on paper. Plasticineography - an unconventional drawing technique
All children are very fond of working with plasticine, because it is very exciting and interesting, you can sculpt everything that your baby’s creative imagination allows: a flower for your beloved mother, unusual animals, dishes for dolls, funny little men, even create a voluminous application! Modeling is very useful for a child: creative thinking and imagination develop, finger motility is in action, which has a beneficial effect on improving the speech of a small person. This activity is called plasticineography.
The task of adults who want to develop artistic abilities in a child is to acquaint them with various options work from plasticine, perform various crafts with them, maintain interest in the manifestation of fantasy and individuality in their work.
A very beautiful picture can be made for children from plasticine on cardboard, thick paper, transparent glass. Such crafts are flat and voluminous, and they can be performed using different techniques. When choosing a technique, one should take into account what will be depicted in the future work, for what age of the baby it is designed, the complexity of the picture.
Smearing technique
To use this technique, you can buy in a special store ready-made template with a picture, then fill it with plasticine (often everything is sold together immediately in a set). And you can independently draw a template on cardboard, preferably colored. Then knead the plasticine to a soft state, lay it with the desired colors on the image and smear it, taking into account the borders of the picture. Some details, at your discretion, can be made convex. Get even more effective.
flagella technique
The main thing in this work is to the child learned to make flagella. First you need to figure out what will be shown in the picture, what details it will consist of. Then, with the help of adults, a pattern is made for future crafts. First you need to do the modeling of flagella. To do this, the plasticine needs to be kneaded and rolled into long sausages, these will be flagella. They can be of different lengths and thicknesses, depending on which figures will be molded from them. Such flagella simply need to be folded in the right direction, forward or backward, to obtain any detail. The resulting figures are attached to the base of thick paper.
Gallery: plasticine paintings (25 photos)


Mosaic technique
Such a technique is this is an app from small colored balls using plasticine. For such a craft, as usual, you need to draw something on cardboard, and then fill in the drawing with multi-colored balls prepared in advance. Modeling this type of technique develops perseverance and patience in children.
Volumetric technique
This performance technique is especially common in kindergartens, primary school institutions. A template is not needed here, the details for the composition are molded separately, and then transferred to a cardboard base in the form of some figures, plants or fairy-tale characters. Do this craft flight for creativity and the little author himself can choose the color solution and the placement of objects in his picture.
Several techniques together
If you combine two or three techniques at once in one picture, you get a very original and original work. How best to do this, your creative imagination and the child who participates in the creation of this beauty can tell.
For example, let's create a picture with flowers. The principle would be: we will do the petals themselves with the smearing technique, then the stems and leaves with the help of flagella. With the help of them, you can also make a beautiful edging for the flower petals, and place balls of colored plasticine in the middle.
Flowers in a jug
We suggest you make a very beautiful picture out of plasticine with your child, these are flowers in a jug. Several techniques will be used in this work. Making such an application is easy, exciting and very interesting!
Material for work:
- Cardboard sheet of any color.
- Glue.
- Scissors.
- Multi-colored plasticine.
Stages of work.

Flower applique
A very beautiful bouquet of daisies can also be made from plasticine. This craft looks original, fresh and summery.
Material for work:
- Color plasticine.
- Blue cardboard sheet.
- Stack.
- Hair spray.
- Pencil.
Stages of work.

The result is a lovely picture of plasticine flowers on cardboard - a bouquet of very pretty daisies that can be hung on the wall, used as a gift or framed and decorate your desktop. You can print regular stencils for drawing and sculpt on them.
Plasticine pictures


Municipal educational institution
Children's (teenage) center "Agnes"
Children's teenage club "Impulse"
Master Class
"Plasticine painting"
(2nd year of study)
Developed by: Sokolova Nadezhda Ivanovna
Teacher of additional education
Club "Impulse"
Nizhny Novgorod
Theme: Plasticine Painting
Explanatory note
Plasticine drawing - increasingly common the new kind painting and this way of depicting contributes to the creative development and variety of artistic expressive methods. Each new creative undertaking for a person is not just a skill, skills, experience: it is also a way of developing mental activity, according to the “hand-brain” relationship.
The factors for the development of an artist are constant practice, improvement of skills, a bold experiment, search and creativity in the process of activity. The combination of these qualities, in the manufacture of plasticine relief works, can contribute to the creation of new, unique works of art.
What is interesting about this technique? First, its novelty. On the other hand, such material allows finding new solutions in the image. The material is affordable, plastic, sticky, soft, keeps its shape. And most importantly: this material allows you to transfer a part of yourself to the canvas of your works, to transfer part of your warmth.
Its basis is a combination of solid surfaces and plasticine, the creation of an image by applying plasticine to the surface using a special technique, the use of auxiliary materials uncharacteristic for painting.
Work in the technique of plasticine painting is very interesting. It develops motor skills of fingers, accuracy of movements, fantasy, abstract thinking, attention, artistic skills in working with plastic materials.
Target: teach the techniques of working in the technique of plasticine painting.
Tasks:
- Give the concept of "plasticine painting";
- Teach how to work with plasticine;
- To teach how to convey shape, color, volume with the help of plasticine;
- Develop skills and abilities to work with plasticine and stacks;
- Develop spatial thinking and creativity;
- To educate children in artistic taste;
- Cultivate cognitive activity, interest and initiative;
Equipment for the d / o teacher: simple pencil, eraser, plasticine, syringe, stacks, cards with examples of techniques, examples of work in this technique;
Equipment for students: a simple pencil, an eraser, albums, cardboard, plasticine, a syringe, stacks, a board for working with plasticine;
Literature:
1. Sokolnikova N.M. art and teaching methods in primary school. - M.: Academy, 1999.
2. Davydova G.N. Plasticineography for kids - Scriptorium, 2003
3. Yakovleva T.N. Plasticine painting. Methodological guide - Sphere, 2010
4. Lykova I.A. I sculpt from plasticine - The world of the book "Karapuz"
5. Internet sources: http://novorozhdennyj.ru/igra_dla_detey/plastilinovaya-zhivopis-iz-shprica / novorozhdennyj.ru; http://stranamasterov.ru/node/507129
Class type: master class
Lesson progress
A bit of history
The plasticine drawing method appeared relatively recently, but immediately gained its popularity not only among children, but also adults. It is believed that this type of drawing was invented by the Englishman James May, thanks to which the plasticine flower exhibition, popular in the UK, was created. A little later, an artist from Canada, Barbara Reid, used the technique of drawing with plasticine, illustrating a children's story.
The technique of creating paintings from plasticine is determined by the concept of "plasticineography" appeared not so long ago, it has two semantic roots: "graphics" - to create, depict, and the first half of the word "plasticine" implies the material with which the idea is carried out. The principle of this technique is to create a stucco picture depicting more or less convex, semi-volumetric objects on a horizontal surface.
Types of plasticine:
The following types of plasticine are produced; paraffin, wax, fluorescent. When working with plasticine, it is necessary to take into account its properties: softness, plasticity, stickiness, the ability to soften under the influence of heat, fragility, the ability to maintain the attached shape, water resistance.
Plasticine drawing techniques and techniques
1 way: invoice transfer
Plasticine painting gives a huge scope for the artist's imagination from the type of application of plasticine strokes and their texture to the choice of color, which visually looks unusually fresh, juicy and rich.
The surface of plasticine smears may look different. The texture itself can resemble silk, glass or ceramics, if you try to make it smooth and shiny. To do this, before smoothing the plasticine surface with your fingers, lightly moisten your fingers in water. But only slightly so that the cardboard base does not get wet in any way. You can make the surface of the picture a little rough. To do this, various methods are used to apply relief dots, strokes, stripes, convolutions, or some curly lines to the surface of the plasticine image.
You can work not only with your fingers, but also with stacks. These are special tools.
Invoice transfer
2 way: work on glass made using a contour or template.
Let's prepare the glass, wipe it with a napkin - degrease it so that there are no fingerprints. Otherwise, mascara will not go well in these places. Putting the sketch under the glass, carefully translate the drawing as accurately as possible with ink or with a marker. It must be borne in mind that in this case it will turn out in a mirror image. Carcasses need to dry a little. During this pause, you can start preparing the material: choose the color of the plasticine and mix its shades for the picture. We lay out the resulting pieces and analyze how well they combine with each other and shade each other. The process of filling the surface is very painstaking and if one large piece fills at once a large part of the picture, the work loses its unusual appearance and beauty. Therefore, it is desirable to apply plasticine in very small pea-sized pieces, with each subsequent one with a slightly changed shade. Then gradually knead them with your finger over the surface. Keep in mind that when rubbing plasticine, sometimes unusual stains are obtained, which only add beauty even more and sometimes emphasize the shape. Follow the outline of the drawing and do not go beyond it. It also happens that an unsuccessfully selected color was applied, it is easy to remove it with a stack and apply a new one. The practice of performing such work has shown that it is better to start filling the glass surface with the main elements, and then the background.
Instead of a sketch, you can use a template - a postcard or a color picture. We put it under the glass and do the same work. Colors and contours are already in the picture.
Template and getting started on glass

Finished work

3 way: scribble.
A thin layer of plasticine is applied to the cardboard, leveled with a stack or knife, and the drawing is scratched with a toothpick, needle, stack, as in the scratching technique.

4 way: work done with the help of "peas"
Cardboard is taken, the outline of the drawing is applied. The desired colors of plasticine are mixed. Peas roll from plasticine and are laid out in a pattern on a primed or clean cardboard surface, filling the entire pattern.
"Peas"

5 way: plasticine painting "from a syringe".
You will need: - plasticine - album sheets- a medical syringe (without a needle) - a container with hot water. Now we need to make flagella. To do this, disassemble the syringe (pull the piston out of the cylinder). We make a “sausage” from a piece of plasticine and place it in the syringe barrel, insert the piston into place and press down the plasticine a little. We do the same with plasticine of a different color. Now we put the syringes with plasticine (horizontally) in a container with hot water for 2-3 minutes (so that the plasticine becomes soft). Then we take syringes from the water, press on the piston and squeeze out the flagella. We lay out the flagella on cardboard in accordance with the pattern.
Painting "from a syringe"

6 way: work on cardboard, made with the help of "strokes".
We draw a picture on the cardboard. We begin to apply strokes from the background. We roll up the flagella thicker, smear them with a finger to the middle, then the center of the drawing element is filled. Strokes are applied as in oil painting. We use mixed plasticine for a larger range of colors.

7 way: relief.
We draw a picture on cardboard. We sculpt the background from plasticine, using the “strokes” technique. We sculpt the details we need and lay out our composition. In this case, it's flowers.

Stages of the work "Home miracle", using different techniques.
Stage 1.
We draw a sketch.

Stage 2.
Let's do the background. We sculpt the background using the “strokes” technique. We are trying to convey light and shade. In our picture, the light falls on the left. We mix the desired colors of plasticine. We took white + blue in different proportions. It turned out light blue, blue and dark blue. We carry out a vertical plane. Strokes are applied vertically. We apply strokes horizontally on a horizontal plane, take the colors a tone lighter (adding more white).
Master class on working with plasticine (plasticineography). "Field still life"
The master class is designed for older children preschool age, teachers and parents.
Appointment of the master class: interior decoration, making gifts.
Target: acquaintance with plasticine technique as a type of visual activity.
Tasks:
Teach how to work with plasticine;
Development of creative abilities, aesthetic perception and artistic taste;
Cultivate cognitive interest, careful and aesthetic attitude to nature.
Not so long ago, I was very interested in the technique of drawing with plasticine - plasticineography.
Drawing with plasticine, as well as among watercolors, oil paintings and gouache compositions, extraordinary landscapes, mouth-watering still lifes and recognizable portraits flare up.
These plasticine “works” are imbued with the warmth of the hands of the artists who created them, and perhaps that is why they radiate some kind of special energy, similar to a small fairy tale. And this fairy tale is revealed only to those who know how to let it into their everyday world, not allowing it to become stale.
Before work, I would like to bring to your attention a fairy tale about friendship that can be used in the classroom.
A Tale of Friendship
A long time ago there lived a girl named Kolosok. She was beautiful, especially her hair, which, blowing in the wind, resembled gold. And she had a beloved friend - Roman. They loved to play together very much, they had their own secrets, which only they knew about. Every day they met in the same place - in a sunny field. Once Roman brought a flower to his girlfriend. The girl admired this flower for a very long time. It was modest - white elongated petals settled around the sunny center, such simplicity and tenderness came from the flower that the girl really liked it. She thanked Roman and asked where he got such a miracle? He said that he dreamed about this flower and when he woke up he saw this flower on his pillow. The girl suggested calling this flower Chamomile - after the affectionate name of Roman, and the boy agreed. The girl suggested: “Why will only you and I have such a flower? Come on, you will collect a whole bunch of these flowers in that unknown country, and we will give these flowers to everyone. kind people!" Roman agreed and went on a long journey. For a long time he was looking for these flowers. Found them at the end of the world, in the Kingdom of Dreams. The King of Dreams offered him an exchange - the boy was to remain forever in his kingdom, and the King would give the girl a field of flowers. And the boy agreed, for the sake of his girlfriend named Kolosok, he was ready for anything!
The girl waited a long time for Roman. I waited a year, two, but he still did not come. She cried, she was sad, lamented that she wished the unrealizable. But somehow she woke up, looked out the window and saw an endless chamomile field. Then the girl realized that her Romashek was alive, but he was far away, and he needed to be saved! Kolosok gave people Chamomile flowers. And people fell in love with these flowers for their simple beauty and tenderness. Feeling the boundless love of the girl, Roman freed himself from the evil spell of the King of Dreams. And unharmed returned home to his beloved girlfriend.
And now we can often see how golden Spikelet and tender Chamomile stand and admire each other on a sunny field.
To work you need:
Cardboard with or without contour drawing;
A set of plasticine;
Napkin for hands;
Board for rolling plasticine;
Waste material (candy box, pen rod);
Hairspray (for varnishing).
Before work, the plasticine should be slightly warmed up.
Ear molding. Roll up 4 sausages from yellow plasticine (2 - stems, 2 - for grains). Roll the sausages so that they become thinner.
.jpg)
Outline the location of the stem on the space of the background of the picture. Lay the stem in the intended place, press and lightly smear.
.jpg)
The stem edges that have come out can be easily corrected with a stack.
.jpg)
From the two remaining sausages we cut - grains (we roll up the oval shape of the oval shape).
.jpg)
Form an ear from grains, place small grains closer to its top.
.jpg)
Along each grain, make a shallow notch with a stack.
.jpg)
Roll up very thin yellow plasticine sausages 2-3 cm long - these will be the awns that need to be placed between the grains, directing them to the top of the ear.
.jpg)
From thin long yellow sausages we form leaves. First they need to be pressed, and then smeared a little, making them flat.
.jpg)
Modeling chamomile. Roll 8 identical balls from white plasticine and arrange in a circle of the desired size.
.jpg)
Now each ball needs to be smeared in a special way, leaving the outer part of the plasticine ball convex and directing the movement of the finger towards the center of the circle (you will get a glued plasticine drop).
.jpg)
Press balls of yellow plasticine into the middle of the flowers.
.jpg)
In the middle of the flower, “draw” dots with the help of a rod from a pen.
.jpg)
We roll up a long sausage from green plasticine - the stem of a flower, press it against the background. From the same plasticine we form leaves and with the help of a stack we cut out the “cloves” characteristic of a chamomile leaf and “draw” the veins.
.jpg)
We sprinkle the finished work with hairspray so that it does not become dusty, since plasticine strongly attracts dust.
.jpg)
We place the finished work in a frame from under chocolates. You can leave the frame as is or decorate it to your liking.
(pasta, grains, bones, seeds, raised wavy lines, etc.)
.jpg)
In the same way, this work “Cat is a thief” was made.
.jpg)
I wish you all good luck and creative success!
This Autumn picture is also made in the technique of plasticineography. See the master class on its manufacture
.jpg)
Quite by chance, I stumbled upon one of the bookstores on andinteresting coloring - drawing with plasticine "Unusual birds" from Kalyak-Malyak. I really liked the coloring, the idea is wonderful and really well done: large drawings, beautiful background. Such drawing with plasticine perfectly develops the baby's hands. My baby, and he is now 2.5 years old, chose the colors himself, sculpted plasticine on cardboard, of course I helped him - I directed my fingers so that he would not crawl out of the edges of the picture, but he also tried his best.
Of the minuses of this coloring book, probably only that there are only 4 pictures in the set, and given that I came across about birds, my son quickly got bored with them, painted only flamingos and it was a little enough for a peacock, he refused to color the other two, he says I want a train . Go and buy 4 more pictures for 39 rubles, namely, at this price I found a coloring book on sale, to be honest, I didn’t really want to, and not because I feel sorry for the money, but because you buy a set and again only 1 picture will suit him, and the rest will lie idle.
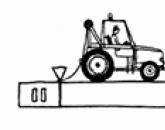
And then it just dawned on me, because I have good coloring pages - the usual large coloring pages for kids, which can also be painted with plasticine. Together with my son, we reviewed all the coloring pictures on the computer and chose only those that he himself wanted: with a locomotive, a typewriter, a truck, an airplane, hot air balloon, pyramid and at the separate request of the child with colored numbers. I quickly printed out several pieces of large beautiful coloring pages with a color sample and that's it, our plasticine drawing went with a bang! You can see everything in the photo below.
And for everyone who, like me, wants to engage and develop a child, but is not always ready to run to the store for another picture at the first request of the baby, on our website https://shop.site I post a selection of good children's coloring pages, which you can paint even with plasticine, even with pencils, felt-tip pens, crayons or paints.
I offer you exactly coloring pages, which, in my opinion, it will be convenient to color with plasticine, including coloring pages: candy, duck, ball, tractor, flowers, leaves, sun, fish, geometric shapes and so on. You can download all of them for free and.
And you can always download a lot of wonderful coloring pages for your kids for free from our website in the heading.
Good luck and interesting educational games and activities!


Templates for drawing and modeling with plasticine for children 2,3,4 years old

Templates for drawing and modeling with plasticine for children 2,3,4 years old

Templates for drawing and modeling with plasticine for children 2,3,4 years old

Templates for drawing and modeling with plasticine for children 2,3,4 years old

Templates for drawing and modeling with plasticine for children 2,3,4 years old

Templates for drawing and modeling with plasticine for children 2,3,4 years old

Templates for drawing and modeling with plasticine for children 2,3,4 years old

Templates for drawing and modeling with plasticine for children 2,3,4 years old

Templates for drawing and modeling with plasticine for children 2,3,4 years old

Templates for drawing and modeling with plasticine for children 2,3,4 years old

Templates for drawing and modeling with plasticine for children 2,3,4 years old

Templates for drawing and modeling with plasticine for children 2,3,4 years old

Templates for drawing and modeling with plasticine for children 2,3,4 years old

Templates for drawing and modeling with plasticine for children 2,3,4 years old

Templates for drawing and modeling with plasticine for children 2,3,4 years old

Templates for drawing and modeling with plasticine for children 2,3,4 years old

Templates for drawing and modeling with plasticine for children 2,3,4 years old

Templates for drawing and modeling with plasticine for children 2,3,4 years old

Templates for drawing and modeling with plasticine for children 2,3,4 years old

Templates for drawing and modeling with plasticine for children 2,3,4 years old

10680
Plasticineography (or plasticine painting) is a new interesting technique for working with plasticine to create three-dimensional paintings. It is accessible even to the smallest children, which makes it more and more popular.
The benefits of plasticine painting
The benefit of this lesson is that children study the shapes, properties of objects, develop finger movements, which helps the development of speech.
When studying objects, observation and imagination of children develop, modeling helps them to create and fantasize.
In the classroom, coordination of movements, consistency in the actions of the eyes and hands develops, children learn to work with tools.
The technique of this creativity is simple and accessible to everyone, everything you need is easy to buy in the store, so it’s easy to organize classes at home.
Teachers advise you to engage in this original work with your child, your passion will certainly be passed on to children and you can benefit greatly from this activity. This is not only the development of children's imagination and creativity, but also the expansion of their knowledge of nature, the development of mental abilities, attention, memory, hand motor skills. This creativity will help prepare the child for school, diversify family leisure.
Classes can start with two - three years , be sure to pay attention to the characteristics of age and the skills acquired, so that due to complex tasks the baby does not lose interest.
I invite you to a full-fledged video online lesson (45 minutes) on plasticineography "Postcard with a penguin". For children over 5 years old, with mom 3+.

Goals and objectives of plasticineography
The purpose of plasticineography is the development of children's creative and artistic abilities.
Tasks at a younger age (4-5 years)
The peculiarities of four-, five-year-old children is that they actively strive for independence. In addition, imagination and fantasy develop at this age.
- interest in creativity, develop artistic skills;
- to acquaint with a new occupation - plasticine painting;
- obtaining knowledge about the properties of plasticine and other means of image, using this knowledge in practice;
- development of a sense of form, color, composition;
- fine motor skills training, preparation for writing;
- education in preschoolers of patience, diligence, activity, aesthetic taste.
Children of 2-3 years old can start practicing, while you need to use the simplest methods (no more than two). By the age of 4 - 5, you can move on to more complicated techniques, use flagella, spirals, additional decorative elements; children learn to respect the boundaries of the drawing.
Download templates for modeling


Tasks for seniors (6-7 years old)
Age six - seven years - transitional to junior school, there is an internal restructuring; The age of seven is often a critical period in a child's development.
The peculiarities of children of six to seven years old is that at this age the main thing remains visual - figurative thinking, sensitivity during this period is increased, more different colors and details appear in the works.
The tasks of plasticine painting at this stage are as follows:
- the study of new species - landscapes, images of animals and people, fantasy works;
- development of initiative, creativity;
- obtaining skills in the use of various improvised means;
- development of the ability to combine and connect different colors;
- learning new ways - bas-relief and tiles, working with a syringe, "finishing" - making frames, albums, etc.
The process of creating a plasticine drawing is as follows:
- you need to choose a picture that we will depict, colors for the background and images;
- then transfer the drawing to the base with a marker;
- work in plasticine;
- arrange the result of the work - make a frame, varnish, place in an album.
Advantages of plasticine painting:
- easy-to-work technique;
- relieves muscle tension, helps to relax;
- trains fine motor skills;
- easy to fix mistakes and make changes.
In the classroom it is useful to use the word of art, game methods.
Topics for work should be familiar to children - these can be objects that they see at home, in the forest, in the park, in books (toys, sweets, fruits and vegetables, plants and animals, fairy-tale characters).
- use soft plasticine or preheat with hot water;
- it is better to take a dense material as the basis for work, for example, cardboard or cardboard covered with a layer of adhesive tape (it is more convenient to apply plasticine on it and remove its excess);
- cook workplace for creativity - a board or oilcloth, a damp napkin;
- before starting work, apply on the base, under the film, the contours of the image;
- after class, first wipe your hands with a napkin, and only then - wash with soap;
- take breaks at work, warm up for hands and fingers;
- cover the finished drawing with colorless varnish or hairspray so that it can be stored for a long time.

Materials for plasticineography:
- plasticine (preferably wax, it is more convenient to work with and brighter);
- base (cardboard, plastic, glass);
- technical means(stacks - special plastic knives; sticks, toothpicks, etc.);
- decorative elements (beads, buttons, beads, threads, rags of fabric, cereals, sequins, natural materials - acorns, leaves, cones, branches, shells, shells, nuts, seeds, small stones, grains, etc.);
- syringe medical or confectionery;
- wet wipe wipe your hands;
- board for rolling sausages and balls.
You can buy a special set for creativity with plasticine in the store.
Video - modeling lesson
We sculpt a New Year's penguin http://artplastilin.ru/intro/
I have a lot of creative ideas on my Instagram page, join me!! https://www.instagram.com/artwithbaby/
Receptions and methods of plasticineography
Drawing with strokes
The technique consists in smearing small pieces of plasticine with your finger.
It is most convenient to use the index finger, strokes can be made of different lengths, depending on what needs to be depicted - long details (tree trunk, wave, blade of grass) or short ones (flower petal, sun rays, leaves).
You can use this technique - smear alternately with different fingers of both hands, this is useful for both fingers and brain activity.
Drawing with plasticine balls
Roll small plasticine balls on the board, press down to the base. Using this technique, you can perform three-dimensional details or fill in the contours of the picture with them. 
Flattening on the basis of rolled balls
Roll into small balls, then flatten them one by one on the base. You can use them as separate elements, together with others, or you can fill the entire surface with them.
Smearing on a large surface
The technique is the same as on small pieces, only large areas are covered with plasticine. You can combine different colors, mix them, vary the thickness of the layer.
Scratching patterns on a layer or parts of plasticine
On the surface filled with a layer of plasticine, or on individual parts, apply various patterns by scratching. This can be done using different tools - sticks, toothpicks, a pen cap, etc. Spiral patterns look original and add volume.
Rolling plasticine sausages
 Children love this trick very much. You need to roll a small piece of plasticine into a sausage and press it to the base. From such sausages you can make: ornaments, snowflakes, twist them into a spiral, twist together two or three sausages of different colors. There are many variations of this technique.
Squeezing plasticine out of a syringe
 If you need a lot of identical even sausages in the drawing, it is more convenient to make them with a syringe (or garlic press). You will need a syringe with a cut off sharp tip and a container of hot water. Place the plasticine in the syringe, dip it in water for one minute and gradually squeeze the plasticine out of the syringe onto the base. Wait for the material to cool slightly and harden. Next, you can give the sausages the desired shape.
The combination of various techniques looks original - a three-dimensional application and a background made by smearing.
Types of plasticine painting.
- Straight. This is a traditional type of plasticine painting, in which the drawing is applied to a horizontal surface. This technique can be mastered by young children.
- Reverse (stained glass). It is carried out on the reverse side of a transparent surface - glass, plastic or plexiglass. Previously, the image is drawn with a marker, then the main drawing is applied with plasticine.
- Modular. In this type of creativity, the drawing is applied with balls, sausages, cakes and other elements. This type is the most difficult, you need the ability to use all the techniques of drawing plasticine.
- Mosaic. In this technique, the pattern is made from balls. The technique is simple, you need to choose the right colors and fill the contours inside the picture with rolled balls.
- contour. The drawing consists of the contours of objects made in the form of thin sausages or flagella.
- multilayer. In this technique, layers of plasticine are applied sequentially. It best depicts landscapes (sky, sea, forest, mountains), while the layers are superimposed on one another. This complex technique is suitable for older preschoolers.
- Textured. In this image, the pattern is convex, divided into three types - bas-relief (a slightly convex image above the background), high relief (a strongly convex image above the background) and counter-relief (concave or in-depth pattern).

Popular
- Technology "25 Frame" Some interesting facts
- How to highlight text using the keyboard?
- We extract the benefits of civilization for the private sector
- Internet to a private house from Rostelecom Fast Internet to the private sector
- The first time at a new job: how to join the team
- Shipbuilding enterprises
- Work on a long-distance ship Work on an icebreaker reviews
- How spaceships travel through the stars
- Self-adjusting the lens
- What is gypsum and where is it mined