Composite lens. Self-adjusting the lens
© 2015 website
The lens should be considered the key node of an optical device called a camera. That's right: not a matrix, but a lens. A photograph is an image, and nothing more than a photographic lens forms this image on a photosensitive material. The matrix only converts the image created by the lens into digital form.
A photographer doesn't have to be an expert in applied optics, but having some understanding of how your camera lens works will not only help your creative growth, but will also help make photography more conscious and controllable.
Lens construction
The main task of a photographic lens - to collect the light coming from the scene being shot and focus it on the matrix or film of the camera - can be handled by an ordinary biconvex lens. However, the image quality in this case will be very mediocre due to the abundance of optical aberrations. To ensure optimal image quality, additional lenses are introduced into the optical scheme of the lens, which correct the light flux, correct aberrations and give the lens the required properties. The number of optical elements in modern lenses can in some cases reach two dozen or more. Elements can be combined into groups and together they must act as a single collecting optical system.
In addition to the optical unit, i.e. systems of lenses arranged in a certain sequence, the design of the lens also includes a number of auxiliary mechanisms that provide focusing, aperture control, changing the focal length (in zoom lenses), optical stabilization, etc.
Rim, i.e. lens body, connects all its components together, and also serves to attach the lens to the camera.
I would like to emphasize that the focal length is not literally the "length" of the lens and only indirectly indicates its linear dimensions. Physically, a lens can be either longer or shorter than its focal length. It should be understood that due to the design features of many modern lenses, their rear main plane can be located both within the lens system and outside it.
If the rear main plane is moved forward, the focal length of the lens will exceed its physical dimensions. Such a lens is called telephoto lens. Almost all modern long-focus lenses are telephoto lenses, which allows them to be reduced in size.
If the rear main plane is located in the middle of the lens, then the focal length is less than the distance from the front element of the lens to the back focus. These are normal and moderately short throw lenses.
And finally, the rear principal plane may lie behind the lens. In this case, the focal length will be shorter posterior focal segment, i.e. distance from the rear optical element to the back focus. Such lenses are called retrofocus lenses or long back lenses. Why is such a complex scheme needed? After all, it obviously does not save dimensions. The fact is that the presence of a rotary mirror in SLR cameras imposes severe restrictions on the minimum allowable value of the back focal length. In other words, the mirror does not allow you to bring the lens close to the matrix or film, which means that short-focus lenses for SLR cameras should be designed according to the retrofocus scheme.

A measure of the light transmittance of a lens is aperture value or aperture number, which is the ratio between the focal length of a lens and the aperture diameter. For example, with a lens focal length of 200 mm and an aperture diameter of 50 mm, their ratio would be: 200 ÷ 50 = 4. The latter is usually written as f/4 and means that the diameter of the aperture aperture is four times smaller than the focal length of the lens.
What happens if we reduce the diameter of the hole, say, to 25 mm? The aperture number will be equal to: 200 ÷ 25 = 8. Thus, the smaller the relative aperture, the larger the aperture number.
Why do they talk about the relative aperture, and not just about the aperture diameter of the diaphragm? Because in this case we are not interested in specific values of the focal length and aperture diameter, but only the ratio between them. The aperture number is a dimensionless quantity. Regardless of their focal length, all lenses set to f/8 will let in the same amount of light. At the same time, it is obvious that the actual diameter of the hole will be the larger, the greater the focal length of the lens - the main thing is that their ratio remains unchanged.
In order to reduce the amount of light passing through the lens by half, i.e. by one exposure step (), it is necessary to reduce the aperture area by half. In this case, its diameter will decrease by √2 times. In this regard, f-numbers spaced one step apart from each other differ by √2, i.e. about 1.414 times, and form the following standard series: f / 1; f/1.4; f/2; f/2.8; f/4, f/5.6; f/8; f/11; f/16; f/22; f/32; f/45; f/64.
Minimum available aperture value, i.e. the maximum size of the relative aperture of a particular lens, commonly called its aperture ratio.
Most modern lenses use a so-called mechanism. "jumping" or "blinking" diaphragm. Its essence is that no matter what aperture number is selected for shooting, the aperture remains fully open until the very moment the shutter is released and only then closes to a pre-selected value. After each shot, the aperture automatically returns to the open position. This allows framing, metering and focusing at the maximum aperture ratio (minimum aperture value) and the corresponding brightest picture in the viewfinder. If the photographer wants to visually assess the depth of field of the future frame, the aperture can be forcibly closed to the working value using the aperture repeater button.
Bayonet
The lens is attached to the camera with a bayonet connection. The shank of the lens barrel has petals (usually three of them), which correspond to the grooves in the camera flange. When installing the lens, the shank is inserted into the flange and locked by turning it at a slight angle. The asymmetry of the petals eliminates the difficulty of incorrect orientation of the bayonet. To detach the lens, press the button and turn it in the opposite direction. See "Changing a lens".

Compared to a threaded connection, the bayonet has two main advantages: firstly, changing lenses is faster, and secondly, it provides more precise orientation of the lens relative to the camera, which is necessary for optimal alignment of electrical contacts and mechanical actuators.

In addition to its main function - attaching the lens to the camera - the mount must also provide a functional connection between them, coordinating the operation of the aperture, autofocus, stabilizer and other devices. The mounts of most modern photographic systems (Canon EF, Sony E, Fujifilm X) do not imply any mechanical connection between the camera and the lens - information is exchanged exclusively through an electronic interface. In more traditional mounts (for example, Nikon F), aperture control (and for older lenses also autofocus) is implemented through mechanical drives.
The most important characteristic of a bayonet mount is its working segment. The working distance is the distance from the bearing surface of the lens (or the bearing surface of the camera flange) to the focal plane, i.e. to the plane of the matrix or film. The length of the working segment depends on the design features of the camera. So, for SLR cameras, the working distance is much larger than for mirrorless ones, since the swivel mirror does not allow the camera body to be too flat.
Do not confuse the working segment with the back focal segment. The working distance is a fixed mount parameter, and its value is the same for all cameras and lenses within a given photographic system. The back focal length is a parameter of a particular lens, and its value may differ from the value of the working segment, both up and down, depending on the model.
Focusing
In the initial position, the lens is focused to infinity, i.e. an image of an infinitely distant object appears in the focal plane. To focus the lens on closer objects, it is necessary to increase the distance between the rear main plane of the lens and the plane of the sensor or film. In other words, the lens should be as if extended towards the subject.
In the simplest lenses with a small number of elements, focusing is carried out by moving the entire optical unit inside the lens barrel. Sometimes only the front lens moves. Worst of all, when it also rotates when focusing, since this makes it very difficult to use polarizing and gradient filters.
More complex lenses use internal focusing. The external dimensions of the lens in this case remain unchanged, and the shift of the optical center is achieved by moving an independent group of lenses inside the lens. A special case of internal focusing is rear focusing, in which the rear group of elements is responsible for focusing.
Most modern lenses assume the use of auto focus. Usually, a ring motor (ultrasonic or stepping motor) is built into the frame of autofocus lenses, which drives the focusing group of lenses. The only exceptions are some classic Nikon and Pentax autofocus lenses that do not have their own focus motor. The motor in this case is built into the chamber, and the transmission of torque occurs through a mechanical clutch.
Zoom lenses
Zoom lenses are called zoom lenses. The design of zoom lenses is much more complicated than the design of discrete lenses and includes a number of additional optical elements, the mutual movement of which not only changes the focal length of the lens, but also compensates for the additional optical aberrations that arise in this case.
The ratio between the maximum and minimum focal length of a zoom lens is called its magnification. For example, the magnification of a zoom lens with a focal length range of 24-70 mm is approximately equal to: 70 ÷ 24 ≈ 3, which allows us to speak of it as a 3x zoom.
Optical stabilizer
In lenses equipped with an optical image stabilizer, one of the lenses can be moved by an electromagnetic drive in a plane perpendicular to the optical axis of the lens, thereby compensating for camera vibration and preventing image blur.
You can read about the features of the device and the practical application of stabilized optics in the article: “Optical stabilizer. Nuances of using IS and VR”.
Light filters
Almost all lenses can be used with filters. Most often, filters are screwed onto the lens from the front, for which a special thread is provided in the lens barrel. However, in cases where the front element of the objective has an unusually large diameter or an excessively convex shape, the traditional use of filters is physically difficult, and therefore there may simply be no filter threads. There are two main approaches to solving this problem. Super-telephoto lenses are usually equipped with a retractable sleeve into which a standard small-diameter light filter can be inserted, after which the sleeve is inserted into the lens through a special slot. Many ultra wide-angle lenses are basically not compatible with glass filters and instead have clips on the shank for thin plastic film filters. Obviously, both the internal and rear arrangement of filters eliminates the possibility of using transparent filters to protect the front lens from dirt and scratches, placing increased demands on your accuracy.
Thank you for your attention!
Vasily A.
post scriptum
If the article turned out to be useful and informative for you, you can kindly support the project by contributing to its development. If you did not like the article, but you have thoughts on how to make it better, your criticism will be accepted with no less gratitude.
Do not forget that this article is subject to copyright. Reprinting and quoting are permissible provided there is a valid link to the original source, and the text used must not be distorted or modified in any way.

This short note was born as a response to one of the letters. Its theme is the creation of an optical system with a variable focal length on the knee of two lenses. This is a very old, well-known, but already forgotten way to get a large image of distant objects in the absence of a long-focus lens. I just tried to illustrate its use with digital SLR cameras. I wrote about composite nozzles for devices with non-replaceable optics quite a long time ago in the article “Kepler tube - a macroconverter and a photogun in one bottle”.
The installation in question was assembled from improvised materials in just an hour. The results are of cognitive rather than practical interest. And yet, my specific experience suggests that sometimes such knowledge can come in handy.
Lyrical digression 1. The specificity of the expedition lies in the fact that everything that was taken was taken; if you need something else, then all hope for scrap and some kind of mother. And although our education is free, but knowing how to use this scrap is sometimes very expensive. So, what will be described later can be very useful if, sitting on a desert island, waiting for a change in a couple of months, you suddenly find that the Loch Ness monster has appeared in the surrounding waters. :-)
So, there are two lenses and some mounting material. With the help of the first of them, we can get an image on frosted glass. And then reshoot it with a different lens, and in a fairly wide range of scales. If the frosted glass is removed, then the resulting optical scheme will still work, albeit with some limitations. Namely: ground glass grains do not allow you to get a very detailed image, but they scatter light in all directions. If we remove it, then the rays passing through the central point will behave almost the same as with it, but the rays that form the image on the periphery of the frame, which can be larger than the size of the rear lens of the lens, will only propagate under angle to the optical axis and away from it. That is, they can be caught and used to build a secondary image only by the edge of the front lens of the second lens. As a result, significant vignetting will be observed, and the brightness of the secondary image will drop sharply from the center to the edge. The smaller the fragment of the primary image we reshoot, the less this effect will appear.
Below is a photo of the resulting setup. It consists of a Pentacon lens with a focal length of 135 mm, PZF bellows, an Industar-61 lens with a focal length of 50 mm, Pentacon bellows, and a Canon EOS D60 camera. The total length is approximately 40 cm.

By changing the length of the Pentacon bellows ( a ), we change the total focal length of the resulting system, and by changing the length of the PZF bellows ( b ), - focus on sharpness. This optical system gives us a direct image of the object, and, therefore, in the viewfinder of a SLR camera, it will be inverted. That. we got the simplest lens with a variable focal length, which, however, brought together all the possible defects that are struggled with when calculating modern zoom lenses. Even a rough estimate of the geometry of the resulting system, i.e. the diameter of the front lens and the resulting focal length, show that the relative aperture will decrease by an order of magnitude. Stopping lenses will cause image vignetting. However, at high magnifications, the peripheral portions of the lenses may not work, in which case stopping down may slightly improve the image. The optimal aperture values of both lenses are selected experimentally for each specific magnification value. I tried to assemble this optical scheme with other lenses, so I used the Helios-44 lens as the second lens. Using the Volna lens with a focal length of 80 mm from the Kyiv 88 device as the first lens (photo in the title of the article) gave good results, but the maximum magnification turned out to be less at the same threshold quality. The pictures below were taken on a cloudy evening on September 3, 2006 from the balcony of a Moscow apartment. results
Let's start with what you can get with a single Pentacon 135 lens:
Now let's see what a compound lens will give us; Let's start with a minimum increase in the combination of Pentacon 135 - Helios 44:.
Now let's increase the distance a and see what happens:
Miniature | Fragment |
|
|


Getting used to using technology, the owner often does not wonder how exactly this or that gadget is arranged, which daily helps him in everyday affairs. Quite often, one has to deal with the fact that acquaintance with the device of technology occurs under unpleasant circumstances, for example, in the event of a breakdown. We will figure out how to choose and operate the camera lens correctly, as well as properly care for it in order to avoid unpleasant situations associated with failure.
The lenses of modern cameras are not much different from their predecessors. The principle of operation and design have remained virtually unchanged for decades. Particles of light fall on the matrix, passing through optical system. The basis of this optical system is the lens. It also includes a viewfinder and a focus sensor. The task of the optical system is to collect the rays of light on the same plane, and here the lens plays the key role.
Theoretical basis
The principle of operation of a photo lens is based on the laws of optics, i.e. on the refraction of a beam of light at the moment of passing through the boundaries of a medium with different densities. You can see this phenomenon everywhere. For example, in a cup, at the moment of stirring sugar in water. A spoon immersed in tea looks broken, distorted just at the border of liquid and air. Light travels slower in liquids than in gases, hence the subtle distortion you can see with your own eyes.
This effect is even more pronounced in the case of the passage of light. at the interface between air and lens. The more the lens is curved, the more the effect is enhanced. As a result of such refraction, the image is projected using a matrix not distorted, but geometrically correct.
Theoretically, the image obtained in this way should not have any obvious distortions, but aberrations still occur. To correct this shortcoming, manufacturers of photographic equipment are constantly improving the optical system, increasing the number of lenses and improving the quality of their polishing.
Main lens elements
The device of the camera lens is quite complex. It consists of several main elements:
- a system of optical lenses and spherical mirrors, which are made of a specialized material;
- metal frame;
- diaphragm.

On the front of the device is an optic that collects light rays - converging lens. Inside the device are lenses and optical mirrors that refract the received rays, forming a subsequent image. The optical system of a camera can have a different number of lenses. Depending on the needs, the lenses can either be adjacent to each other or have an air gap.
Basic models of digital cameras contain from one to three lenses. Professional devices have up to ten lenses and more.
lens mount is responsible not only for the strength of the entire structure, it also serves as a retainer for the optics. In the arrangement of lenses, the highest accuracy is required, it is imperative that each installed lens is exactly at the indicated distance, without moving, because this can affect the quality of the shooting. Therefore, the frame is most often made of durable metal alloys.
The frame has a complex device. Its main part is responsible for external protection from physical and weather influences; as a rule, optical lenses and a diaphragm are located in it. The inner part of the frame (it is also called transitional) serves to move parts along the axis, as well as for a strong connection with the body (body, carcass) of the camera. The inner frame is equipped with several ring parts. When one of these rings turns, the part in which the external block is fixed comes into motion.

The frame allows automatic or manual adjustment of aperture settings. is an adjustable opening that controls the amount of light rays entering the inside. It consists of movable metal petals, which, taking different positions, regulate the level of rays falling on the matrix. The petals are movable both around the optical lens and outside it. This detail is necessary for working with depth of field when conveying space on the frame. The smaller the aperture size, the sharper the picture on the frame.
Focus mechanism and image stabilization
When photographing, another part of the lens plays an important role. With help focus ring manual focusing is performed. When the ring is rotated, the focus is on the foreground or the background. The focusing ring helps to work with a variable focal length (the more familiar name is "zoom", "enlargement of the image", etc.) both in manual and automatic mode, of course, if the latter is supported by the model.

In models with autofocus function, the ring rotates using a mechanical manipulator. If you press the shutter, then there is an automatic calibration in the center.
Modern camera manufacturers use ultrasonic focus motors (USMs) that are built right into the lenses. This device provides extremely fast and smooth focusing. The lens is also known with screwdriver drive. The disadvantage of this system is slower and noisier operation. The screwdriver in the camera is a motor, due to which the individual parts rotate, due to which focusing occurs. It is located outside the case, on a metal ring for mounting the device.

In addition to autofocus, the lens may also have stabilization mechanism, compensating for inertia during long exposure. This allows you to get clear shots without using a tripod. Zoom lenses are equipped with a zoom ring that is used to change the focus distance. With the help of such rings, you can significantly zoom in or out on an object inside the frame.
Types of lenses and their application
SLR cameras are characterized by the presence of various types of lenses. If the camera is equipped with a fixed lens, the frame will be built into the design of the device. But models with a removable lens type are more popular. Various filters can be attached to the lens itself, depending on the methods and location of shooting. Lens sizes can also vary greatly.
To fix the lens on the body of the device, a bayonet is used - a special mount. Each manufacturer produces their own patterns, so there are no universal lenses, with the exception of a few "open" mount standards.
So, let's look at what lenses are.
cetacean
Kit lenses are preferred mostly by beginners. It is an optic supplied complete with camera body. The viewing angles of kit optics are almost identical to those of humans, without regard to peripheral vision. This fact makes kit optics quite popular; such devices are easy and convenient to use in everyday shooting, for setting simple shots. Sometimes a whale is called a standard or complete lens. This is a versatile item for a wide range of applications. A whale lens is notable for its low price, as well as the ability to take photos in almost any format: from a moving object to a portrait or microphotography. At the same time, the quality of the final image varies from low to quite high.

wide angle
Types of lenses for SLR cameras include a wide-angle format. This is an optic with a wide range of visibility (from 60 degrees or more). Very comfortable with this optic. shoot a group of people and take photos in tight spaces. The background remains slightly blurred. The focus distance can be up to 28mm. Such lenses cost a lot of money, but their purchase in most cases is justified. Used for wedding and interior photography, as well as landscapes.


This is an optic with faulty distortion. The field of view angle of this lens is as much as 180 degrees. Focus distance from 4.5 to 15 mm.
Distortion among photographers is a distortion that makes an arc from a straight line of the horizon, similar to a real fish eye.
Sometimes such a lens is also called a "fisheye". With the help of such optics it is convenient to make circular and diagonal photo. Fisheye is the most common way to capture city shots, as well as photos of extreme sports.

macro lens
As the name implies, this is a lens designed for photographing small objects. As a rule, such optics allow you to take close-ups from a short distance. Focus distance from 50 to 180 mm. The maximum aperture value is f/2/8. A feature of this optics is the ability to aim a close-up on small objects, as well as high image sharpness and good color reproduction. Most often used in natural shooting (insects, flowers, etc.).

long focus
Optics with a long focus distance from 70 to 300 mm. Visibility is from 39 degrees. Such optics are of two types: telephoto and telephoto. Due to the blurring of the boundaries, today both of these concepts have finally mixed up and become identical. Used for photographing moving objects and events: sports competitions, moments from the natural world.

Long lens on Canon

Telephoto lens on Canon
portrait optics
A lens with a focus distance that remains the same during operation. Best suited for portraits. Possesses high luminosity. The portrait lens allows you to mask small skin imperfections.

Basic criteria for choosing a lens
You can choose a camera lens according to several criteria.
- Focal length. One of the most important parameters when choosing optics. Unfortunately, it is rather difficult to recommend any specific parameters due to the fact that only the photographer himself can know the minimum focusing distance. The most effective lenses tend to have short focus distances. To measure the focal length, it is necessary to measure the distance between the focal plane and the object being photographed.
- Aperture. The most important criterion for those who plan to shoot in low visibility and low light conditions. Optics with large aperture ratios are usually of very high quality. If possible, it would be better to purchase optics with the highest aperture value. It is important to remember that a constant aperture value for a lens is better because aperture values change with focus distance.
- Image stabilization. Professional lens models have this parameter. Most of all, devices with long-focus shooting need stabilization. The best image stabilizer to date in almost any climatic conditions has been and remains the most ordinary tripod. However, if the model has a built-in stabilization system, you should probably use it.
- Manufacturers. The main manufacturers of lenses are two companies - these are Canon and Nikon. In most cases, it makes sense to buy their products. There are Sony products on the market, but it is the equipment of the first two manufacturers that is marked by most professional photographers as the most convenient and reliable.
- Fastening. Lens mount is an open, debatable issue among professionals. To date, a universal type of mount has not been developed, which the main players in the photographic equipment market would adhere to. Each manufacturer produces optics with a unique mount, designed only for their own equipment. With the exception of a few options for lenses that claim to be universal, the technical side of the issue of attaching the lens to the body of the device is not worth it. By purchasing a certain body, the future owner already knows what company he will have a lens.
How to properly change lenses
The first and very important point that must be observed is the cleanliness of the room in which the replacement takes place. It is desirable that there are no air currents in the room. The device is placed face down on a soft cloth to prevent scratches. Next, you need to prepare the lens that you plan to install. It is desirable that he be at hand all this time. With the finger of the left hand, press on unlock button, after which it will be possible to unscrew and remove the lens. The lens is unscrewed counterclockwise. It should be put aside.

The removed lens must be closed with a protective cover (cover) to exclude direct sunlight, dust and moisture.
Then we pick up a new lens and fix it on red or white (depending on the manufacturer) dots. Once the lens is in the appropriate slots, it should be carefully screwed in a clockwise direction. When the thread is fully tightened, a characteristic click will be heard, signaling that the process is completed.


When replacing optics, various problems can arise. If a lens jammed then you need to take a few simple steps:
- check the instrument display for lens errors;
- remember if the camera has received physical damage recently;
- refer to the user manual for clarification.
If the initial diagnosis did not help in any way, you need to slap your palm on the side. Light blows to the body sometimes help to restore the work of a jammed lens. As one option, you can try to clean the tube and connect the device through the cord to the charger. Sometimes the problem may lie in the lack of battery power.
Advice! Sometimes, if the lens on the camera does not open, you should remove the batteries and memory card from the camera, and then reinsert them - this may help to resolve the error.
Still won't extend the lens? It's possible do by hand. To do this, gently rotate the lens with your fingers, not in automatic mode. Sometimes you can slightly push or try to pull the optic. You can also put the device down with the lens and tap it on the palm of your hand, folded in the form of a handful. If you hear a click, then the lenses have returned to their original position. Sometimes you can try forced autofocus, in some cases it is possible to correct the error that has occurred in this way.
Self-adjusting the lens
The alignment process is a sharpening adjustment to improve the performance of the optics. Calibration is carried out by correct alignment of all lenses. This allows you to take better pictures. The process is not simple, requiring experience, skill and perseverance, so it is recommended to do it only if the user is confident in his own abilities.
The camera is adjusted in case of a factory defect, if the lens is “loose”, backlashes and gaps have increased, after mechanical damage to photographic equipment.
Many modern appliances boast self-diagnosis function "Live View". With the presence of this function, it is much easier to determine whether the instrument needs adjustment or not. If the model is equipped with Live View, then the following steps must be performed to align.

- Put the device on a tripod, turn on stabilization, if available.
- Using "Live View", focusing on the target (target) is carried out.
- The diaphragm must be open.
- Turns off the Live View function and returns the unit to One-Shot AF with the center point in focus. The tripod and the focus ring must not be touched.
- You should half-press the AF button or shutter release, watching the distance indicators on the lens itself and the focus ring. The latter must remain motionless. If nothing has moved, then no adjustment is required.
- If the distance scale or the ring nevertheless moved, it is necessary to fix exactly where. If the model has autofocus adjustment, it is necessary to make corrections corresponding to the original parameters.
Adjustment at home without Live View and autofocus adjustment is possible, but requires deep knowledge and the availability of special devices: an optical bench with a collimator, a microscope.
Lens cleaning at home
Cleaning the camera lens is one of the main maintenance rituals that almost every user has to do. Generally, the lens needs to be cleaned after being exposed to rain or after shooting in dusty, windy conditions. The wider the circumference of the lens, the more likely that debris will begin to accumulate on it.
In order to wipe the camera lens, you need a clean room and several devices.

Sometimes a mop is used instead of a rag. The mop is a plastic stick with a soft tip. With its help, it is very convenient to clean the middle part of the lens.
The optics cleaning pen has two sides: graphite and softer. graphite part necessary for clearing frozen debris. Care must be taken to use this device so as not to damage the sensitive optics. To clean problem areas (edges of the lens), it is best to resort to soft side cleaning pencil.
In the case of using all three devices (cloth, pencil and mop), it is necessary to touch the surface of the lens very carefully, because the lens is very easy to damage. If you have doubts about your own abilities, it would be better to clean the lens at a service center.
Having basic knowledge about the design and operation of the lens, the user will always be able to independently diagnose and eliminate minor malfunctions if they occur. In addition, information about the structure and types of camera lenses allows you to more soberly assess your perspectives in photography, which is very important for novice photographers.
4223 I am a young photographer! 0
Well, friends, have you already mastered your camera a little? Did you find out what and why he needs buttons on the case? Probably not everything is clear yet. Don't despair, you will definitely figure it out! Feel free to ask adults what is difficult and not clear to you, or write to us on the site's forum. Deal?
Today we will find out why a camera needs a lens. Let's look inside its design and try to understand how it works. We will also figure out what lenses are and why they are needed. Not scary? Then go ahead, for knowledge!
The lens is the round barrel in front of the camera. If you have a compact camera, it can hide inside the case when turned off. The rest of the cameras - SLR or mirrorless - it is solidly located in its place, and you can even detach it and examine it.

Compact camera lens - it can hide!
Why do we need this complex optical device - a lens? It is he who transmits the image, the light reflected from it - inside the case, to the sensor. And the better the lens you have, the cooler you can take photos with it!

REMEMBER!
The quality of photos, as we already found out in the first lesson, depends not only on the physical size of the sensor, but also on the quality of the lens. And - to a greater extent from the lens!
Now let's see what's inside the lens. The camera lens is a very complex structure. It consists of many round glass elements - lenses made of special optical glass, a metal frame and a diaphragm. In the simplest lenses, only a few lenses are used, and in very expensive ones, the number of these elements can be ten or more.

In no case, of course, should not try to disassemble the lens! So what, what's interesting! If you don't want to mess it up, leave it the way it was.
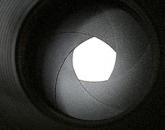
 The aperture in the lens is a flap of petals with a hole in the center, which prevents all light from reaching the matrix. These aperture blades rotate simultaneously with each other. The diaphragm also serves to change the depth of the sharply depicted space, or DOF for short. What it is? We will find out a little later, remember the new term - GRIP! The aperture size is controlled either automatically by the camera or manually. The aperture values that can be adjusted on the lens are shown on the label. For example: f/2.8 or f/ 3.5-5.6.
On a non-compact camera lens, you may notice rings. As a result of turning one of the rings, the camera is brought into focus in manual mode. If the lens is autofocus - auto means with automatic, not manual focus - the ring rotates automatically thanks to a special motor inside the lens: when you press the button for photographing (it is called the shutter button), the lens automatically focuses on sharpness. Switching from manual focusing to automatic focusing is done either on the lens body or on the body (or in the menu) of the camera itself. Those who have a compact camera cannot do this.

Focus switch on the lens: A - automatic; M - manual (manual)
What is manual focus for? - you ask., Because everything is sharpened by the smart electronics of the camera. And it happens when it is difficult for her to do this or she focuses not where you want. That's when manual focus comes in handy. Let's go further!
In addition to autofocus, a stabilization mechanism is often built into the design of the lens, or its pros call it a "stub". It helps to get sharp shots when the lens can’t cope without a stub and a blurry image will turn out at a slow shutter speed. This is a special movable lens, which is controlled by the same camera electronics. A very useful tool!
 A zoom lens (zoom lens) has a special ring used to change the focal length. With the help of such a ring, the lenses inside the lens move, as in the diagram, and you can zoom in or out on the subject in the frame. Let's say right away that there are lenses in which it is impossible to "zoom in" - these are fixed lenses, they are of better quality, but less convenient to use.
REMEMBER!
A zoom lens is a zoom lens that can zoom in or out on the subject. A more complex, heavy and often expensive lens, but when you change the focal length (zooming) - the quality of the pictures may change. You can recognize it by the marking on the case. For example: 18-55mm or 70-200mm.
Fixed lens - with a constant focal length, a more compact and high-quality lens, but less convenient to use. You can also recognize it by marking, for example: 50mm or 35mm.
One zoom can replace several fixed lenses in your photo bag at once, but if you need super-quality, it’s better not to save space, but to carry several primes.
Cameras, in which the lens can be removed and changed to another, have a mount - this is the lens attachment to the camera. Each company has its own fastening systems. That is, a lens from Sony, for example, cannot be put on Canon or Nikon. If your camera allows you to remove the lens - with the help of adults, practice shooting and putting the lens on the camera. We give a hint: there are special points on the camera body and lens to facilitate the correct installation.

So, we have found out that the lens has the following characteristics: aperture value (it is also called Aperture) and focal length. The values of these parameters are indicated on the body of any lens. Aperture lenses are lenses that have f / ... - a figure as small as possible, from 2.8 and further: 1.8, 1.4, 1.2 - the quality of photographs with such lenses is noticeably better, but the price for them can be simply fantastic.
If you are thinking about buying a camera, you need to choose a camera with the highest quality, fast lens possible.
Cameras with interchangeable lenses are often sold complete with a standard, "kit" lens. Keith, from English. Kit - set, kit; a regular lens, and has nothing to do with a huge marine mammal or terrible groups of blue whales on social networks.
It is also better to refuse such a lens and buy a "body" - only a camera and a separately more expensive, but better lens.
The highest quality photographs are obtained with fast lenses with fixed focal lengths (fixes), which is why most professional photographers prefer shooting with them.

And now, to take a break from complex terms, we will tell you a little about how to properly care for your lens. Lenses really don't like dirt and smudges on the lenses, which can reduce the quality of your photos. And scratches are not desirable at all. Therefore, remember a few simple rules:
1. To care for the lens, you need to buy special napkins, brushes for cleaning pencils (let parents ask at the Lenspen store), pears for blowing dust. It is necessary!

2. Always use a dedicated bag for your camera and lenses. The bag will protect the device from dust and shock, which often occur during transportation.
3. Never remove dirt or stains from lenses with your fingers or use non-special material. This may damage the lens or its coating.
4. Do not blow on the lens - microscopic droplets of saliva are sure to fall on the lens, no matter how you want it.
And now - our "home".
1. Carefully study new words on the topic of the lesson and try to remember them. In the future, you will often use them.
2. Practical task: study the lens of your camera, its markings. Tell us what is written on the case, what numbers are in the marking and where the focal length is indicated, and where is the aperture.
We are waiting for the results of the assignment on the site forum. You can also ask your questions there. See you soon, our young friends!
How I made a macro lens ...
It was in the evening - I photographed the watch in the water, I realized that on my whale 18-105mm with 45cm focusing (for 35mm) nothing good would come of it.
Therefore, I had to revise a bunch of macro lenses on the Internet (in fact, there are not so many of them on my camera). The parameters are wonderful - but the prices bite a little, so I bought a couple of lenses for experiments in a nearby market. (photo below)
Purchased lenses(in the photo above) are characterized by magnification, in order from left to right 5, 6, 10, 6 and long focus, in order from left to right 90, 60, 50, 60 mm.

To get the most acceptable quality you need to place the object at a distance less than the length F (focal length). The figure shows that I set the object at a distance of 5cm.

View of an object through a lens
It is already possible to work with such an arrangement, we get an increase in the image on the face. It remains only to photograph. This is what we do, we install our camera, so that the main center line coincides with the lens and the lens and adjust ... (photo below)

Layout for macro photography
When shooting like this, it decreases focal length the lens itself (more precisely, the ability to take pictures at a shorter distance).
But this method introduces inconvenience:
1. You need to expose the lens, the subject and the camera itself
2. It is inconvenient to correct the positions of all 3 parts of the shooting
Therefore, it was decided to experiment and make a lens as a lens attachment. The difficulty was that the diameter of the lens and objective are different. In my case, one of the lenses was half a centimeter smaller than the diameter of the lens (which is 67mm).
Therefore, I did the following trick - I broke off the lens holder (what it was and what it became can be seen in the photo below), and added the difference in diameters with ordinary tape.

how the lens was made
I advise you to wind in such a way that the adhesive tape and the lens in the frame are on the table in order to avoid the bevel of the tape winding.

When winding, it was necessary to periodically check whether it was wound enough.

This was done quite simply - an attempt to install lens on lens. After several attempts, everything worked out.
After - it remains only to cut off the residual protrusion of the adhesive tape.

Now we could start shooting.
When shooting the problem of setting the composition and system parameters was no longer there - everything became ingeniously simple - point and shoot.
Here's what happened with this experiment. (Please note that the 3 photos below are not cropped - that is, not cropped, but are originals compressed to a smaller size while maintaining aspect ratio).
SIM card, screen shot, phone keyboard shot (my Nokia 7610 old)

testing - sim card

testing - display snapshot

testing - a snapshot of the phone's keyboard
Of course, free cheese is only in a mousetrap, so I will say about cons of such a setup:
1. Very large chromatic aberrations (which are almost impossible to cure with software chrome dove)
2. Terrible distortion (which can be treated by cropping the central zone of the photo)
3. Inconvenience of lens installation
4. The inability to photograph at distances greater than 2F lenses (adjusted for the lens)
But, of course there are pluses:
1. Cheapness (the delivered lens costs 8 UAH 30 kopecks, which is equivalent to 45 rubles, or 1 dollar)
2. Easy to create
3. Ability to create "psychedelic creations"
4. At a critical moment, you can still take a picture of the little thing that you need.
Conclusions? Experiment and experiment again!
P.S. You can see the original size of the photo of the monitor. All success!


Popular
- What is gypsum and where is it mined
- How a nuclear power plant works
- The simplest clay dishes in survival conditions!
- Ao Kamov. Light helicopters of Russia. Production of light helicopters in Russia Where light helicopters are used
- Children's electronic presentations and clips Children's electronic presentations for preschoolers
- How to make a do-it-yourself collage of photos: ideas, methods and design examples Funny do-it-yourself photo collage
- How to make a collage of photos with your own hands on the wall: create home comfort Collage of family photos with your own hands
- Funny fairy tale scene about a turnip Fairy tale turnip for the new year for children
- Prom theme: how to choose and what ideas do you have?
- Batman comics: where to start reading?