Step by step birds from plastic bottles. How to make birds from plastic bottles with your own hands
Decorative elements from plastic bottles do it yourself. Crafts vary in degree of difficulty, but they always become the subject of attention of others. Many birds from plastic bottles are made according to a similar algorithm, only the outlines and details differ. The options for their manufacture will be discussed below.
Handy materials and nuances of the registration process
The creative imagination of the master is able to create a masterpiece from ordinary things. In addition to bottles, other available materials are used to decorate birds:
- Plastic cans serve as an excellent base for the bird's body.
- Polyurethane foam helps to give the desired volume.
- Styrofoam will help to make the bird's head as close as possible to the original.
- Self-tapping screws, wire or glue are used to connect the parts together.
- Poultry legs are trimmed with a corrugated pipe, twine, or parts are cut out from plastic containers.
- Small bottles of dairy products help shape the legs of the bird.
- Moisture resistant acrylic paints and anchor varnish transform the nondescript silhouette of a bird beyond recognition.
To cut and connect all this, you will need scissors, a stationery knife, a stapler, an awl. This is a basic list that changes depending on the selected bird model.

Comment! The beauty of the craft is largely determined by the quality of the plumage. If you want to decorate the site with a spectacular bird, please be patient to make a large number of small and large feathers.
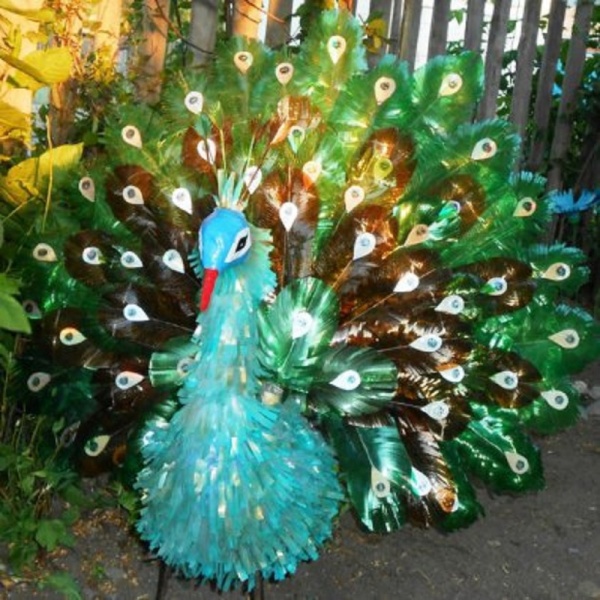
Novice craftsmen can be offered a simple step by step guide where a peacock acts as a bird from plastic bottles:

Advice! Pre-filling the body with sand will help to give the bird's figure stability.
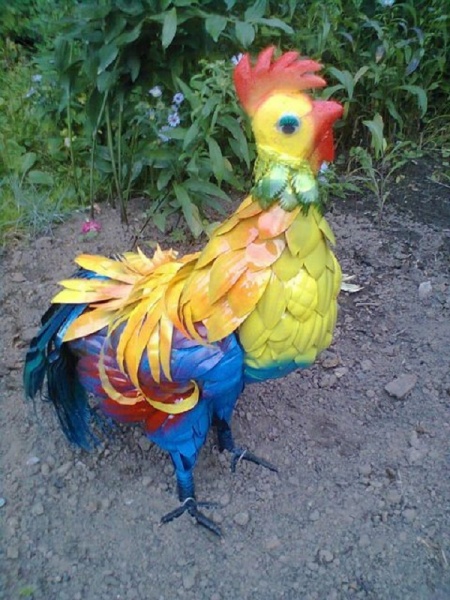
Making a bird using a rooster as an example
Having gained experience with light crafts, you can move on to a more complex process. The proposed algorithm on how to make a rooster out of plastic bottles will be an excellent guide for making other birds as well.
Materials at hand:
- a plastic canister and a 5 liter bottle;
- PVC pipe about 40 cm long;
- containers of 1.5 liters for thighs - 2 pcs.;
- many bottles for plumage.
Frame
Process of creation:
- The work begins with the formation of the bird's frame. The side of the plastic canister is cut and slid to the side.
- The pipe is given the desired shape, after which it is screwed to the body of the bird with self-tapping screws.
- The cock's neck is made from a 5 liter plastic bottle, rolled up in a bag. Depending on the chosen bird model, the elements can be replaced with other parts. For example, another piece of plastic pipe is perfect for the neck of a flamingo.
- The rooster's legs have a thickening at the top, bags from 1.5 liter bottles will perform the function of thighs. For other birds, the volume of containers is selected in proportion to the figure. The elements put together represent a similar framework:

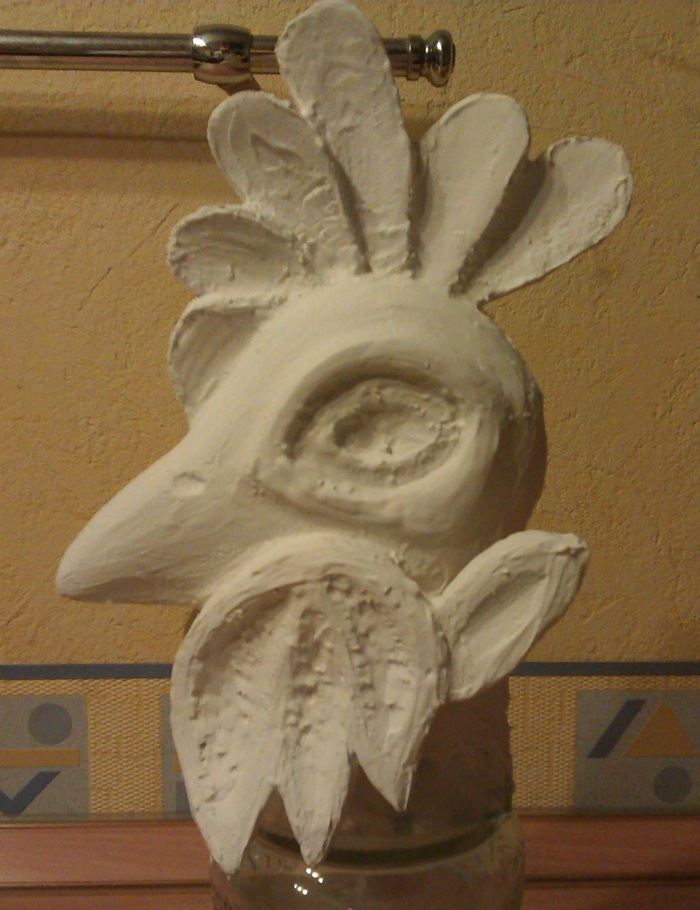
Head
The rooster's head is cut out of polystyrene foam. If it is difficult to cut a solid shape with a comb and a beard, you can prepare all the elements separately, and then glue them together. Sometimes this part is also formed from a plastic bottle. So that in the future the foam blank can be easily dyed, the following measures are carried out with it:
- carefully processed with sandpaper;
- covered with acrylic putty;
- after the composition has dried, they are re-sanded to give a smooth surface;
- a layer of PVA glue is applied.
Elements of the bird's head are decorated at the discretion of the master. The eyes can be painted with paints or finished parts can be fixed. Various crests, scallops are cut out of plastic or foam. The beak is often made from a tight plastic container (usually a shampoo container).

Plumage
The size of feathers varies not only in different birds, but also on one figure:
- The back, sides and breast are usually decorated with medium-sized feathers.
- Smaller elements are cut into the neck.
- The wings and tail are most often formed from long feathers.
Comment! Feathering bottles are propped in the same color so that, after staining, they get an even shade throughout the figure.
They begin to form the plumage from the thighs, fixing each subsequent row so that the attachment point of the previous one is not visible. The work is carried out using a wire, threading it into the holes prepared with an awl, or with self-tapping screws.
After the legs, they move on to the rest of the body, leaving the back free, where the bird's wings will be attached. In order for a rooster to stand firmly on its feet from plastic bottles, it needs to make paws. The frame is made of rigid wire, subsequently it is fixed on plastic pipe... Then the base is processed with a corrugated tube or twine.
The most difficult step for many may be the formation of the wings and tail of a bird based on plastic bottles. For these purposes, a reinforcing mesh is usually used. The size of the base for the wings and tail is selected depending on the species characteristics of the selected bird. For example, a peacock's tail feathers can be attached to an oval piece of linoleum. But mesh is a more common option. The elements are fixed with an overlap, each row covers the fastening of the previous parts.
The moment of complete assembly of all elements from plastic bottles can be carried out before or after paint application. At the finish line, painting is done. A bird with the same plumage throughout the body can be decorated after complete assembly. It is more convenient to paint the elements of the frame, tail and head separately, and then connect them using self-tapping screws and wire.
Review of interesting ideas
The versatility of plastic bottles allows you to make crafts of various degrees of complexity. One and the same bird can be presented in different variations, and its production is not always a laborious process.
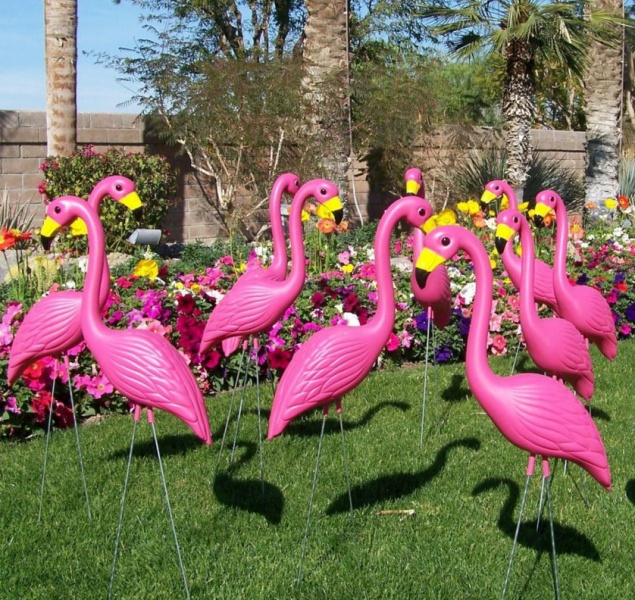
Bright pink handsome flamingos will help to add exoticism to the site. Guided by the algorithm proposed above, a bird can be made in a short time due to its large plumage. Various options are presented in the photo:

Another cute bird in hot countries is the parrot. Here, much determines the originality of the color. The plastic bottle body can be covered with feathers or simply covered with paint. The complexity of the feathers and tail is at the discretion of the master. The design methods are shown in the photo:


An owl or an eagle owl, familiar to our regions, is another worthy decoration of the garden. An imposing beauty made from plastic bottles can take a long time.

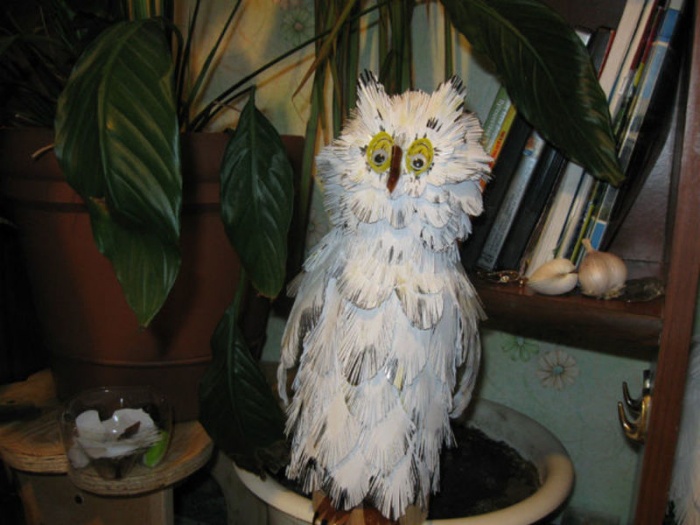
For busy people, there is a simplified version of the night bird.

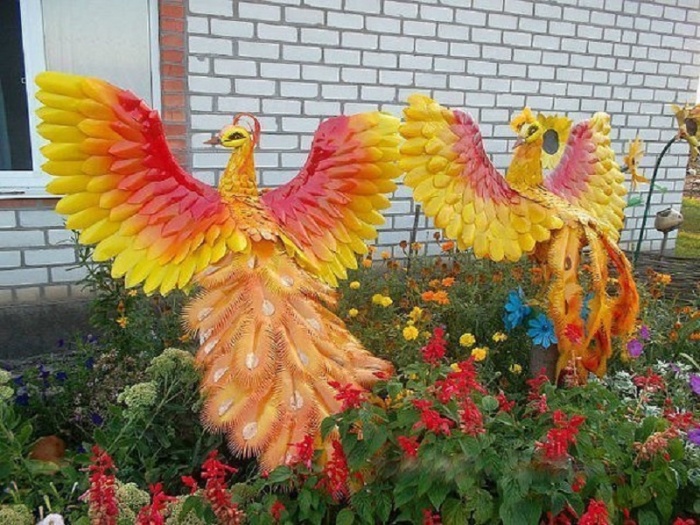
A peacock will help you get closer to the scenery of the royal court. The gorgeous tail of the bird will not leave anyone indifferent. Make the peacock bright or white, leave the tail folded or straightened - the owner of the site decides. Or maybe you liked such a firebird?
Perseverance and patience will require a chic dove, for the manufacture of which white plastic bottles will come in handy. It is better to prepare the plumage on long winter evenings, when all work in the garden is suspended, so that by the spring the site will be transformed with a new resident.

On which bird model to stop, it is up to the craftsman to decide. The process of making any craft can be facilitated by replacing jewelry-made parts with simpler elements from plastic bottles.
Birds from plastic bottles are a popular decoration of a suburban area or local area. The availability of scrap materials is the main reason for the demand for crafts. You can make birds of any category of difficulty with your own hands, it all depends on the skills and availability of free time. Simple master classes are suitable for novice lovers of creativity from plastic bottles or those who want to involve children in the process. Medium to high difficulty will require hard work, but the result will be a real masterpiece landscape design.
Preparatory steps
Decorating a plot is an exciting activity, it is much more interesting to make a bird with your own hands than to purchase a ready-made copy for decoration. This creates an opportunity to show creativity. And for those who lack their own imagination a little, the presented step-by-step guide about birds from plastic bottles will become a reliable help in needlework.
The auxiliary materials at hand will help to make the craft original. Depending on the type and size of the bird chosen, work may require:

In the process of working on a bird, scissors, a stapler, an awl should be at hand. Regardless of the shape chosen, plastic bottles are thoroughly washed before starting the creative process, removing the remnants of labels and glue. Otherwise, the birds will quickly become dirty and lose their attractiveness.
Comment! The main difficulty in the manufacture of birds based on plastic bottles is the plumage. The thicker and finer it is, the longer it will take.
Most simple crafts contain a minimum of details, figures with large plumage can be attributed to the average category of complexity. To create a masterpiece, you have to be patient and time consuming.
Beautiful birds from plastic bottles with their own hands are presented in numerous photos:


Simple, fast, beautiful
You can quickly decorate the site, spending a minimum of time and effort, using simple bird figures, where a small number of details are used. The decorative effect is achieved through bright colors.
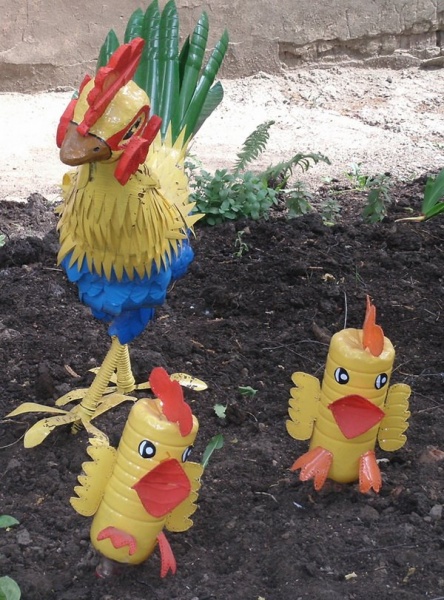
Chick
Chicken can be made in different ways, it all depends on the chosen container. If a small figure is required for a landscape design composition, 1 liter thick plastic bottles containing dairy products are suitable. The average size it will turn out from a container of 1.5 liters. To make the chicken visible from afar, you can take a plastic container of 5-6 liters. The basic steps are straightforward:
- The selected container is covered with bright yellow paint.
- A comb, beak and legs are cut out of dense plastic, which are fixed with an awl and wire.
- Chickens look more impressive, where the wings are additionally cut and fixed from the bottles.
- At the final stage, eyes are drawn to the chicken.


A sly fox from a plastic container, which lurks near the chicken, will help to give originality to the composition.

In order for the bird figure to play not only a decorative role, but also to be of practical use, bird figures from plastic bottles are often used as containers for plants. The chicken idea is no exception. The next photo shows a great idea of how a bright chicken doubles as a flower pot.


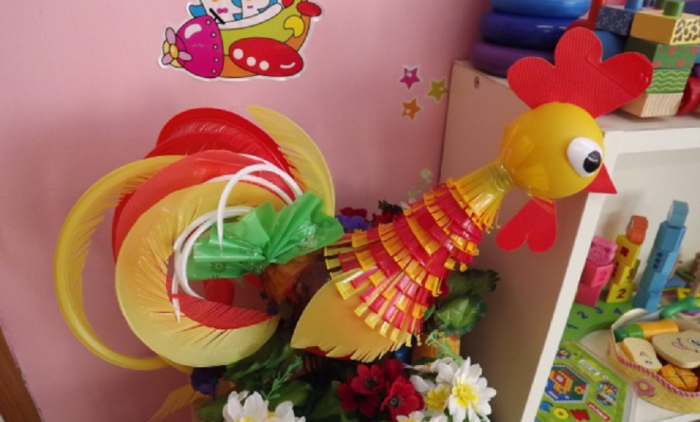
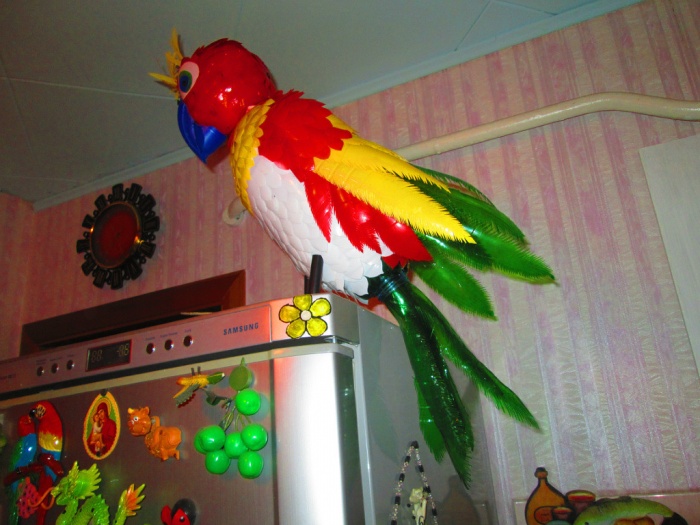
A parrot
There are even more ways to make a variegated parrot based on plastic bottles. Let's start with the elementary. For work you will need:
- Plastic bottles, preferably 1.5-2 liters.
- A flat container made of dense plastic.
- Self-tapping screws, glue and scissors.
- Acrylic paints.
The easiest way to make a parrot is to choose a bottle with a spherical shape for the body, which will transform into a head. The neck is covered with a funny tuft, which is also cut out of plastic bottles.
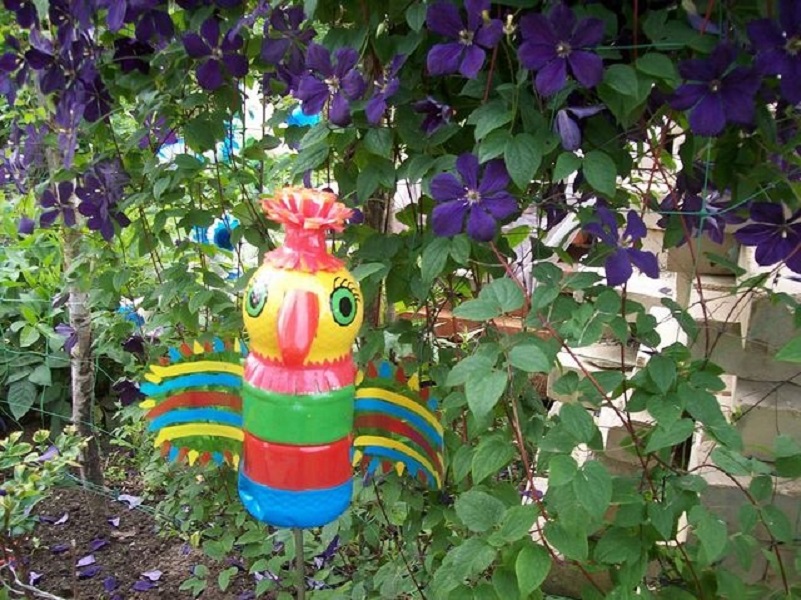
In order not to be mistaken, the details of the wings and tail are first drawn on paper. The neck and bottom of plastic bottles are removed, cut lengthwise and left under pressure overnight. Paper blanks are transferred to plastic and cut out. All elements are colored separately. Then the torso, wings, tail and crest are connected together. The beak is cut out of dense plastic. An ordinary metal twig will help to fix the parrot to the ground. Even a 10-year-old child is able to make such a bird.

Advice! In order not to get hurt in the future, it is recommended to melt the cut out parts of the bird over a small flame, an ordinary candle will do.
If you want to make a parrot with plumage, you will need much more effort. The bird, painted in exact accordance with the cartoon character Kesha, looks extremely impressive. We will not go into the nuances of making a colorful figure, they will be described using the example of a rooster made of plastic bottles.

Medium difficulty category
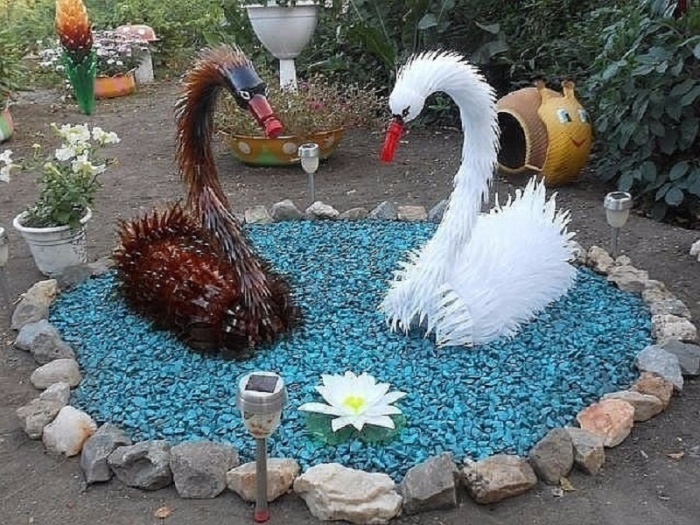
Graceful swans and exotic flamingos always attract attention. You can make them yourself from plastic bottles.
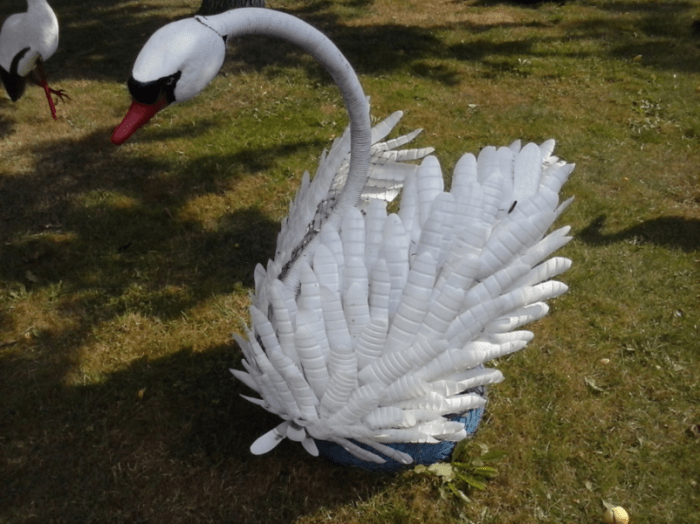
Swan
Milk plastic containers of white color with a volume of 0.3 liters are ideal for making a swan.
Algorithm of actions:


Comment! The work on the formation of the plumage begins from the bottom up or from the back to the front so that the upper element covers the attachment point of the lower part. This rule applies to all instructions on how to make a bird using plastic bottles.
The main stages of the creative process are shown in the photo.

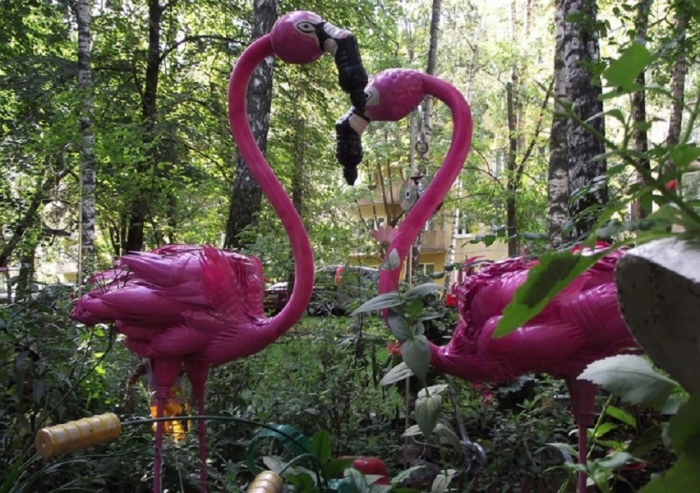
Flamingo
It is easy enough to make flamingos out of plastic containers. Large bird does not require meticulous actions to cut out numerous small feathers, so the process moves quickly.
A plastic canister with a volume of 10 liters is usually taken as a basis. For the legs, PVC pipes are required, it is better to make the neck from a flexible hose. As you can see in the photo, the upper part of the bird's legs is assembled from milk bottles. The body is decorated with large plumage. The final touch is coloring exotic bird in bright pink color. A large figure needs careful fixing on the site. Long legs are best fixed in the ground. If you do not plan to move the flamingos, you can even pour a small amount of concrete.

The bird looks unusual, where the bottoms of plastic bottles are used instead of plumage.


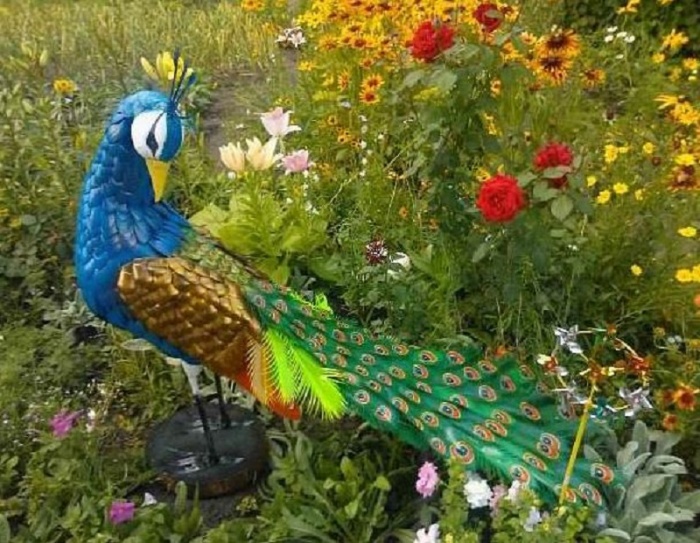
Peacock
A peacock or a firebird will help you immerse yourself in a fabulous atmosphere on the site, which are also based on affordable plastic bottles. You can make the process easier by replacing part of the plumage with plastic bags.
Main stages:


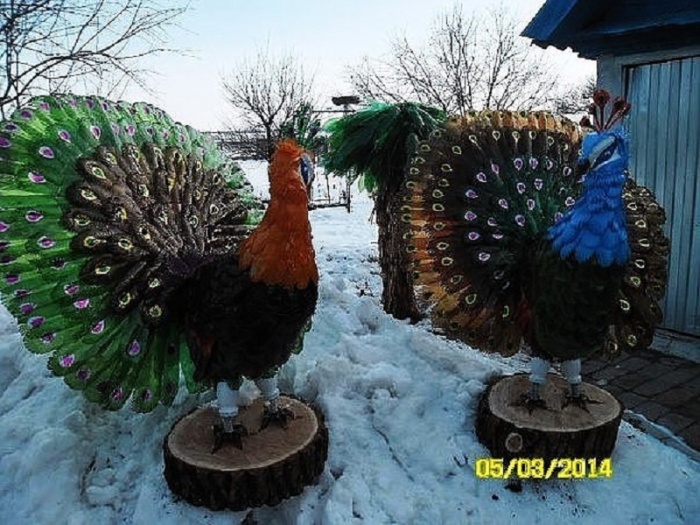
To keep the peacock stable, the body is pre-filled with sand. Peacocks look incredibly impressive, where the plumage is completely made of plastic bottles. The original coloring will help to make an individual bird that will be different from all the specimens presented.


Masterpieces of creativity
Experienced craftsmen can be offered instructions on how to make a rooster out of plastic bottles. For crafts you will need:
- Plastic canister on the body.
- 5L bottle for neck.
- Plastic tube 40 cm for poultry paws.
- Bottles of 1.5 liters for the design of the thighs.
- Lots of plastic containers for feathers.
Frame
The formation of any bird, including a rooster from a plastic bottle, begins with the creation of a frame.
Key stages:
- The side of the canister is cut off and pushed aside.
- The pipe is bent in the shape of the paws and screwed to the canister with self-tapping screws.
- A capacity of 5 liters is rolled up in a small bag, this will be the neck of a rooster.
- To make a thickening on the legs, plastic bottles of 1.5 liters, cut off at the top, will help.
If you plan to make a small bird, take a smaller container.

Head
You can bring the figure of a rooster as close as possible to a natural bird if you make a head from foam. Such work is notable for its jewelery and requires certain skills. Cutting out a single piece is quite difficult, it is easier to separately prepare the head, comb and beard, and then connect the parts. Then the workpiece is prepared for staining, for this:
- the bird's head made of polystyrene is sanded with sandpaper.
- the surface is treated with acrylic putty;
- when the mixture dries up, it is re-grinded;
- a layer of PVA will give the workpiece the desired smoothness and prevent excessive absorption of acrylic paints.
You can design a bird's head in various ways. The eyes draw or attach small pieces of a suitable shape. Handicraft shops provide a wide variety of decorative items. The scallop and beak are easier to cut from plastic containers than from styrofoam.


Plumage
The plumage of birds differs depending on the part of the body. The tail usually consists of long feathers. Large details required for the wings. The body and especially the neck are decorated with small elements. Observance of proportions will bring the decorative figure as close as possible to the selected prototype. Small feathers are fixed with wire into holes prepared with an awl, large elements can be fixed with self-tapping screws. When forming the wings, a reinforcing mesh is often used.
The legs of the rooster also deserve attention. The plastic tube at the top is supplemented with bottles fixed with the neck down, the lower part is crowned with legs twisted from wire and wrapped in twine.

When to paint it depends on the color of the bird. A solid figure can be finished with a decorative layer. It is better to paint the elements of variegated birds in advance, before starting the assembly.


When you have the skills to work with plastic bottles, you can make a real masterpiece to decorate the site. Whether it will be an important rooster, an owl at night or a royal pigeon - it's up to the master to decide.
As you know, plastic bottles come in different sizes, shapes and colors. This allows you to create a wide variety of crafts from them: both the simplest ones, such as vases, targets, shovels, and quite voluminous and complex ones - figurines of animals, birds, even furniture and whole houses. So we came up with the idea to teach you how to create a fairy-tale character - the Firebird craft, a master class will be given in this article.
It must be admitted that this is not an easy task. After all, the Firebird is a fairy-tale character, he is fictional. You can't find this in nature. She was seen only in pictures in children's books. This is how she is in our imagination.
Firebird from plastic bottles: master class
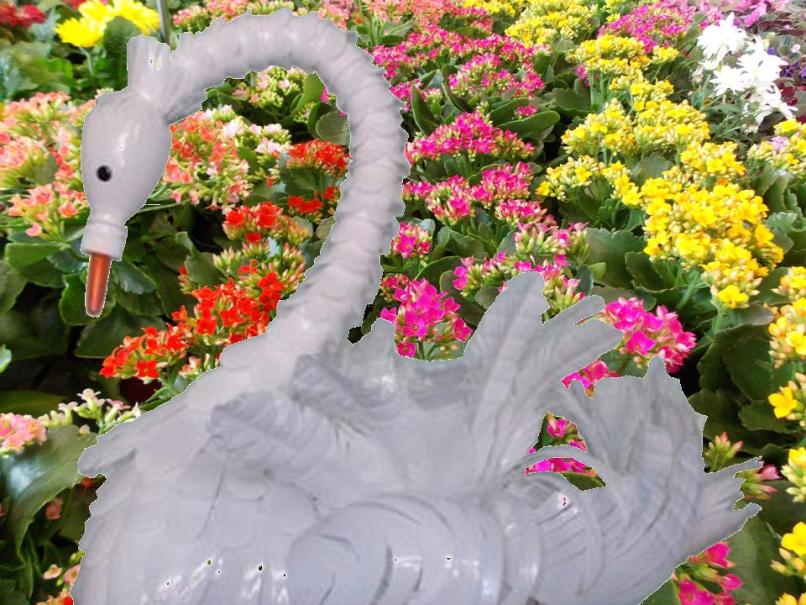
But we are not used to deviating from the intended goal. In nature, there is a bird very similar to this fairy-tale character. This is a peacock. We will take it as a basis. So the lesson begins: how to make a firebird out of plastic bottles.
For example, we decided to take the process of making a white peacock. Use this as a framework or outline to help you implement your idea. After all, the white peacock differs from the firebird only in color. You just have to paint your bird of happiness so that it finally becomes like a character from our childhood.
Take thick foam and cut the base of the bird's body out of it.

Cut off the neck and bottom of the stained bottle.

Cut the resulting cylinder into two parts.

We divide each part into two more equal ones. As a result, we end up with four pieces of the same size. On the upper side, they need to be slightly rounded.


Let's start working on the tail. The basis for it is a sheet of linoleum. Sheet size: 1.2x1.4 m.

Now we begin row by row to fill the space of the tail with feathers. To keep the feathers well on the linoleum, we make punctures with an awl and attach the feathers through these holes with a wire.

See what a gorgeous ponytail you get.

The ponytail is attached to our foam base with nails that are masked with white paint.

Working on the wings. Cut a small cylinder out of the bottle and cut it into two equal parts. Then these parts are cut into teeth and attached to the base also with nails.

The process of working on the plumage continues until the entire base is covered with feathers.

Now we are working on the feathers of the tuft. Cut out a piece of plastic that resembles a spoon.

Cut the upper round part into cloves, and bend the leg in the middle.

Paint the ornament.

For the future beak, cut a triangle of the required size from the neck of the bottle.

Paint it white and fold it in half.

Attach the beak to the head, first from the bottom, then the top.

Now we glue the prepared tuft feathers to the head and draw beautiful eyes.

To make the legs, we need two bottles. We attach them to the peacock.

The final chord is choosing the best place in the garden for the bird. For stability, insert two tubes into the bottle legs and dig into the ground. 
Since this is still a white peacock, and not a firebird, you just have to color it. As you remember, we have already covered the peacock with paint, and it will serve us as a base. Therefore, you can use spray paint on top. Or some other, according to your taste. Here is an example of coloring firebirds one of the craftsmen.

Below is another idea - a diagram of a firebird from plastic bottles with your own hands. This version of the bird of happiness was made by a mother needlewoman with her children.


Watch a video with detailed tutorials below.
Supporting video MK:
- “On the Internet, and in stores, I often saw figures and. - Tamara Bayandina (Voronezh, Russia) talks about creating a figure of a heron for the garden, - So the idea arose to create a proud heron, as an integral decoration of ours! Since the base of the heron is made of waste material, the material costs are not high, but the pleasure from the process of creation and the result is great! ”

- Master class by Tamara Bayandina ““.
- Photo 1. We make the base of the heron: a wire frame (neck, legs), a body made of a 5-liter plastic bottle, the joints are additionally fixed with tape. There is a block of wood inside the bottle so you can attach the wire. We cut the bottle from the bottom and inserted this bar with the drilled holes into it, but not through it, in order to drive in the thick wire, and then we selected a position for stable standing.

- Photo 2. With the help of textiles, we begin to shape the body. With the help of textiles, it means that with the help of various rags (tapes from old sheets) she pulled tightly a little bit and “tamped” with tape. She wrapped it with a serpyanka over the scotch tape. For those who do not know what it is: the mesh, impregnated with some kind of glue solution, to better adhere to the putty, looks like a wide tape. Serpyanka is intended for painting and is sold in hardware stores. On the head is a piece of foam rubber for the form.

- Photo 3. I cut the wings out of foam, and then glued them! “Muscles” and wings are covered with putty and covered with PVA glue on top. Universal putty for outdoor use. But I didn’t apply it immediately over the scotch tape that tightened the winding, but over the serpyanka. The putty was smoothed with a wet paint brush so that the product did not look gnarled. The number of layers of putty is at your discretion - until the unevenness is smoothed out. Well, and then, PVA glue and acrylic glossy paints for wood.

Due to the variety of shapes, colors and sizes of plastic bottles, you can create a variety of and original crafts with your own hands from them. At the moment, there are various schemes for the manufacture of plastic products. Using certain skills and a simple set of tools, it is possible to create various flowerpots, inventory such as spatulas, darts targets, figures of animals and animals, wild birds, interior items and furniture, and even buildings and houses. But there are such unusual tasks as the manufacture of fictional or fairy-tale characters, the ready-made schemes for the manufacture of which may not be available. This is due primarily to the fact that such species of animals and birds do not exist in nature. You will not find them in the forest, in the field, in the city. All that is known about them is the fiction of the authors of children's books or films, which at times complicates the task of making such crafts. A master class on creating a firebird from the most ordinary plastic bottles!
DIY workshop on making a firebird from plastic bottles
The fabulous firebird can be considered one of the rather complex samples of this kind of products.
In addition to a rich artistic imagination, the existing prototype of this miracle bird can help in making a firebird from ordinary plastic bottles, also with your own hands. The white peacock is such a prototype. Considering the similarity of these two creatures, real and fabulous, after making a white peacock, it will need to be painted in bright various colors, so that in the end the product looks like a bird of happiness. After all, how to make a firebird out of bottles? This article proposes a scheme for making such a craft.
It is necessary to start making a fairy-tale character by creating the body of a bird. This will require dense foam, from which the base will be cut.
After that, a plastic bottle with a capacity of 1.5 liters should be painted white. Coloring is required two times. This will prevent the finished product from shining through in the light. After the paint dries well, you need to cut off the neck and bottom from the bottle. The resulting cylinder must be cut into two equal parts with scissors. After that, each received part must be divided into two more identical elements. Further, in the form of teeth, it is necessary to cut the edge of the part, and bend it in the middle, thus obtaining a feather-shaped element.

The next step is to make the tail of the bird. For it, a sheet of ordinary linoleum 1.2x1.4 m in size and already made plastic feathers are used. The feathers should be secured over the entire area of the tail with a metal wire, after making small holes with an awl. The result is a wonderful and original tail with minimal investment. Then you need to attach the made tail to the foam body with nails, masking them using white paint.
Next, the wings of the bird are made. To create the wings, almost the same algorithm of actions is used as when creating feathers for the tail. It is necessary to cut the plastic cylinder from the bottle into two equal parts. After that, teeth are cut along the edges of the parts. The finished wing feathers are fixed on the bird's foam body, again with the help of nails.
To create an attractive craft, it is necessary to cover the entire base of the firebird with plastic plumage. And only after that you can start making the feathers of the crest.

To create a bird's tuft, it is necessary to cut out an element from a plastic bottle that looks like an ordinary spoon. The edges of the upper round part of the spoon must be cut into cloves, and the whole part must be bent in the middle of the leg. Then the ornament is applied to the round part of the product with paint. After that, a triangle of the required size should be cut from the neck of the bottle. It will serve to make the future beak. The beak is painted white and bent in half, after which it is attached to the foam head, first from the bottom, and then to the top with nails. After that, the already made tuft feathers are fixed with glue, and eyes are applied with a brush and paints.
Firebird legs are made from two plastic bottles, from which it is necessary to separate the half with a bottom. This part is unnecessary. The learned two elements should be attached to the main body. At the final stage of creating a firebird with your own hands, you must choose appropriate place on the summer cottage for the finished craft. For structural stability, you can use two tubes of the required diameter. These tubes are inserted at one end into plastic legs, and at the other end they are immersed deep into the ground.

All that remains to be done to complete the manufacture of the craft is to paint ready product in the colors of the firebird. Using spray paint or any other paint, you can turn a white peacock into a fabulous miracle bird. The video below has one example of a firebird coloring.
Related videos
-
 How to register a company abroad?
-
 How the passenger pays for the trip Benefits of travel for corporate orders
-
 Organization of a paid extended day group as an idea for a private business!
-
 Own business: using thermal imaging cameras to inspect houses Thermal imaging cameras as a business can you make money
Popular
- Technology and timing of installation work
- Serbia - the life of Russian emigrants in the Balkans Cost and terms of company registration in Serbia
- Hospitality - by whom to work, a list of professions, in which universities to study, what to take for a specialty Enter the hotel restaurant business
- Job description of the deputy head of the shop Submits to the head of the shop
- Examples of personal qualities of an employee for a resume
- Business idea: auto parts store
- Profitable business in serbia
- What to write about yourself, how to describe yourself in your resume: example, employee qualities that employers value
- How to start a business in Israel and not screw it up
- Electronic submission of reports: in what case is it obligatory, what can be sent, services and their cost Program for electronic reporting to the tax