Cold porcelain how to make at home. How to make cold porcelain with your own hands: competition from Chinese craftsmen
Graceful and durable products made of cold porcelain outwardly resemble ordinary porcelain, in practice they have little in common. Despite the fact that the Japanese have been familiar with it for more than five thousand years, it has spread across Europe recently. Properly prepared porcelain looks fragile and translucent, but in fact, very durable gizmos are obtained from it. In addition, it is completely safe and easy to use.
Preparing the material at home is as easy as shelling pears, and even a child can handle modeling. We invite you to take our master class "How to make cold porcelain".

Instruments
You don't need any special tools to master the craft. If you are not going to become a professional sculptor, get by with improvised means.

Use rulers, knitting needles, nail files as stacks. Fasten the bead on a toothpick: with this simple device it is convenient to roll the material to the desired thickness.


To sculpt some gizmos, texture molds are needed. Unexpected things can act in their role. For example, real plants and flowers will help to create a beautiful petal or leaf.

cooking recipes
Homemade cold china can be made in a number of ways, using ingredients you probably already have at home.

No recipe is complete without starch. It is best to use corn: the material will turn out to be more elastic, weightless and transparent. Potato will give a grayish tint and visual heaviness. Suitable for modeling jewelry, figurines.

Cooking without heat treatment
Send two tablespoons of starch and a tablespoon of vaseline oil to the container, mix. Drop a little vaseline oil and a pinch of regular soda. Pour in two tablespoons of PVA glue and mix well.

with heat treatment
Mix in a bowl a glass of starch, one tablespoon each of baby cream, vaseline oil and petroleum jelly. Pour in a teaspoon of citric acid and 100 (if necessary, a little more) milliliters of PVA glue. Cook the "dough" over low heat until a dense lump is obtained.


Alternative recipe
Mix in a bowl 150 milliliters of PVA glue, a teaspoon of glycerin and oily hand cream, pour in 100 milliliters of water. Start cooking cold porcelain.

Bring the "dough" to a smooth consistency over low heat. Pour in 200 grams of starch. Stir constantly while cooking. When the mass begins to form a lump, remove it from the heat. The second part of the preparation is the same for all recipes.

Moisten the towel and put the future porcelain on it. After waiting for it to partially cool, proceed to kneading. At this stage, various dyes can be added. Both food and synthetic ones are suitable, the main thing is that they do not cause allergies.

Wrap the elastic mass in polyethylene and put it in the refrigerator. Start creating the next day: porcelain should rest. Without delay, start washing the pan until the remnants of the material have dried on the walls.


Cooking errors
Good cold porcelain will be elastic, easy to mold. An error in the dosage of starch, in particular its excess, will lead to excessive rigidity of the material. It will be inconvenient to pinch off pieces from such a mass.

If you see inclusions of starch in the "dough", do not rush to throw it away: add a little PVA and knead the material again. Having achieved the desired elasticity, wrap the "dough" in polyethylene and put it in the refrigerator for a day.

If the material turned out to be sticky, hardly holding its shape, not plastic, liquid glue is to blame (you may have used clerical PVA), an insufficient amount of plasticizer. You can try to cook porcelain until the required qualities appear. If this does not help, you will have to repeat the preparation with a better glue.

The quality of the adhesive is largely a fundamental factor in the final result. Because of it, the finished product may crack. Building glue with a plasticizer is best suited.


Properly prepared cold porcelain does not stick to hands and surfaces. If, even after thorough kneading, the mass does not want to take the required shape, it hardly lags behind the film, it means that it lacks glycerin or petroleum jelly. They are responsible for getting rid of excess moisture and plasticity of the material.

The material loses its shape, tends to fall off? Add some starch to thicken the "dough".


Speed up the drying of the craft by using a hair dryer or microwave. A slightly preheated oven will also help. If you are not in a hurry, just turn the piece occasionally to dry it on all sides.

Coloring crafts
At the kneading stage, add pigment or water-soluble paint to the mass: tempera, gouache, acrylic.

Powdery dyes (including food ones) will help to color the molded part. Apply them to the craft and hold over the steam, allowing the color to soak in.


To draw details on the finished product, use a thin brush and paints. Please note: when dry, water-soluble ones will fade slightly, while oil ones will retain their brightness and saturation.

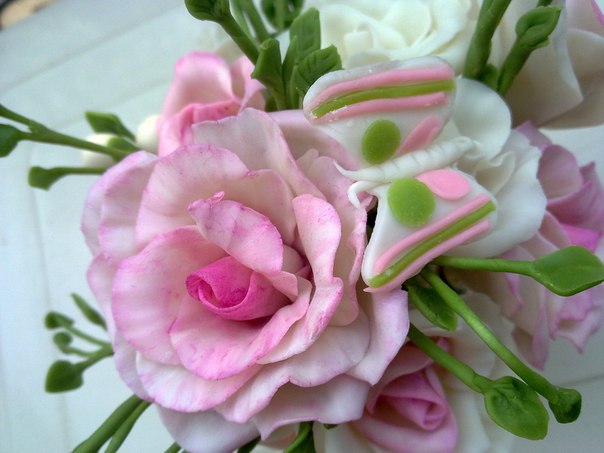
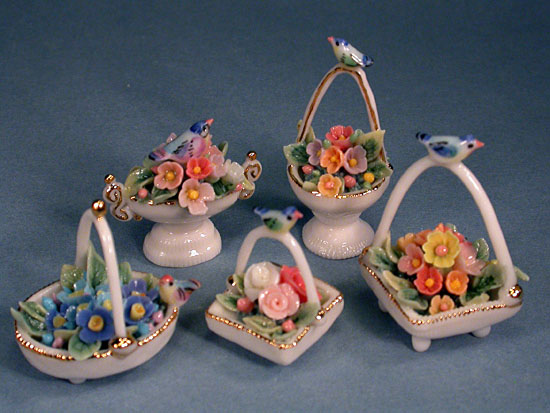
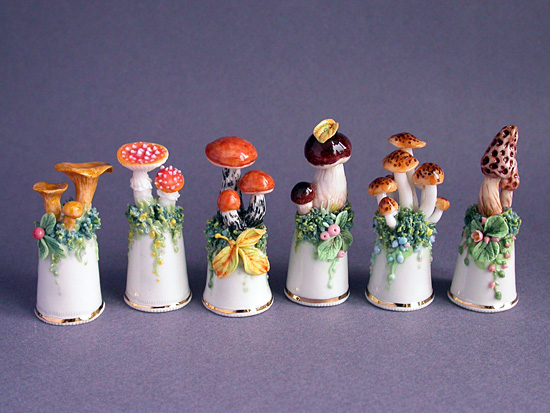
Look at photos of cold porcelain gizmos: what amazing and stunningly beautiful things you can create with a little effort and imagination!


Drying
Naturally, the craft will dry in 1-7 days. Putting it in a slightly preheated oven will speed up the process.

Do not be alarmed when the product shrinks a little after drying: it should be so. Consider future shrinkage during the sculpting process.

Benefits of work
Surprisingly, this is true: modeling from cold porcelain will bring into the world not only a beautiful product, but will also have a positive effect on the well-being of bones and joints. It will improve blood and lymph circulation, alleviate seasonal exacerbations of arthritis, arthrosis and gout. Working with small details will improve fine motor skills and calm the nervous system.

Modeling is a very exciting process that is not difficult even for beginners. Let your first work be cold porcelain flowers, a bird, an animal, jewelry. By increasing the level of skill, you will be able to perform elements that require more delicate work.


Use our simple instructions for beginners in modeling from cold porcelain, so that creativity brings only positive emotions!

DIY cold porcelain photo


Cold porcelain is a mixture of glycerin, oil, glue and starch. There are several recipes for making porcelain that may be suitable for a beginner. But before you start doing it, you need to know that its shade depends on the recipe itself and the composition of the products. Items made from potato porcelain are grayish and dense, while those made from corn porcelain are airy, transparent and have a slightly yellowish tint.
Recipe number 1 - DIY cold porcelain
Ingredients: 
- One hundred and fifty grams of cornstarch and a little for kneading.
- teaspoon of glycerin.
- A teaspoon of white hand cream.
- One hundred milliliters of water.
- One hundred and fifty milliliters of PVA.
Cooking:


Often, craftsmen during cooking change the composition and thereby improve recipes. So feel free to experiment.
Recipe #2 - Improved Cold Porcelain Recipe
All the same ingredients as in the first recipe.
Cooking:

This porcelain will be smoother and more uniform. The picture on the right shows a mixture that is made according to the first recipe, and on the left - according to the second.

Recipe number 3 - Making cold porcelain from potato starch without cooking
Ingredients:
- PVA glue.
- Baking soda.
- Vaseline oil or Vaseline.
- Potato starch.
Cooking:

Phosphorus should be painted with all kinds of food dyes and paints (acrylic, oil, oil and others), to do this, add the color to the prepared mixture and knead so that the color is evenly distributed.

To paint a frozen finished product, apply dry food paint to the element with a brush, then hold it over the steam of the kettle. In this way, porcelain will absorb the dye and get a natural color.
How to work with cold porcelain?
- Use special tools (rolling pins, stick stacks, etc.).
- Lubricate your hands with cream before starting work.
- After kneading, the mixture should lie down for at least a day.
- Store in sealed packaging.
How long does cold porcelain dry?
Cold phosphorus dries depending on the thickness of the product (one or several days), while the size decreases. When drying flat figures, they must be turned over so as not to deform.
You can use the oven to speed up drying.
Cold phosphorus is a rather plastic material, almost everything can be molded from it. And to decorate products, you can use different materials: pieces of fabric, threads, beads, beads, and so on.
Content
In Europe, cold porcelain appeared quite recently, but the Japanese have been using it for 5 thousand years. It has nothing to do with ordinary porcelain, but it is visually fragile, translucent and weightless in the finished product.
Each master who is fond of modeling from cold porcelain has his own recipe, which he developed after much experimentation. But a novice in this business can try to make cold porcelain without cooking from known ingredients. And over time, develop your own recipe, which will be individual.
From corn starch
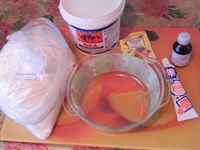
To prepare the material you will need:
- Corn starch - 200g;
- Construction PVA glue - 150g;
- Water - 100g;
- Glycerin - 1 tsp;
- Any cream - 1 tsp
Cold porcelain at home from cornstarch will have a yellow tint, while its appearance is more transparent and it looks weightless in products. This material is ideal for making delicate flowers and leaves.
Step by step manufacturing
Mix glue, water, glycerin in an old saucepan and put on a small fire, you need to mix without stopping. Starch is added at the moment when the mass in the container becomes homogeneous, while stirring constantly. It is worth noting that the mass will boil only at the edges of the pan, and if you do not interfere constantly, it will burn. As soon as the contents of the pan begin to lag behind the pan and gather into a lump, it can be removed.
Another way, with the use of which porcelain will turn out to be of better quality, is cooking in a water bath. Using this method, you can pull the pan out of the water and mix the mass well.

Important! Be sure to fill all the tools and pots used in cooking with water.
While the mass is hot, you need to knead it in a towel until it cools. After the porcelain has cooled, we remove the towel and begin to knead with our hands, which we periodically dip in starch.
In the process of kneading, the raw materials are dyed.
As soon as the mass ceases to stick to the hands, it is ready for use, but it is better to put it in plastic bag and refrigerate overnight.
Recipe in the microwave
An indispensable attribute of almost any kitchen is a microwave oven. And it is well suited for making cold porcelain. Cooking is best in glassware. There is practically no difference in cooking, only the timer needs to be set for 30 seconds, and the mixture should be stirred. After complete thickening, spread the mass and knead well with handles. This is a fairly simple recipe for making cold porcelain.

Without cooking
Without heat treatment, it is possible to make cold porcelain from potato starch.
We take vaseline and potato starch in a ratio of 1: 2. Mix the mixture well and add a pinch in the process baking soda. With continuous stirring, add PVA glue to the desired density. After that, knead with your hands. For comfortable kneading, grease your hands with any fat cream. To prevent porcelain from sticking to the surface, it can be sprinkled with starch or smeared with cream. Cold porcelain without cooking can be prepared by any beginner.
After kneading, you need to let the porcelain stand and after that it can be used for modeling. A master class on cold porcelain without heat treatment can be viewed below.
Advanced Recipe
As mentioned earlier, masters who have been practicing cold porcelain modeling for a long time are constantly experimenting with ingredients. And thanks to these researches, the composition of an impeccable material for modeling was created. There is no big secret in this - this is the addition of citric acid to the mixture. Let's figure out how to cook cold porcelain at home - another, updated recipe.
Ingredients we need:
- 150 g - corn starch;
- 150 g - glue "Moment";
- 3 tsp - glycerin;
- 1.5 tsp - massage oil;
- 1.5 tsp - lemon juice.
Cooking:
Take a pan with thick walls, pour glue into it, which is mixed with glycerin, massage oil, lemon juice. Mix until smooth. Starch is introduced into the mixture in very small portions. Once the starch is introduced, mix well and leave to swell for 4 hours.

Then transfer the mixture to a microwave cup and heat it three times for 30 seconds at a power of 80 0C, then three times for 20 seconds, and three times for 15 seconds. Do not forget to stir the mass after each warm-up. The output mass will turn out to be sticky, and it must be kneaded with hands smeared with any cream. The surface on which the kneading will be done can be smeared with cream or starch. As soon as the finished material stops sticking to your hands, we transfer it to a bag and place it in the refrigerator. The recipe for transparent porcelain differs little from the preparation of this material from cornmeal.
Conclusion
It is worth noting that home-made cold porcelain is the cheapest option to bring your creative fantasies to life. Thanks to this material, magnificent works of art, of extraordinary beauty, can be made.
The homogeneous, plastic structure of the material allows you to create not only flower arrangements, but also the smallest details for any crafts. In a duet with cold porcelain, you can use:
- ropes,
- pebbles,
- shells,
- beads,
- sequins,
- beads,
- the cloth,
- accessories.
If you are just starting to deal with cold porcelain and do not know what ingredients are needed and what kind of glue, how to cook it correctly, then watch the training video:
Do not take on complex and small products immediately. Start with something big, big, and simple. As soon as you start to get simple elements, you can complicate your task.
Cold porcelain is the most comfortable and practical material for creativity at home.
Post Views: 1044
Evgenia Smirnova
To send light into the depths of the human heart - this is the purpose of the artist
Content
Art activities involve working with various kinds of materials. When sculpting figures, for example, in addition to clay, you can use cold porcelain, which is much easier to deal with. This plastic composition is more delicate, which ensures that the feeling of weightlessness is preserved in finished crafts. Often, flowers and small details that require careful study are made from cold porcelain.
What is cold porcelain

The main ingredients, without which it is difficult to imagine the preparation of this type of porcelain, have long been considered glycerin, corn starch, PVA glue and oil. Modern recipes undergo changes in composition. A homogeneous composition for modeling was invented at the beginning of the last century in distant Argentina. Initially, it was created for the manufacture of small figurines with many details. Art molding from cold porcelain is popular among adults and children because of the extreme ease of working with it.
How to make cold porcelain with your own hands
The convenience of soft pliable mixtures for creativity lies in the possibility of preparing them at home. You can make cold porcelain with your own hands without much effort and Money. Step by step instructions differ, but basically contain the same steps and ingredients. The recipe for cold porcelain at home may contain such a step as cooking, or it may do without it. There are ways to cook even in the microwave, but they are more time-consuming.
Training master class for beginners
It will take time to learn how to sculpt beautiful figures, but even beginners who have never sculpted handicrafts can easily prepare cold porcelain. The mass is prepared from the following components:
- corn starch;
- baking soda;
- water;
- vegetable oil.
A more common cooking method looks like this:
- Take the same amount of soda and starch, move between them in a saucepan.
- Gradually add water to the dry ingredients. The proportions should be 2:1.
- Pour in some oil.
- Put the composition on a gentle fire and, constantly kneading, bring to a thickening. Porcelain should be of a dense consistency.
- After turning off the stove, cover the saucepan with porcelain, pre-moistened with a towel.
- When the temperature is right, pat the material with your hands to ensure uniformity.
Recipe for cold porcelain without cooking

To cook or not to cook? That is the question! Craftswomen who prepare cold porcelain with their own hands are divided into two categories: the first for cooking, and the second against it. There are practically no differences in consistency and properties. Cold porcelain without cooking is just as plastic and easy to make. The required ingredients include:
- starch - 2 tbsp. l.;
- vaseline - 1 tbsp. l.;
- baking soda;
- PVA glue.
The algorithm is:
- Take a dry dish and pour starch into it. You can take corn or potatoes.
- After slightly melting the vaseline in a water bath, add it to the dry ingredient.
- Sprinkle some soda. Thoroughly mix the future porcelain to avoid the formation of lumps.
- Next, add glue by a teaspoon to achieve softness of the composition.
- Before work, lubricate the material washed to homogeneity with petroleum jelly.
How to cook from potato starch on the stove

Potato starch is a more familiar ingredient for culinary experts than its corn counterpart. It can be found in almost every home, so cooking porcelain from it may be easier in terms of availability. If you plan to create light elements, such as rose petals, it is better to forego potato starch, since the characteristic of the product is a grayish color. A simple classic way involves cooking on the stove. List of components:
- potato starch - 180 g;
- glue - 180 ml;
- lemon juice - 1 tbsp. l.;
- glycerin - 1 tbsp. l.;
- vaseline - 1 tbsp. l.
Actions are as follows:
- Sequentially combine all the ingredients in a small saucepan. The mass will turn out to be liquid, it must be mixed to a uniform consistency before being cooked through heat treatment.
- The dishes with the solution are placed on the weakest fire and the composition is stirred. Readiness is determined by the mass adhering to the spoon.
- The cooled material is kneaded with hands smeared with cream for at least 5 minutes.
How to color the resulting mass

Cold porcelain made at home requires staining. To impart color to the mass, food dyes, pigments and acrylic paints. The first two dyes are used when cooking porcelain, adding to the composition along with the main components. In this case, you will need to prepare several balls of porcelain mass in order to endow each with a different color. Acrylic paints are used when the product is dry and just needs to be painted. This option is a little more convenient, more practical and takes less time.
How to do crafts
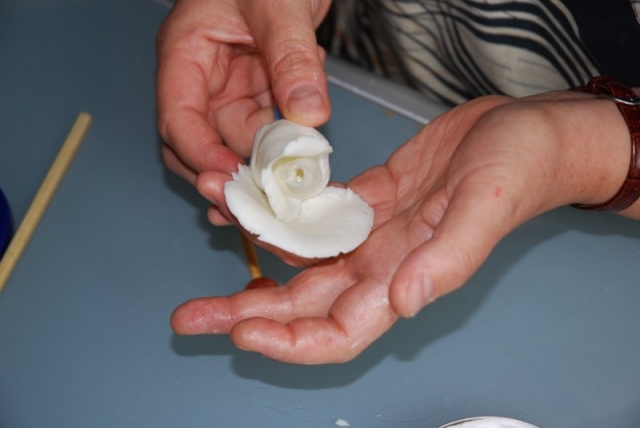
Cold porcelain is a material that is often mentioned in master classes for making flowers. You can blind them without using special tools, with one hand, but the best result can be achieved with the help of molds. In addition to them, delicate flowers are made using plastic spoons. The plastic mass is laid and rolled along the deepening of the spoon, and then several of these elements are assembled into a flower, for example, a tulip. You can use different tools, this creative process is limited only by imagination.
How to dry the finished product

Drying the finished craft - milestone all work with cold porcelain. There are cases when, when drying the finished product, the material cracks, leaving ugly grooves. How to properly dry the craft? This is done at room temperature, at least during the day. It is very important to turn the product over if it is lying on one of the sides, and not in an upright position. To speed up the process, some needlewomen slightly heat the oven, and then, turning it off, briefly place the craft there.
Video: how to make liquid porcelain with your own hands
The network is literally teeming with video-recorded master classes of craftswomen, where they share their secrets for sculpting from cold porcelain. Such lessons are very visual, they contain step by step recipe preparation of the material and several options for handling it. It is often easier to visually understand how to work with a plastic mass than when the phased creation of crafts is described verbally. Check out some detailed video tutorials below.
Liquid porcelain is very convenient for crafts, it can be made at home and even without cooking. Today's master class will be devoted to the manufacture of this material with your own hands.
There are several ways to make it, but before cooking it should be noted that the color scheme depends on the ingredients that are in it, for example, potato starch gives a grayish tint, and corn starch gives a yellowish one.
Do-it-yourself liquid porcelain from cornstarch
We will need:
Dry corn starch - 150 gr.
Glycerin - 1 tsp
Cream for pens light shade- 1 tsp
Water - 100 ml.
PVA - 150 ml.
We stir all the flowing raw materials in one container and cook on a small medium heat, during cooking we knead to one mass. Next, add corn starch in small portions, but at the same time continue to stir so that nothing burns.
At first, the consistency is similar to liquidish cottage cheese, but after a certain amount of time it becomes like mashed potatoes. We continue to knead until the solution begins to gather around the spoon into a lump.
As soon as the whole mass is cooked, remove the container from cooking, take out the hot solution on a damp cloth and wrap it with this cloth. Without unfolding the fabric, that is, right in it, knead the dough by hand until it cools completely. Then we knead by hand without a cloth, while lubricating the hands with starch to prevent sticking.
When the solution stops sticking to your hands and the dough becomes elastic, transfer it to a well-closed container or a plastic bag.

Do-it-yourself liquid porcelain in a water bath
We will need:
Dry corn starch - 150 gr.
Glycerin - one teaspoon.
Regular hand cream - one small spoon.
Water - 100 gr.
PVA glue - 150 milliliters.
We mix all the liquid components in one container, then sift the starch through a sieve and pour it into a container. Stir the resulting solution to a uniform consistency and then filter.
We prepare the resulting mixture in a water bath and stir constantly during the cooking process.
When cooking, starch begins to brew in the area where the temperature is higher, and therefore it is difficult to have time to mix everything in the bath, then you need to remove the container and stir, and then put it back in the bath to cook, while stirring further. We continue this process until the solution is around the spoon in one lump.
We shift the solution to a wet cloth, wrap it and knead it in the cloth until it cools. Then we remove the fabric and knead by hand, not forgetting to grease our hands with starch. After kneading, when the dough has become elastic, we remove it in a well-closed container.
Liquid porcelain without cooking
We will need:
Regular soda.
Vaseline or vaseline oil.
Dry potato starch.

In a cleaned and wiped dry container, grind a couple of large spoons of potato starch and 1 spoon of petroleum jelly. Then we put a little soda and interfere with the resulting solution. Add PVA one small spoon at a time and begin to stir the solution.
When the solution becomes soft, lubricate the hands vaseline oil and stir until cooked through.
Porcelain painting
Painting is done with food coloring, acrylic, oil and other paints. To do this, simply add a certain color to the prepared solution and stir until the color is evenly distributed.
If you want to decorate a product that has already frozen, then you need to take a brush, apply paint material in powder form to the product and hold it on steam. As a result, the product absorbs the colorful material and a natural shade is formed.

Method of working with porcelain
When working, various tools are used: rolling pins, figured knives and much more, which can be useful in modeling and product design. Before mixing by hand, hands are smeared with cream. After everything is kneaded, let the resulting solution lie for at least forty-eight hours. This dough is stored in an airtight container or in a plastic bag.
Drying time for porcelain
Drying of this material depends on the size of the product and lasts from twelve hours or more, but the size is made smaller. When drying flat products, they should be turned over so that they do not change appearance, that is, to avoid deformation. If you need to reduce the drying time, then you can dry it in the oven.
Often, during the cooking process, the composition is changed and recipes are improved, you can experiment as much as you like, and creating from such a pliable material is a pleasure.
Enjoy your creativity and beautiful crafts!
Video on the topic of the article


Popular
- Drinking water bottling business
- Sales agent job description
- Ready-made business plan for opening an insurance agency from scratch
- How can I open an IP for apartment renovation?
- Statistical reporting 1 type annual deadline
- How small business reports to Rosstat
- What new business ideas have appeared in Russia from Europe and the USA (America)?
- Features of the production of plastic bags
- Foreign trade balance (trade balance) How is a country's foreign trade balance measured?
- Ready business plan for a beauty salon