EVE Online Crawling - Skills, Modules, Ships, Research Locations. Connectors come in several different categories
In this article, we will consider the basic principles of equipping a ship or how this process is usually called in EVE Online - fitting (from English Fitting - installation (installation)).
Installing modules:
Ships in EVE Online are, in fact, a constructor.
Initially, you buy an empty ship hull in the market, which has a certain set of slots (cells) into which you can install various modules. In the future, they can be removed and changed for others, adjusting the characteristics and capabilities of the ship, depending on the task at hand. Slots have a specific structure: the so-called "highslots"(high power connectors), "medical slots"(medium power connectors) and "low slots"(low power connectors), as well as separate slots for "rigs"(tuning modules).
The various types of modules, respectively, are installed in their designated slots. That is, for example, rocket launchers and cannons can only be installed in high slots and you cannot push them into any other place.
In the market, the belonging of modules to a particular slot is indicated by the corresponding icon. Rigs do not have pictograms and are highlighted with a characteristic background pattern.

Important: in highslots, medicalslots and lowslots - the fit can be changed quite arbitrarily. While the rigs, you can change only by destroying the previously installed ones. Don't forget this.
Each module fitted (installed) on the ship consumes a certain amount of the ship's resources, in the form of powers processor (CPU) and power grid... Rigs take into account the "Calibration" parameter. Therefore, when fitting, it should be borne in mind that if any of these resources are insufficient, some of the modules, even if you have free slots, will not work.

Important: when installing the same modules, or modules responsible for the same characteristic - a penalty is imposed on their action. The first module gives 100% of the result, the effect of the second is already less than the declared one, etc. That is, installing more than three modules responsible for one effect is most often irrational in terms of slot consumption, it is better to strengthen some other direction more.

Applies only to those modules, the info of which contains a warning about a penalty when installing more than one module:
Selecting a ship:
When choosing a ship, first of all, you should pay attention to what bonuses it provides. Based on this information, you determine the specialization of this ship. If the ship has bonuses for the shield (shields) and missiles, then in 99% of cases, it should not be fitted into armor (armor) or laser turrets installed on it, because nothing good will come of it. But not because the equipment will not work - it will, but you will not reveal the potential of the ship and the effectiveness of such a fit will be minimal. Roughly speaking, if you have a microscope in your hands, then it is rather stupid to hammer in nails with it. You can score something, but it would be better to do it with a hammer.

Equipment size:
Different ships, most often, can use equipment of a certain type-size:
Frigates and Destroyers - Fitted with Small modules.
Indians, cruisers, battlecruisers (BC) are fitted with Medium modules.
BS (battleships), capital and supercapital - fit large (Large) or extra large (Extra Large) modules.

More often than not, you simply cannot install a module that is not designed for size on a ship. However, sometimes you can manage to do this - but you always need to understand well how much you really need it, and whether it was not better to think about other fit options well in advance.
If the module's characteristics do not indicate its type and size, then it can be installed on any ship.

Technologies:
In addition to size, modules and ships also differ in technology level (category):
Tech 1 (t1), Tech 2 (t2), Tech 3 (t3) In the market, they are marked with the corresponding pictogram:

The technology difference is pretty tricky. That is, one cannot simply say that t1 equipment is worse than t2, and t3 is better than t2 - because this is far from always true.
Tech 1 technology has a gradation according to the meta level - from meta 1 to meta 4. The higher the meta level, the better the characteristics of the module.

At the same time, the module t1 meta 4, sometimes may not differ, or even surpass the module t2 in some way. And its cost will also be much higher.
It is important that t1 meta 4 module requires the same leveling as t1 meta 1, while t2 is always a much more demanding technology.

In addition, meta 4 modules are less demanding on the ship's resources. Therefore, there are a large number of fit options in which meta 3-4 modules will be more preferable than their t2 counterparts. But do not forget that t2 modules are often a little better. In addition, only T2 weapons can use some types of ammunition.

T3 technology is a very special case. It is neither worse nor better - it is separate. Tech 3 technologies are represented by separate ships with their own unique features. At the moment, these are strategic cruisers, whose hulls have a modular structure of subsystems, and due to this, they have the ability to vary the number of some slots at the expense of others, which no other ships can.

"Fraction". Factional and officer equipment.
Apart from everything else, it should be noted, the so-called "faction" (Faction).

These modules and ammunition have overestimated characteristics. They are not produced by the players and are obtained only through the application of unparalleled efforts in the game, plus luck. With this in mind, their cost is often off the charts.
Faction modules make sense to use if you are going to invest in the most efficient ship, regardless of its cost. You will not be able to improve the characteristics of the ship at times, but you will have to spend a lot. It is worth doing this only if you really understand your goal - otherwise the investment will not pay off.
Associated programs (wicks):
There are a large number of third-party programs that make it possible to consider various fit options without going into EVE Online and without buying ships and modules. If you are going to seriously delve into the game, you need to master at least one of them. This will make your life much easier and increase your efficiency in the game. Don't be lazy.
The most popular wick programs are EveHQ, Pyfa, EFT... At the same time, the first, in addition to the wick itself, also includes a huge number of other useful utilities and services, but it is rather difficult to master. The other two are just wicks.
EVE-online weapons
Rockets in EVE are the third fundamental weapon besides cannons and drones. The Negro beckons the cannons, the Amarr burns the swears on the enemy ships with a laser, the Gallentes are invigorated by drones and hybrids, and the missiles are used by the Caldari. Although negros use the same.
Rockets (please note inquisitive observers, here the whole class is meant by "Rockets") in Eve compare favorably with guns in that they learn much faster. Also, missiles are extremely convenient for war against NPCs (computer opponents) and for completing missions. Both of these factors contribute pretty well to the popularity of rockets among beginner players and among mission walkers.
There are two main differences between rockets and guns. First, missiles always hit. Secondly, missiles fly to the target for some time. From the first property follows the fact that the damage from the missile is stable and never critical. That is, if the first rocket friendlyly poked your worst friend into the shield for 500 hit points, then all subsequent ones will poke into the shield in the same way. The good news is that the damage is completely independent of the distance. It’s bad, oddly enough, exactly the same, because if the lasers hit much harder near than in the distance, then the rockets hit absolutely the same everywhere. Yes, besides, there are anti-missile defense (ABM) systems. Skills from the Missiles group control all missiles - Controlling missile launchers.
Rockets and their characteristics.
The damage done by a rocket explosion depends on:
- - on whether the target is within the reach of the rocket or not (range of the rocket) - if yes, then the explosion of the rocket will undoubtedly harm the enemy, but if not, then naturally it will not;
- - from the signature (radius) of the target, which is compared with the radius of the rocket explosion;
- - on the speed of movement of the target, which is compared with the speed of the blast wave of the rocket.
 Max Velocity - The maximum speed of the rocket. The Missile Projection skill is responsible for it (+ 10% per level).
Flight Time - flight time. The Missile Bombardment skill is responsible for it. If you multiply the value of this skill with the value of the previous skill, you miraculously get the maximum range for this type of missile.
Explosion Radius - explosion radius. Missile damage depends on the size of the target's Signature. If the signature is greater than or equal to the target's radius, then the rocket will do all the damage (damage can be reduced due to the speed factor, but more on that below). If the ship is small and its signature is less than the radius of the rocket explosion, then the damage done will be less.
Hence the rule: large missiles and torpedoes are great for large battleships, but against small things, like frigates, they cannot do anything, because the latter have a much smaller signature than the explosion radius of torpedoes and large missiles; the smallest rackets are very cool at chopping frigate trifles, because their explosion radius is less than the signature of the frigs, but they are useless to shoot at the same battles - even if they will inflict all the damage, but what's the point, because this damage is too small.You don't need to be a genius to notice that the steeper the rocket, the larger its impact area (explosion radius). In order to reduce the explosion radius (read: concentrate the damage) of all missiles, cram the Guided missile precision skill. It is also useful for rocketry to use something like Tsrget Painter, which artificially increases the target signature for your weapon systems.Explosion Velocity - the speed at which the explosion spreads.After the explosion of the rocket, a damaging blast wave spreads in all directions from the epicenter. Each rocket has its own explosion velosity, measured in meters per second. If the target is faster than the blast wave, then the damage dealt is reduced.
Hence the rule:large missiles and torpedoes usually have a low velocity of propagation of the blast wave and there is little for fast frigates to do, while slow troughs, for example, battles, will turn around with a bang; but the ridiculous rockets will give you both little things and big ones, however, as you understand, they will harm the battle like an elephant from a mosquito.
These two parameters are responsible for how well the missile hits small targets. Again, you do not need to have a doctorate to establish the following relationship: the smaller the rocket, the greater the speed of the blast wave it has. To increase this parameter, you need to get the Target navigation prediction skill.
Damage - damage done by the rocket. Each type of missile hits with some specific type of damage:
Electromagnetic
Thermal
TO inetic
Into zryvnoe
The amount of damage is influenced by Warhead Upgrades skills (+ 2% per level), as well as skills for each specific type of missiles.
Launchers in EVE and their characteristics
Information about launchers can be found in the market (as well as most standard modules).
First of all, launchers differ in the type of charges used.
For example, Rocket Launchers are capable of using Rockets and unable to use Missiles, with the exception of Defender missiles.
["Defender Missiles" are capable of using almost all launchers, however these are specific missiles. They are mainly used to shoot down enemy torpedoes or missiles. Until you have something big enough to use torpedoes or cruise missiles against, don't worry about this type of charge. ]
Heavy Missile Launchers use Heavy Missiles.
Cruise missile launchers use Cruise missiles, etc.
Some launchers are capable of using FoF Missiles. This type of missile does not require aiming, but it has its drawbacks.
The choice of a launcher depends on several factors:
The ship is at your disposal. (As you might have guessed, launchers, like everything else in EVE Online, use the CPU and Powergrid, the larger the module, the greater the requirement).
- the tasks that you set for yourself (You can put both "Standard Missile Launcher" and "Rocket Launcher" on the Frigate, each type has its own advantages and disadvantages in different situations).
- Capacity - capacity, the number of charges in one clip depends on this parameter.
- Volume - The volume occupied by the gun does not affect the firing parameters, it may be of interest only for transportation.
- Tech Level - Technological level. Weapons (as well as any other devices) of the second level (T2), as a rule, surpass T1 in parameters and allow the use of T2 charges.
- Meta-level - T1 meta 1-4, T2 meta 5 and fractional. In T1 warrants, the higher the meta level, the better the PU characteristics.
- Used with (chargegroup) - the type of charges used by this launcher.
- Rate of fire - rate of fire
- Overheating - Improvements from overheating and damage to the module.
| Launchers | Rockets | ||
| Rockets Launcher Melee missile launchers | Rockets Melee missiles |
||
| Light Missiles Launcher light launchers | Light missiles light rockets |
||
| Rapid Light Missile Launcher rapid-fire light PU | Light missiles light rockets |
||
| Heavy missiles launcher Heavy missile launchers | Heavy missiles heavy rockets |
||
| Heavy Assault Missiles Launcher PU heavy short-range missiles | Heavy assault missile heavy rockets small range |
||
| Cruise missiles launcher Long-range missile launchers | Cruise missiles ranged missiles |
||
| Torpedoes Launcher torpedo launchers | Torpedoes torpedoes |
||
| Citadel Cruise Launcher for ships of large tonnage (KBT-class) | Citadel cruise missile | ||
| Citadel Torpedo Launcher for KBT class ships | Citadel torpedo | ||
FoF missiles with auto-lock, shooting without aiming. | Auto-Targeting Light Missile Auto-Targeting Heavy Missile Auto-Targeting Cruise Missile |
||
| These rockets are used as appropriate. their launchers name. Missile defense. | Heavy defender missile Light defender missile |
Types of missiles in EVE.
Just like cannons, missiles are clearly subdivided into different classes. However, unlike the various arquebusses, the difference between the missile types is much clearer. If for guns, inflicting damage is just a matter of hitting the enemy with a large-explosive projectile, then for missiles the type of ammunition emitted into the enemy's brain also plays a significant role.
Each type of missile has its own skill, which adds a certain percentage (usually 5%) of damage per level.
The game has the following types of missiles and launchers:
Rockets, or rockets, small, but large-explosive
Rockets are the smallest type of rockets. Despite the fact that rockets seem to be some kind of garbage to overly suspicious newcomers to the EVE world, they nevertheless inflict very sensitive damage due to their wild rate of fire. Rockets are distinguished by extremely low range, extremely high rate of fire and good damage per second (DPS). However, to use them, you need to clearly understand your actions, which somewhat reduces their usefulness for beginners. Rockets hit absolutely everyone well.
Rocket Launcher. This unit holds quite a bit of ammunition, but it has a decent rate of fire and an extremely modest fitting.
Skill milking the Rockets.
Standart Missiles
Standards, or light missiles, are simple and unpretentious. Designed primarily for frigates or for protection against frigates. Nevertheless, they have a good radius of action (with skills), good damage and are good choice for beginners. Suitable for attacking any type of ship.
The frigate Kestrel is especially strong in firing standard missiles.
Launchers for Standart Two-Standart Missile Launcher & Rapid Light Missile Launcher. The first installation is designed for frigates, the second for cruisers and larger. The Rapid Light Missile Launcher comes with a lot more rockets and a slightly higher rate of fire.
Skill for Standart Missiles.
Heavy missiles
Heavy missiles, or heavy missiles, are intended for cruisers, ammunition ships and others like them. They do quite interesting damage at quite interesting distances, but their effectiveness against frigates and other small targets is already slightly reduced. The most evil launchers of heavy missiles are the Kaldyr cruiser "Caracal" and the Kaldyr NAC "Cerberus" (T2 Caracal), the battle cruiser BK Drake, as well as TZ strategic cruiser Tengu. As a rule, for a war with frigates, it is better to put assult lancers on the same caracal.
Heavy Missiles Launcher is required to launch Heavy Missiles. Skill-heavy missiles.
Cruize missiles
Privilege cruise missiles for battleships. They have the largest range among all missiles, they kick well with battle ships, a little worse for battle cruisers, even worse than cruisers and they hit frigates quite badly. They have a higher rate of fire than torpedoes and are quite versatile. They work well against NPCs.
Launcher - Cruize Missiles Launcher, a module exclusively for battleships. According to the required fitting, it is more advantageous than a torpedo launcher. The absolute king of cruise missiles and torpedoes is the Raven (caldari). The Cruize Missiles skill is responsible for cruise missiles.
Torpedoes
Torpedoes are the most powerful missile in the game. The price to pay for the damage done is quite low speed and a relatively small radius of action. However, for the battle between battleships, torpedoes are absolutely irreplaceable. Unfortunately, they hit cruisers so-so, and even more so-so frigates.
Torpedoes need Siege Missile Launcher, the Torpedoes skill is responsible for them.
Missile defense.
Many of us, with a sharp eye and not a dull mind, have cleverly noticed that the best defense against missiles is to kill a rocketman. This, of course, is true, but the possibilities are not limited to this - especially for missile defense, there are missiles in the game called Defender, commanded by the skill of the same name.
These missiles are fired from RocketStandard, launchers and attack any missiles flying into your ship. Defenders are quite effective against cruise, heavy and standard missiles at a distance of 20 kilometers or more. Against torpedoes, however, they are not really useful, because a torpedo needs three defenders - they simply do not have time to shoot them down. It's the same with short distances - defenders won't keep up either.
The order of using defenders is as follows - they are charged into the launcher and then, when there are torpedoes flying at you in space, the launcher is activated. Everything, as long as there is someone to defend against or as long as there are defenders in it, the launcher will shoot incoming missiles. An important point there are two things here - you need to recharge the launcher in time and make sure that it does not turn off. Yes, if there are no gifts given to you in space, then the defender will not turn on, and if it is already on, it will turn off.
It's a pretty good idea to use rocket launchers as defender launchers. Although they need to be constantly reloaded, the density of missile defense fire, thanks to the rate of fire, they create quite good. Another popular option is the Assault launcher - there with a worse rate of fire, but the volume of the ammo rack is impressive.
I want to note that it is not worth getting too carried away with defenders - more often it is easier to put another combat unit and kill the enemy earlier.
For all types of rockets, except for Rockets & Torpedoes, there is also FOF ammunition.
They differ from ordinary ones in half the damage they have, as well as in the absence of the need to capture the target. The main value of such ammunition is manifested in situations where it is impossible or not possible to acquire a target. For example being jammed.
Rocket launchers (PU) in EVE have the following modifications:
Technological level PU 1 (T1) - for missiles T1 and fractional
Technological level PU 2 (T2) - for missiles T1, fractional and
T2 missiles: - with increased damage ("damage")
With increased flight range (or increased accuracy - for small targets)
Factional and story-based launchers - for T1 and factional missiles.
T2 level PU differs from T1 in increased rate of fire, large ammunition, increased consumption of PG and CPU, more time for pumping skills.
Fractional launchers are more expensive but approach (or exceed) T2 characteristics and are less demanding on skills for their use.
Factional rockets have more damage than T1 rockets.
Installation of PU on the ship.
First you need slots for launchers
And the most important thing is the ship's bonuses for the use of specific missiles (see the description of the ship). Let's say Drake has a bonus on missiles: 10% of the damage of kinetic missiles Heavy Missiles, Heavy Assault Missiles, respectively, on neno and put the Heavy Missiles Launcher, Heavy Assault Missiles Launcher launchers
Ballistic Control Systems module for increasing the DPS of missile launchers.
Ballistic Control Systems - gives a bonus to the rate of fire and a bonus to damage (e.g. T2 module Ballistic Control Systems II - + 10.5% bonus to rate of fire and + 10% bonus to damage from missiles)
Available on the market in the following versions: T1, T2 and fractional.
The most popular for missions in EVE is the factional "balcony" Caldari Navy Ballistic Control System. Appreciated for reduced CPU consumption and improved performance.
Tuning modules (rigs) for launchers and missiles.
Minus. Installation on a ship leads to a 10% increase in the amount of processor (CPU) computational resources consumed by launchers.
- Hydraulic Bay Thrusters I / II - bonus to maximum missile speed 15% \ 20%
- Rocket Fuel Cache Partition I / II - bonus to missile flight time 15% \ 20%
- Warhead Calefaction Catalyst I / II - Rocket Damage Bonus 10% \ 15%
- Warhead Flare Catalyst I / II - bonus to the speed of propagation of the explosion of missiles 15% \ 20%
- Warhead Rigor Catalyst I / II - Bonus to the radius of the explosion of missiles 15% \ 20%
Implants to improve the characteristics of launchers and missiles.
EVE - market - implants and combat stimulants - skill implants - implants rocket shooting.
Connector 6
Zainou "Gnome" Launcher CPU EfficiencyLE-601 \ 602 \ 603 \ 604 \ 605 \ 606:
1% \ - 2% \ - 3% \ - 4% \ - 5% \ - 6% reduction in CPU performance requirements for launchers
Zainou "Snapshot" Cruise Missiles CM-601 \ 602 \ 603 \ 604 \ 605 \ 606:
Increase Cruise Missiles damage by 1% \ 2% \ 3% \ 4% \ 5% \ 6%
Zainou "Snapshot" Torpedoes TD-601 \ 602 \ 603 \ 604 \ 605 \ 606 ::
increased damage done by torpedoes by 1% \ 2% \ 3% \ 4% \ 5% \ 6%
Connector 7
Zainou "Deadeye" Missile Bombardment MB-701 \ 702 \ 703 \ 704 \ 705 \ 706:
Reduces the maximum flight time of all missile types by 1% \ 2% \ 3% \ 4% \ 5% \ 6%
Zainou "Deadeye" Missile Projection MP-701 \ 702 \ 703 \ 704 \ 705 \ 706:
Increases the maximum speed of all missile types by 1%.
Zainou "Snapshot" Heavy Assault Missiles AM-701 \ 702 \ 703 \ 704 \ 705 \ 706:
Increases damage dealt by heavy assault missiles (HeavyAssaultMissile) by 1% \ 2% \ 3% \ 4% \ 5% \ 6%
Zainou "Snapshot" Heavy Missiles HM-701 \ 702 \ 703 \ 704 \ 705 \ 706:
Increase Heavy Missile damage by 1% \ 2% \ 3% \ 4% \ 5% \ 6%
Connector 8
Zainou "Deadeye" Guided Missile Precision GP-801 \ 802 \ 803 \ 804 \ 805 \ 806
bonus to the explosion radius of all missiles -1% \ - 2% \ - 3% \ - 4% \ - 5% \ - 6%
Zainou "Snapshot" Defender Missiles DM-801 \ 802 \ 803 \ 804 \ 805 \ 806
Increase the speed of anti-missiles (Defender Missiles) by 1% \ 2% \ 3% \ 4% \ 5% \ 6%
Connector 9
Zainou "Deadeye" Target Navigation Prediction TN-901 \ 901 \ 902 \ 903 \ 904 \ 905 \ 906
Bonus to the propagation speed of all missiles by 1% \ 2% \ 3% \ 4% \ 5% \ 6%
Zainou "Snapshot" Light Missiles LM-901 \ 901 \ 902 \ 903 \ 904 \ 905 \ 906
1% increase in damage done by Light Missiles 1% \ 2% \ 3% \ 4% \ 5% \ 6%
Zainou "Snapshot" Rockets RD-901 \ 901 \ 902 \ 903 \ 904 \ 905 \ 906
increased damage done by Rockets by 1% \ 2% \ 3% \ 4% \ 5% \ 6%
Connector 10
Whelan Machorin's Ballistic Smartlink increases the rate of fire of all missile launchers by 5%.
Zainou "Deadeye" Rapid Launch RL-1001 \ 1002 \ 1003 \ 1004 \ 1005 \ 1006
increases the rate of fire of all types of rocket launchers by 1% \ 2% \ 3% \ 4% \ 5% \ 6%
Zainou "Snapshot" FOF Explosion Radius FR-1001 \ 1002 \ 1003 \ 1004 \ 1005 \ 1006
reduction of the explosion radius (when detonating a homing missile - FOF) by 1% \ 2% \ 3% \ 4% \ 5% \ 6%
Skills section rocket launchers Eve - Character sheet - skills - control rocket launchers.
Increased missile range.
|
Approx.
Citadel Cruise Missiles, Citadel Torpedoes - skills for launchers of I KBT class ships,
Auto-Targeting Missiles is a skill for homing missiles.
Defender Missiles - Skill, anti-missiles. + 5%
Increase the damage done by the corresponding launcher per skill level.
Ever since the very conception of civilization, people have always been burning with curiosity to find out what is in the mysterious cosmic obscurity. This curiosity has not faded away until now, and the exploration of boundless space continues both by private players and corporations. New Eden is the perfect place to explore, where every player can discover something interesting.
If you started your adventure in the vastness of the legendary space MMO, then the first thing you need to learn is to scan. The game features over 5200 unique star systems, each of which is fraught with many secrets. These secrets will be able to bring you valuable items and a lot.
At a basic level of scanning Eve online use special probes. They are capable of detecting so-called cosmic signatures. There are 4 types of objects (or sites, sites) that can be detected during a signature scan:
- The EVE Online gas fields are where gas collects in interstellar clouds. This gas is very widely used in the EVE industry and is very profitable to collect and sell. Although it is not particularly valuable for the average player, it is a very good find for true miners. But we will not go into details, since we have a number of separate articles on this topic.
- Combat Sites are part of the game's PvE mode, which includes battles against factional enemies and pirates. Clearing such areas of hostile NPCs will reward you with valuable loot, like Deadspace and Faction. But if you are an ordinary explorer and do not have combat capabilities, then it is better to avoid such finds.
- Wormhola, or - these are unstable rifts in space that lead to various star systems. But the problem is that you cannot know what is at the other end of this rift. Wormhole research can be fun and rewarding. We also have a separate article about this, so we will not dwell on the details here either.
- Relics and Valuable Data - These places contain special containers that can be hacked by a data analyzer. There can be five categories: sleeper sites, sleeper caches, ghost sites, drone data sites, and pirate information and relics. For researchers, these areas are of the greatest interest, which is why they will be the focus of this guide.
But before talking about the possible location of the relics and dates of EVE Online, we first need to master the basics of scanning and learn all the skills, modules and ships necessary for this.
Eve online scanning and required skills
Any activity in EVE online requires skill. Without development, you cannot experience the many pleasures of the game. Therefore, for a researcher in EVE online, you need your own set of skills.
Some will help you with hacking data and relics, some will increase your survivability in especially dangerous places, and some will allow you to use the best research. All of them are presented in the table below.
|
Skill name |
Description |
|
Racial frigate skills |
This skill allows you to fly Tech 1 research frigates (Caldari -, Amarr -, Minimatar -, Gellente -). It refers to entry level skills, and you must definitely learn it in order to start using the base research ship (all four ships also require the Spaceship Command I skill) Important Note: The Amarr Frigate III and Gallante Frigate III are required for the Astero-class pirate frigate. |
|
This skill will allow you to fly Tech 2 racial research ships (Caldari -, Amarr -, Minimatar -, Gallente -). This is an advanced research skill that requires other skills such as Spaceship Command III and Electronic Upgrades V. |
|
|
This skill is required to use scanning probes that identify cosmic signatures. It is also required as a basic skill that, among other things, requires the study of Science III. Without it, you will not be able to carry out even the simplest research. |
|
|
Astrometric Acquisition |
A skill that will increase your knowledge of how scanners work and reduce scan times for probes. It is an auxiliary skill that will increase your effectiveness; requires Astrometrics III skill to learn. |
|
Astrometric Pinpointing |
This skill will allow you to find scanned targets with increased accuracy. It is an auxiliary skill that improves the accuracy of scanners; requires Astrometrics IV. |
|
Astrometric Rangefinding |
This skill will increase the strength of your scanning probes. This is an auxiliary intelligence skill that will require Science III knowledge. |
|
This skill will allow you to get more accurate information about ancient artifacts, allowing you to analyze and identify them. This is the basic skill required to operate the Relic Analyzer module. Requires Survey III and Science III skills to learn. |
|
|
A skill that allows you to access items at the location of data and relics. To do this, you need to hack security computer systems. This is the basic skill required to operate the Data Analyzer module. Requires Electronics Upgrades III and Science III skills. |
|
|
This is a skill required to use a cloaking device that allows you to remain invisible to hostile players. This is an advanced skill that requires CPU Management IV. |
Modules for
The correct set of modules will greatly increase the efficiency of exploration and survivability. That is why this point cannot be ignored. The customization of your ship will largely depend on the number of high, medium and low power slots available in it, as well as the rig. The tables present and describe modules to help you with your research.
High power modules:
|
Module name |
Description |
|
Core Probe Launcher (required module) |
This module will allow you to launch Core Scanner Probes used to scan space signatures. The basic version of this module will require knowledge of Astrometrics I, and the Tech 2 version requires Astrometrics V. Alternatively, you can install Expanded Probe Launcher, which will also launch scan probes, but it has much higher requirements. |
|
This is a cloaking module that will hide your ship from enemy detection. This best shape protecting every research ship. The base version of this module requires Cloaking I, and the Tech 2 version requires Cloaking IV. |
|
|
Salvager Module (optional) |
This specialized scanner will allow you to locate and collect valuable items from shipwrecks. This can serve as an alternative source of income during your research. The basic version of the module requires knowledge of Salvaging I, while the Tech 2 version requires Salvaging V. |
|
Capacitor Neutralizers, Launchers, Turrets etc. (completely optional) |
There are many weapon modules available, and you can choose the ones that suit your PvP or PvE style. These are optional modules, and most likely they will not save your life. You can use them to clear battlefields, but that's not what exploration ships are for. |
EVE Online Medium Power Modules:
|
EVE Online Brick Name |
Description |
|
(required module) |
It is a module used to analyze and find ancient ruins. It is required for looting at relic sites. The basic version of the module will require Archeology I, and Tech 2 will require Archeology V. |
|
It is a hacker module used to break into security computer systems. Required to loot data locations. It will not give you as much profit as Relic Analyzer does, so it is not required. The basic version of this module requires Hacking I and Management II, while the Tech 2 version requires Hacking V and Management II. |
|
|
Micro Jump Drive (required module) |
Also known as Microwarp Drive (MWD). This module allows your ship to jump 100 km forward in a given direction. It will significantly increase research efficiency (containers with data or relics are often far from each other) and survivability (you can combine Micro Jump Drive with your cloaking device, activating one immediately after another) and will provide the ability to perform MWD Cloak Trick, which will simultaneously bounce from danger and hide from it. |
|
Allows you to scan the cargo holds of other ships. It can also be used to scan data and relic locations to determine their value. It's a great productivity tool as it lets you skip space that costs little. The basic version of this module requires CPU Management I, and the Tech 2 version requires CPU Management II. |
|
|
Scan Rangefinding Array (optional) |
This module increases the strength of your scanning of your probes. This will make your scans more reliable. The basic version of the module will require Astrometric Rangefinding II, and the Tech 2 version will require Astrometric Rangefinding V. |
|
Scan Pinpointing Array (optional) |
This module enhances your scanning probes by reducing their deflection from scanning. Like the previous module, this one will make your scans more reliable. The basic version of the module will require Astrometric Pinpointing II, and Tech 2 will require Astrometric Pinpointing V. |
|
Scan Acquisition Array (optional) |
With this module the scanning time of your probes will be reduced. This will make it possible to perform more often scanning... The basic version of this module will require Astrometric Acquisition II, and Tech 2 requires Astrometric Acquisition V. |
EVE Online Low Power Modules:
|
EVE Online Brick Name |
Description |
|
Inertial Stabilizers (completely optional) |
This module will improve the maneuverability and handling of your ship through its signature. But Mounting Inertial Stabilizers will create a lot of problems for you, so it's best to avoid it. The basic version of the module requires Hull Upgrades I, and the Tech 2 version requires Hull Upgrades II. |
|
This module compensates for glitches and fluctuations in the ship's warp. It is a very powerful defensive tool that eliminates warp disturbances caused by attackers; however, it is only useful in high-secs and low-secs. The basic version of the module requires knowledge of Warp Drive Operation I, while the Tech 2 version requires Warp Drive Operation IV. |
|
|
It will make your ship's components lighter, but fragile at the same time. As a result, this will increase the maneuverability and speed of the ship, but by itself it will reduce the strength of the hull. Every researcher's best strategy is to run away before anything bad happens, so this module has essentially no flaws. The basic version of this module requires the Hull Upgrades I skills, and the Tech 2 version requires Hull Upgrades II. |
|
|
Damage Control (optional) |
This module prevents damage to the system using a combination of redundancy and containment field emitters. In simpler terms, this is an increase in the resistance of your hull, armor and shield. This is not to say that it will bring absolute protection, so we classified it as optional. |
Riga EVE Online:
|
EVE Online Brick Name |
Description |
|
Small Gravity Capacitor Upgrade (highly recommended) |
This setting will enhance the scanning of your ship. It will significantly update your probes, which will undoubtedly be beneficial. The basic version will require the Jury Rigging I skill, and the Tech 2 version will require Jury Rigging IV. |
|
Small Memetic Algorithm Bank (optional) |
This setup increases the efficiency of the data modules installed on your boat, which in turn has a beneficial effect on the efficiency of the data analyzer. The basic version of the module requires Jury Rigging I, and the Tech 2 version requires Jury Rigging IV. |
|
Small Emission Scope Sharpener (optional) |
This installation increases the efficiency of the relic modules installed on your ship; this will increase the durability of the Relic Analyzer. The basic version of the module requires Jury Rigging I, and the Tech 2 version requires Jury Rigging IV. |
|
Cargohold Optimization (optional) |
This rig increases the carrying capacity of your ship, but reduces the armor. This will make the research longer and therefore more profitable. Although the only negative is vulnerability to enemies. The basic version of the module requires Astronautics Rigging I, and the Tech 2 version requires Astronautics Rigging IV. |
|
This equipment will increase the maneuverability and speed of your ship, but reduce its armor, that is, you will become faster and more agile, but it will be much easier to shoot you down. The basic version of the module requires Astronautics Rigging I, and the Tech 2 version requires Astronautics Rigging IV. |
|
|
This rig will increase the agility of your ship, but reduce its armor; that is, you will be able to level jumps along the warp, which will increase your survivability, allowing you to quickly escape from danger. The basic version of the module requires Astronautics Rigging I, and the Tech 2 version requires Astronautics Rigging IV. |
|
|
This rig will improve your warp but increase your signature radius; this will greatly increase the speed of your research. The basic version of the module requires Astronautics Rigging I, and the Tech 2 version requires Astronautics Rigging IV. |
|
EVE Online Brick Name |
Description |
|
Salvage Drones (optional) |
They are used to find and rescue wrecked ships. They can also come in handy as an additional source of research income. |
|
Caldari Electronic Warfare Drones; ECM Drones |
These drones specialize in jamming enemy sensors and guidance systems. ECM Drones are a great defense option, as they can bring you a few precious minutes, in which you can warp away from danger. Caldari Electronic Warfare drones are best used as perimeter defense. Both types of drones require the Electronic Warfare III skill. |
|
Combat Drones (optional) |
These specialize in damaging and destroying enemy ships. Research vessels use them primarily for defensive purposes to compensate for their low firepower. They are less effective as a protective tool than ECM Drones. Combat drones come in three flavors: light, medium, and heavy. |
We have provided you with information about and, but which ones to put, it's up to you. In the next part of our guide, we will tell you about the ships that are used for scanning in EVE Online.
Choosing the right exploration ship can be quite difficult for a beginner as it depends a lot on the player's style, experience and level. Therefore, we decided to describe three types of research ships and 9 available models. Of these, you will find the one that best suits your skill and level.
Before going into details, we will provide a brief description of each of the ships. Heron is a great starter exploration ship thanks to its 5 medium slots; Buzzard upgraded it to Tech 2; if you are a complete beginner, then these two should be your starting points. Probe and Cheetah have a more dynamic playstyle and suit more experienced players. Magnate is one of the strongest exploration frigates, but its disadvantage is the small number of medium slots. But you shouldn't worry about this: the "older brother" of this ship, Anathema, compensates for this lack in its characteristics. The Helios may be a fairly versatile exploration ship, but you can only get to it with the mediocre Imicus. And finally, if you decide to conduct research with aggression, then Astero has everything you need for this: a powerful platform for drones and advanced cloaking technology. Its power will also come in handy in wormhole and nullsec EVE Online.
Exploration Frigates for scan
These ships are purposefully created for space exploration. They have good hacking and scanning bonuses, which means it is suitable for any aspiring explorer. However, the combat power of these ships is painfully ridiculous, so don't even think about engaging in open combat with them. Only drones can increase their survivability, but only on condition that they are correctly selected.
This type:
- Heron
- Magnate
It is the heaviest of all Tech 1 research frigates, but it only has 3 medium module slots and this reduces its research potential. It has one more slots for low-power modules, namely 4. To control it requires the Amarr Frigate I skill, and gives the following bonuses:
1. 7.5% bonus to the power of combat and main scanners (a percentage is awarded for each level of the Amarr Frigate skill);
2. Reducing the duration of salvaging by 5% (a percentage is calculated for each level of the Amarr Frigate skill);
3.5% bonus to data analyzer and relics (role bonus).It is the fastest and most agile of all Tech 1 research frigates. Probe is very adept at avoiding trouble, and its 4 medium module slots make it a competitive explorer. The three low slots are best used for modules that give the ability to avoid pursuers. Requires Minmatar Frigate I skill and provides a way to:
1. 7.5% bonus to the power of combat and main scanners (a percentage is awarded for each level of the Minmatar Frigate skill);
2. Reducing the duration of salvaging by 5% (a percentage is calculated for each level of the Minmatar Frigate skill);
3.5% bonus to data analyzer and relics (role bonus). - Imicus
Slowest of all Tech 1 exploration frigates, but also the best in drone control (20Mbit / sec Drone Bandwitch). Therefore, the correct selection of combat drones is essential in order to compensate for Imicuse's poor survivability. Its four middle slots are enough to operate like a solid exploration ship. Requires Gallente Frigate I skill and provides bonuses:
1. 7.5% bonus to the power of combat and main scanners (a percentage is awarded for each level of Gallente Frigate skill);
2. Reducing the duration of salvaging by 5% (a percentage is calculated for each level of the Gallente Frigate skill);
3.5% bonus to data analyzer and relics (role bonus).
A feature of this ship is as many as five medium slots. This makes it very easy to research. If you're a beginner, choosing this as your first exploration ship will save you the hassle of deciding which mid-power module to install and which to skip. To control Heron requires Caldari Frigate I and provides the following bonuses:
1. 7.5% bonus to the power of combat and main scanners (a percentage is awarded for each level of the Caldari Frigate skill);
2. Reducing the duration of salvaging by 5% (a percentage is charged for each level of the Caldari Frigate skill);
Covert Ops Frigates and Scanning
Essentially, these are Tech 2 upgraded versions of regular research. Their most notable feature is the warp with an active cloaking device. This feature makes them one of the trickiest ships in the game. The ability to stay under enemy radar is often used in PvP wars, where frigates for special operations will be able to get a lot of valuable data to corporations. In addition, they have good bonuses for research and use scanning extremely good, which, combined with advanced masking technology, makes them a very good choice for scanning in zero-sec and wormhole.
Ships of this type:
- Buzzard
Like Heron, it has its own strengths and weaknesses. Like the Heron, it has 5 medium slots to help set up your ship to navigate dangerous areas in space. Buzzard does not have a Drone Bay. This ship can deploy Covert Ops Cloaking Devices and Covert Cynosural Field Generators, and its cloak reactivation delay has been reduced to 5 seconds. Requires Caldari Frigate V and Covert Ops I to control, and provides the following bonuses:
1. Bonus 5% to rocket and kinetically light rocket damage (percentage is calculated for each level of Caldari Frigate skill);
2. Bonus 5% to the rate of fire from rocket launchers and light rocket launchers (a percentage is awarded for each level of the Caldari Frigate skill); - Anathema
An advanced version of the Magnate, this ship has a good tank for a special operations frigate. Unlike its predecessor, it has 4 medium slots, which gives it much more opportunities to explore. Anathema does not have Drone Bay. This ship can deploy Covert Ops Cloaking Devices and Covert Cynosural Field Generators, and its cloak reactivation delay has been reduced to 5 seconds. Requires Amarr Frigate V and Covert Ops I skills and provides the following bonuses:
1.5% bonus to rocket damage (a percentage is awarded for each level of the Amarr Frigate skill);
2. Reducing the recharge time of the capacitor by 5% (the percentage is calculated for each level of the Amarr Frigate skill);
3. Reducing the requirements for Cloaking Devices by 20% (a percentage is calculated for each level of the Covert Ops skill);
4. Bonus of 10% to the probes of the combat and main scanner (a percentage is awarded for each level of the Covert Ops skill);
5. Reduction of Survey Probes flight time by 10% (a percentage is calculated for each level of the Covert Ops skill);
6. Bonus +10 to the analyzer of data and relics (role bonus). - Cheetah
It is the fastest and most agile special operations frigate, but low CPU power and not the most best performance capacitor reduce its versatility. But nevertheless, as with the Probe, it helps to avoid certain troubles. Due to its speed and agility, the Cheetah plays the role of a scout and spy. It also doesn't have a Drone Bay. This ship can also deploy Covert Ops Cloaking Devices and Covert Cynosural Field Generators, and its cloak reactivation delay has been reduced to 5 seconds. The skills to control it are Minmatar Frigate V and Covert Ops I. It also provides the following bonuses:
1.5% bonus to damage from a small projectile (a percentage is awarded for each level of the Minmatar Frigate skill);
2. 10% to the optimal range of Small Projectile Turrets (a percentage is awarded for each level of the Minmatar Frigate skill);
3. Reducing the requirements for Cloaking Devices by 20% (a percentage is calculated for each level of the Covert Ops skill);
4. Bonus of 10% to the probes of the combat and main scanner (a percentage is awarded for each level of the Covert Ops skill);
5. Reduction of Survey Probes flight time by 10% (a percentage is calculated for each level of the Covert Ops skill);
6. Bonus +10 to the analyzer of data and relics (role bonus). - Helios
This is the only Special Ops frigate to have a Drone Bay, but the low drone capacity and the dreaded Drone Bandwitch make this advantage almost useless. It only has two slots for high power modules. This is sufficient for research purposes, but not ideal at all; this is somewhat offset by the 5 medium slots. It can also be equipped with Covert Ops Cloaking Devices and Covert Cynosural Field Generators, and its cloak reactivation delay has been reduced to 5 seconds. To control it, you will need the skills of Gallente Frigate V and Covert Ops I, and it, in turn, will provide the following bonuses:
1.5% bonus to damage from Small Hybrid Turret (percentage is calculated for each level of Gallente Frigate skill);
2. Bonus 10% to thermal damage from Scout Drones (a percentage is calculated for each level of Gallente Frigate skill);
3. Reducing the requirements for Cloaking Devices by 20% (a percentage is calculated for each level of the Covert Ops skill);
4. Bonus of 10% to the probes of the combat and main scanner (a percentage is awarded for each level of the Covert Ops skill);
5. Reduction of Survey Probes flight time by 10% (a percentage is calculated for each level of the Covert Ops skill);
6. Bonus +10 to the analyzer of data and relics (role bonus).
Pirate Frigates - Aggressive Scanning
Unlike other research ships, pirate frigates can not only defend themselves, but also be aggressors. These vessels are designed for long missions and are not required to visit the stations too often.
Ships of this type:
- Astero
This is a one-of-a-kind exploration pirate ship. It outperforms other models in cunning exploration and attack power. It has the largest drone capacity of any research frigate (75m³ and 25 Mbit / s). Even though it is Tech 1, it can be fitted with Covert Ops Cloaking Devices and has a cloak reactivation delay reduced to 15 seconds.
All this has made the Astero one of the most popular spacecraft for space exploration, despite its high price. To control it, you need the skills Gallente Frigate III and Amarr Frigate III, and it gives the following bonuses:
1.20% bonus to hit points of drones (a percentage is calculated for each level of Gallente Frigate skill);
2. Bonus of 4% to all armor resists (a percentage is awarded for each level of the Amarr Frigate skill);
3. Reducing the requirements for Cloaking Devices by 100% (role bonus);
4. Bonus 37.5% to the power of combat and basic scanners (role bonus);
5. Bonus +10 to the analyzer of data and relics (role bonus).
This was the list of EVE Online space exploration ships. Now that you have all the proper information about the modules, skills and ships that will be needed for scanning, you can move on to describing the scanning process itself and the places where it is most profitable to do it.
So, after we told you about the skills, modules and ships required for space exploration EVE Online, it's time to start directly with the scanning process itself. In this part, we will tell the reader about the places where scanning can take place, as well as about the relics and data you can come across during your travels.
Scanning systems
There are 4 types of systems that are separated by the security level of the area: high security space (high sec), low security space (low sec), zero security space (zero sec), and wormhole space. It is easy to guess that the higher the complexity of the system, the more profitable the scanning will be. We propose to consider each of these systems in more detail.
- High security systems. These systems are popular not only among beginners, but also among those who are afraid to take risks in dangerous parts of space. This means that the already limited resources located in this territory are diminishing even more due to the huge number of competitors in it. If your plan is to make more claims, then the right decision will leave this system as soon as you have the necessary experience.
- Low security systems. Here you can find much more valuable objects with relics and data; the more so as there will be an order of magnitude less competitors for these objects. However, the danger here will be much greater.
- Zero safety systems. There are very valuable places for mining data and relics here, and due to their large number, the risk of being attacked here is not so high. Combined with the fact that many researchers are too afraid to visit null-seki, there is plenty of room to turn around. But on the other hand, a lot of dangers have gathered here in the face of aggressive factions of NPCs and gankers, who have extensive experience in killing researchers.
- Wormhole spaces. The value of finds in these systems is comparable to the value in zero-sec. There are even fewer visitors here than zero, so research here will be very lucrative. The risk of being attacked here is very low, but this danger cannot be ruled out, and you need to be well prepared before going to the wormhole. The difficulty is further increased by the fact that you do not know how many people are in the same space with you, and even more so you do not know who they are (unless, of course, the players type something in the local chat). Although, in general, these systems are safe and there can be plenty of lawsuits.
Data and Relic Sites
The sites or (i.e. location) of data and relics that you will have to deal with will vary greatly in both complexity and potential profit. In total, there are five types of these date sites:
- Sleeper Sites. They are in Wormhole space. These places are well protected, and it is impossible to hack them without first defeating the defenders. The hostile NPCs that defend this site are valuable on their own, as they lose good loot when defeated. Therefore, even those ships that are not able to hack sites will find work here.
- Sleeper Caches. This is a very complex data site full of dangers and triggers (an unsuccessful hack could explode the container, and the sentry guns present could launch an attack on you). These sites do not appear in wormholes and can be found on normal systems. Sleeper Caches come in three different types: higher (difficulty of scanning - level 5), standard (difficulty of scanning - level 4) and limited (difficulty of scanning - level 4); and may contain blueprints for polarized weapons, skill tutorials, and crafting materials.
- Ghost Sites. These are data objects that are controlled by pirates, and pirates do not like unwanted guests on their territory. After these sites are hacked, a timer starts, during which pirates can overtake you if you are not fast enough. Unsuccessful hacking attempts will cause the container to explode and damage every ship within 10 km. These locations can contain various blueprints of Ascendency Blueprints, "Yurt" and "Wetu" Mobile Depot Blueprints, and "Magpie" Mobile Tractor Unit Blueprints.
- Drone Data Sites. They are available in just a few regions: The Spire, Ethernium Reach, Outer Passage, Kalevala Expanse, Oasa, Malpais, Perrigen Falls, and Cobalt Edge. And these sites contain three containers: one at Research and Development Laboratories and two at the High-Security Containment Facility. A second unsuccessful hacking attempt here will result in enemy frigates spawning and no further hacking attempts will be possible until the emerging enemies are destroyed. These sites also contain Racial Drone Components and Blueprints (specific to the race that owns the site).
- Pirate Relic and Data Sites. They can be found in class 2 and 3 wormhole, as well as in all common space systems. At the moment, these are the safest places to hack data and relics, since there is not a single hostile NPC or any other defense. Each of these sites contains multiple jailbreak containers, emergency stations, abandoned cars, etc. Pirate relic sites contain skill books, blueprints, T1 and T2 salvaging materials; and pirated data sites include skill books, Decryptors, Data Cores, blueprints, and production materials.
Hacking process
Hacking is an integral part of EVE Online research. The main goal of the hack is to disable the kernel of the container system. A successful hack is done only by passing the mini-game. This game is about maneuvering a computer virus through the container board. At its core, the hacking process resembles a typical Minesweeper, so if you have mastered the classics from Windows, then you should have no problems with hacking in EVE.
Secrets and tips
Now that the basics have been covered, we can leave some helpful hints on how to scan and use for novice (and non-beginner) researchers. scanning.
- Use hotkeys, as they speed up your actions (this is a trivial advice, but it's still worth pointing out, since many players rarely use them).
- Take full advantage of your cloaking device. This is your best defense, and you should invest in it as much as possible.
- Try to avoid densely populated systems. Configure the map to display ships that have been destroyed in the last hour; it will help you estimate how many players are in the system with you; if your map shows a lot of destroyed ships, then it would be better to leave here as soon as possible.
- Learn how to use Secure Safe Spot Bookmarks.
- Never try to fight attacking ships, because most likely you will not survive (ships that attack research ships are often well prepared for battle). You should use superior (if, of course, you equipped your ship correctly) speed, agility and ECM Drones.
- Use directional scanning as often as possible when your disguise is inactive and run away at the slightest enemy activity.
And in conclusion of all this, I would like to say that scanning is not only a profitable business, but also just an interesting activity. You may face many difficulties, but if you are calm and attentive, you will be able to avoid danger.
If you need help, you can always find it on the website. We are an online store that sells game, ships and other items for EVE Online. We also sell accounts, services and consultations.
I continue to collect materials from various sources on game issues. Today - an article about mining. It is a translation of several articles from off site, diluted with comments. This article is not for beginners, it will not tell you exactly how to dig. It is assumed that the reader is more or less versed in the game.
Mini dictionary:
Apocalypse, Apoc - Amarr BSh
Dominix, Domi, Lodge - Gallente BSh
Retrivier - Medium Barge
Covetor - large barge
Mackinaw - Exhumer, "second generation" barge, basic ice mining bonuses.
Hulk - Exhumer, "second generation" barge. Additional bonuses, serious resists.
Remine - mine is more efficient.
Belt - Asteroid Belt - Asteroid belt, where they usually mine.
Rep - Respawn in pirate NPC belts actively trying to stop you from digging.
Mining Upgrades - MU (Mining Laser Upgrades in the Market) - modules increase the efficiency of mining, and increase the CPU consumption of lasers.
Strip Miners - installed only on barges, provide higher digging efficiency compared to conventional mining lasers.
Yield - lane efficiency. The amount of ore you dig per cycle.
1) To use or not to use barges?
2) Mining Crystals
3) How to become the best miner ?!
4) Drones
5) Hulk. Should I buy or not?
6) Mining Ice
7) Bottom line
1) To use or not to use barges in eve online?
It seems that this question comes up very often. There is no definite answer to this question, but I will help you make the right choice. An Apocalypse or Dominix can mine as efficiently as an average barge. And Covetor, in turn, will "remine" all other ships. To swing to it, however, takes a long time (Astrogeology V, Mining Barge V) - it's about 40 days, with more or less pumped lerning or 30 days with well pumped lerning and +3 implants.
If you're serious about mining, you need Covetor.
I advise you to get Astrogeology IV and Mining IV as quickly as possible.
Let's start with the Retriever
Mediocre barge.
Skills you need Mining IV, Astrogeology IV, Mining Barge III
Using Strip Miners I, you get something like this:
847.58 ores per cycle (180 sec)
This means that for a minute you will receive 565.05 ore / minute
Continue with Apoc and Dominix
Who are they? If you are determined to mine like a serious pepper, then you probably want to join a corporation living 0.0.
Don't waste time in the Empire - real money is found in zeros. Apoc or Lodge are the best solo miners. If you have not stepped into zeros, then, having been there, you will understand what harmful NPC pirates in belts (not to mention real ones). You will need an assistant to deal with them if
you will be mining on a barge. What if no one agrees? Then the barge - not your choice - is dismantled and destroyed in no time. In such a situation, your BS will save you.
Personally, I prefer the Apok to the House, because you can shove a couple more Miners II into the Apok. Apoc can hold 8 mining lasers without sacrificing two low slots for coprocessors, which can be used to increase protection.
The house can also hold a rep in total (even 3x 1.5 million BShs with an escort of cruisers) without harming 6 mining lasers.
Let's now compare their performance using t2 mining-lasers
The skills you need: Mining IV, Astrogeology IV
Using Miners II, we get the following:
86.4 ores per mine laser / cycle (60sec)
This means that in a minute:
For Domi (86.4 * 6 minelasers) = 518.4 ore / minute (596.16 with Mining Upgrade)
For Apoc (86.4 * 8 minelasers) = 691.2 ore / minute (794.88 with Mining Upgrade)
If you mine in the empire, then there is no sense at all to tank on the BS, so you can insert 3 Mining Upgrades and get about a 15% increase in your efficiency. Comparing the results, it can be seen that the considered BSH and Retriever are approximately on the same level. But Apok can re-mine the Retriever with its eight t2 mine lasers.
If you have a tank in a corporation that can and wants to help you in mining, then download directly to Covetor. If it doesn't work out and you have to dig a lot alone, then your choice is the BShs discussed above.
Let's finish with Covetor.
Gentlemen, I can tell you that Covetor is a mega-monster of mining, a maniac, better than which there are only two Covetors. But in order to sit on it, you have to wait a long time for pumping the necessary skills.
Let me show you what he is capable of.
Skills you need: Mining V, Astrogeology V, Mining Barge V
The first time I wrote about Mining V. 6 days of leveling from 4 to 5 level for an additional 5% is worth it, especially because the fifth level of this skill will come in handy when you are going to put t2 Strip miners. Teach, you will not regret it.
Using Strip I, we get the following:
1018.828 ores per Strip / cycle (180 sec)
So, per minute, (1018.828 * 3 strip miners) / 3 minutes = 1018.828 ore / minute
We get an increase in efficiency of 180% compared to Covetor and 128% compared to Apok (with eight miners and 3 MU). But this is just the beginning!
2) Mining Crystals in Eve online
If you've boarded Covetor, you might want to put yourself t2 Strip miners, which I use crystals for each type of ore to work with. Swinging for another 30 days, you can use them. Do not even hesitate - swing on them, they are effective!
What do we get?
T1 Crystal: (360 * 1.625) = 585
T2: Crystal: (360 * 1.75) = 630
Skills required for T2 Strips: Refining V, Advanced Refinery V, Metallurgy IV, Mining V, Mineral-Specific Processing up to III (T1 Crystals) or up to IV (T2 Crystals.)
Let's now calculate in our head how the Covetor will dig with our sexy T2 Strip miners and crystals.
Using Strip II along with T2 crystals, we get the following:
1118.63 ores per miner / cycle (180sec) (from 1 MU)
This means that per minute: 1118.63 ore / minute.
We get an additional 100 units. ore per minute.
3) How to become the best miner ?!
Do you want to know how to become an uber miner? Below are the modules and skills that will help you become as efficient as possible. (about drones later).
To be an uber solo miner, you need to have 2, or best of all, 3 accounts. Why?
1 account: mine
2 account: carries
3 account: BC or BSH who would help with the reproduction of pirates on belts
With two accounts, you can have a BC, like a tank, and a mine carrier in one person.
With new gang mining skills ALL gang members get mining bonuses. But a person with a pumped Foreman skill should be in the same system as you, moreover in open space and naturally with you in the gang.
Here is a list of what will make you an uber miner:
Mining V - 25% yield bonus
Astrogeology V - 25% yield bonus
Mining Barge V - 15% yield bonus
Mining Foreman V - 10% yield bonus
Strips II with T2 Crystal - 75% yield bonus
Mining Upgrades - You can put 2 on Hulk (about him below) (10% bonus to yield), or 1 on Covetor (5% bonus to yield)
Mining Implant (slot 7) - Gives a 5% yield bonus, but is rare. Usually sold for 300-350 lam.
Mining Implant (slot 10) - Not as rare as the one in slot 7. Also gives 5% yield, usually sells for 150 million dead-pale Amarrs.
Exhumer V - 15% to yield (Exhumers only)
Mining Foreman Midlink (slot 10) Uberimplant. Leaves for about 500 lamas. Gives as much as 15% bonus to the digging efficiency to the owner. It also increases the efficiency of the Mining Foreman skill by 50% (it turns out that with the fifth Foreman level, the bonus will be 15% instead of the initial 10%). It also increases the efficiency of any foreman link module by 50%.
So: all these implants personally increase your efficiency by 25%, and the effectiveness of the gang by 10%. But you must have the skills cybernetic V, mining foreman V and mining director V, which is hard.
Keep in mind: you can only use one imp per slot, so the mining foreman mindlink and the usual mining implant, which sit on the tenth slot, you will not be able to insert. You have to choose.
Let's now see what we will get if we put all this on ourselves and learn.
Ship: Covetor.
Using Strip II with T2 crystals, we get the following:
1438.24 per miner / cycle (180 sec) (with 1 MU)
That means in a minute: 1438.24 ores / minute without mining drones, which is 254% more efficient than the Retriever we reviewed.
Great, isn't it? And that's not all!
4) Drones in Eve online
Some will say that the drones are not worth it, but don't believe them, they are wrong.
Three types of mining drones available to you:
T1 Mining Drones - Ignore Them
T2 Mining Drones (approximately 600K apiece)
Harvester Drones (approx. 6 lamas per piece)
Skills needed: Drones V, Mining Drone Operations V (25% bonus to yield), Drone Interfacing V (100% bonus to drone yield)
using T2 drones (base yield is 25):
62.5 ores / minute drone
using Harvesters (base yield is 30):
75 ore / minute drone
You cannot say that using 5 t2 drones you will get an additional 62.5 * 5 ore / minute. Because the SSR cleverly rounds up the results of the drone mine.
T2 Mine drones are faster than their T1 counterparts, as well as faster than Harvesters. Therefore, t2 drones, under certain circumstances, look better against the background of expensive Harvesters and can remine them.
For instance:
Digging with the Bistot drones (trash ore in zeros after Mercoxit, 16m3) you will receive:
62.5 / 16 = 3.9 Drone Bistot per minute. Rounding always goes down, so you get 3 units. from a drone. Harvesters will mine 75/16 = 4.68 Bistot per minute, bring, respectively, 4 units. As a result, we get that Harvesters will bring 1 additional unit of ore per minute, i.e. 5 add. units from all. I'll explain later how important this is, for now, just remember these numbers.
Now comes the fun part.
5) Hulk ... Buy or not?
The million dollar question! Hulk costs a lot of money (somewhere between 300 and 500 million). Many people think that this is an unprofitable investment. I'll tell you: if you are serious, then you need it. I'll prove it now.
You will need approximately 25 days to research Exhumer V (15% yield bonus).
You can insert 2 MU into it instead of one, Hulk will bring you an additional 20% efficiency. Is 20% worth three hundred lamas? Naturally! You can buy imps for 500 lamas and get the same efficiency gain. But losing a ship is as annoying as an egg with a cloud of imps?
But, but, but ... The best that the Hulk can give you is that he can tank just like the Dominix! Previously, you used an alt or co-corpsman to cover you, now you can leave him alone and tank yourself, getting even more ISK hours.
The resists and tanking capabilities of this barge will pleasantly surprise you.
Let's estimate the fit.
High-
3x Strips II
Med-
1x Gistii-A Small Shield Booster
1x T2 Cap Recharger
2x required Hardeners (depending on how much damage the NPC has)
Low-
2x Mining Upgrades
It all costs about 150 lamas.
Now, as usual, let's get down to demonstrative calculations.
Using Strip II with T2 crystals and all bonuses from skills and imps in the section "how to become the best miner" we get the following:
360 (Base yield) * 1.25 (Mining V) * 1.25 (AstroV) * 1.15 (Barge V) * 1.1 (Foreman V) * 1.75 (T2 Crystal) * 1.1 (2x Mining Upgrades) * 1.05 (Implant 1) * 1.05 ( Implant 2) * 1.15 (Exhumer V) = 1732.74 ore from mining laser / cycle (180sec)
This means that per minute you will receive 1732.74 ore / minute. This is 306% better than Retrivier and 254% better than Covetor discussed above.
Great, isn't it? Let's now see how much ISK we will receive.
A covetor with a pilot who has fully pumped skills and imps inserted to the maximum will dig 1438.24 ore / minute. Digging Bistot, (after refining we get 1438.24 / 16 = 89 units per minute, which means 5349 units per hour) which goes for about 9000 ISK in the empire per unit, after selling about 48.000.000 ISK per hour.
If you dig with a Hulk, which digs (under the same conditions) 1732.74 ores / minute, which means 108 units. Bistot, thus receiving 6480 units per hour, we will receive an approximate income of 58,000,000 ISK per hour.
In short, with the Hulk you will dig about 10 more lamas in an hour than with the Covetor. The difference in cost between them is 280 lyamas (Hulk - 300, Covetor - 20). So you will pay off it in 28 hours (280 / 10mil hour = 2
But you still need to transport and sell the accumulated funds, so a more realistic payback time is 60-80 hours. But if you sell ore right in the zeros, then the return on investment will naturally be faster.
Skills like mining, astrogeology, barge do not affect yield. The only thing that can affect is the Mackinaw bonus, which increases ice yield by 100%. If you dig on it, then you will dig 1000 for each cycle. The skills Ice Harvesting and Ice Harvesting Upgrades reduce the cycle time, therefore, with proper pumping, you can get more ice in an hour.
The basic cycle time with Harvesters I is 600 sec.
The basic cycle time with Harvesters II is 500 sec.
IMPORTANT: You must wait until the cycle is complete, or you will not receive a single unit of the mineral.
Mackinaw
A Mackinaw with the Exhumer V skill will give you a 100% bonus to ice picking efficiency for each ice harvester, regardless of the Exhumers skill level. Each level of Exhumers grants a -5% bonus to the cycle time of each harvester. Since Mackinaw also has a negative bonus - 25% minutes to the digging speed, pumping up to level 5 of the Exhumers skill will nullify this negative moment, returning you to your previous 100%.
Cycle time with Ice Harvesters V and 2 Ice Mining upgrades (Harvesters I) = 405 sec.
Because you dig 2000 ore from each harv per cycle and can complete 8 complete cycles in an hour, your success in digging will be 36 units. ice per hour.
Cycle time with Ice Harvesters V and 2 Ice Mining upgrades (Harvesters II) = 337.5 sec.
Because you dig 2000 ore from each harv per cycle and you can complete 11 complete cycles in an hour, your success in digging will be 44 units. ice per hour.
Covetor
Only 1 MU can be hung on it and it does not have the yield bonuses like Mackinaw, but you can put an additional strip on it.
Cycle time with Harvesters I - 427 sec.
Cycle time with Harvesters II - 356 sec.
Since you can only dig out 1000 per cycle, in total (for 3 harves) per cycle we get 3000, which means:
with Harvesters I: 9 cycles per hour, 27 units. ice
This means that Mackinaw can dig up an additional 11 units. ice for the same time. (hour)
Hulk
Hulk's only merit in this aspect is that he can hold 2 Ice Harvester Upgrades against one on Covetor. The Hulk will have exactly the same cycle time as the Mackinaw, but will lose the 100% yield bonus.
Skill Exhumers does not give any bonuses to the amount of excavated.
From each harv we get 1000 per cycle, which means from 3x - 3000.
c Harvesters I: 9 cycles per hour, 27 units. ice
c Harvesters II: 11 cycles per hour, 33 units. ice
Much the same as Covetor. Hulk will dig that much just a few minutes faster than Covetor.
Outcome:
Mackinaw
with Harvesters I: 9 cycles per hour, 36 units. ice
with Harvesters II: 11 cycles per hour, 44 units. ice.
Covetor
with Harvesters I: 9 cycles per hour, 27 units. ice
with Harvesters II: 11 cycles per hour, 33 units. ice.
I think the comments are superfluous. Anyone who wants to effectively dig ice - sit on the Mackinaw.
Edit: There is a different opinion about Mackinaw. Below, from Mahmud.
7) Bottom line
So where did we come to?
Retrivier with weak skills will dig 565 ore / minute
Covetor with good skills - 1188 ores / minute
Hulk with great skills and full imps - 1732 ores / minute (one, no tank support).
In the money, selling Bistot (9000 ISK per unit)
Retrivier - 30 lems per hour
Covetor - 64 lems per hour
Hulk with great skills and full imps - 93 lems per hour.
Have you forgotten about the drones?
T2 drones: 15 extra units Bistot per minute (3 from each of 5 drones), which means 900 extra. units per hour - additional 8.1 lam per hour.
Harvester Drones: 20 extra units Bistot per minute (4 from each of 5 drones), which means 1200 extra. units per hour - additional 10.8 lems per hour.
Hulk is the bomb, the dream of any serious miner. Hulk will save you a lot of trouble and bring you great profits. Having 2 accounts, the second can be put on the transportation of the accumulated, increasing your efficiency. This large investments, I agree, but they are worth it and very soon you will become a billionaire.
Mining may seem boring to many, but TeamSpeak or some interesting movie will brighten up your gray days.
Market -> ship modifications -> tuning modules.
Modification (rigs)or tuning modulesin eve - this is a special equipment that gives bonuses to various functions of the ship, and works on the principle of implants for the characters themselves. Installing mods on a ship is forever.
After installation in the appropriate slots, if they are pulled out, they will be destroyed. They will also burn when the ship is drained and repackaged.
Installing rigs
 To install a mod on a ship, you need two things: a free slot for it and sufficient calibration power.
Calibration is a designation of the number of modifications already installed on a ship, and limits subsequent ship upgrades, just as Power and CPU restrict the installation of common modules.
On an example of a rake, there are 400 calibration units, and since this is a Tech 1 ship, it has three slots for modifications. If you install 3 rigs of T1 modification for 50 calibration units, then 250 units will remain free.
Riga are
- T1 and T2 varieties
- differ in calibration,
- characteristics and price.
And subclassed:
- small
- medium,
- big
- KBT class
Each for its own class of ship.
The installation always succeeds, but as we noted at the beginning - if the installed modification is pulled out, it will be destroyed. Therefore, be absolutely sure that this is the modification you want to install on this ship before starting the process.
Impact modifications to the ship
 Rigs affect the attributes or modules of the ship on which they are installed. Most often they bring andpositive and negative effectsimproving one function and lowering the other. Some modifications do not have any negative effects.
If you install a modification that should increase a special type of module, and such a module is not installed, then there will be no positive effect, only negative. For example, if you install "Core Defense Operational Solidifier", which decreases the shield booster cycle but increases the ship's signature, without installing any shield boosters, Solidifier will still increase your ship's signature.
Rig skills.
profile skill level 1. (T1 rig) and 4th level (t2), also, this skill reduces the negative effect by 10% per skill level.
Jury Rigging Level 3
Mechanic lvl 3
Where can I find mods?
You can buy them in the market. You can also make them yourself if you have special components that are only found when collecting materials from the wreckage. To collect these materials, you need the Salvaging skill and a special module. When the Salvager module is activated on a ship wreck, there is a chance to find materials. You can successfully collect materials from each destroyed ship - only once.
To produce mods, you also need blueprints for those mods. Tech 1 blueprint mod. can be found on the market, and blueprints for Tech 2 modifications can only be obtained by inventing a Tech 1 blueprint (or bought from other players, of course).
-
 Do I need to annually approve the contingent for the medical examination?
-
 How to release office workers who work only at a personal computer and with office equipment from on-the-job briefings (primary and secondary)?
-
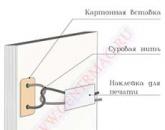 On the organization of training and verification of knowledge of the labor protection requirements of the organization's personnel
-
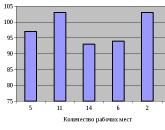 Features of the definition of similar jobs with a special price
Popular
- Named lists of persons subject to medical examinations
- What does the correct protocol for testing knowledge of labor protection requirements look like?
- With changes and additions from
- On approval of the procedure for the formation and work of commissions to test the knowledge of labor protection requirements of training organizations
- Labor protection instructions for administrative personnel and specialists (office workers) Name of labor protection instructions for employees
- Soviet Historical Encyclopedia
- "Roman newspaper": history of the country, history of the magazine
- Mikhail injections A session of public telepathy
- Buy sectional garage doors inexpensively in installments
- Oil production and refining companies