How to make a secret out of paper. Mk functional pages with pockets
Scrapbooking is the art of creating and designing original photo albums. The main goal of this direction of needlework is to turn a boring photo album into a unique story from our life. In this article, you will learn the history of scrapbooking, as well as how to make an album cover, binding and secrets.

In the 16th century, notepads were popular for writing down important dates, quotes, recipes, and more. At the end of the 17th century, a book appeared in which there were additional blank pages so that the owner himself could paste the illustrations he liked. After the advent of color printing, collectors actively began to collect cut-out images in their albums. This was the beginning of the development of scrapbooking.

In the 19th century, when photography began to actively develop in scrapbooking, a real revolution took place: they started special pockets for photos and colored pages on their own. Girls' albums with drawings, photographs, stickers and secrets became popular. Today there are many styles of scrapbooking and it has regained popularity all over the world.
Scrapbooking album, do it yourself
Scrapbooking photo album cover
Materials:
- canvas;
- cardboard or paper with millimeter markings;
- synthetic winterizer;
- PVA;
- cardboard;
- scissors;
- eyelets;
- rings.
- Decide on the dimensions of the album. In our master class, the album turned out to be 30 × 30.
- With the help of a cardboard or a sheet, measure on a regular cardboard 30 cm long and 30 cm wide.

- Cut a piece of synthetic winterizer of the same size.
- Glue the synthetic winterizer onto the cardboard with PVA glue.
- Cut off a square of canvas, while making a margin of 1 cm on each side, so that it is convenient to stick. Glue the canvas on the padding polyester.
- To close the pieces of material, a sheet of cardboard is glued on the inside. The back cover for the album is ready.


- Glue a synthetic winterizer on the front of the cover, and canvas on top, but without a window.
- Now carefully cut out the window and glue the edges to the cardboard.

- Make holes for the eyelets at a distance of 2 cm from the edge.

If you want the album to be not on rings, but like a bound book, then do not make holes for the eyelets. You can decorate the cover to your liking, not necessarily the same as in the first master class.

Sheets are needed to complete the album. It is best to use cardboard. Also cut additional strips, 2-2.5 cm wide, for gluing the main sheets together. Ready-made color pages, such as paper or thin cardboard with color prints, will also come in handy.

On each strip in the center, measure a strip 2-4 mm wide, for this you can use a pen that does not write or a sharp object. This is done so that the album can store voluminous decorations, for example, convex flowers made of paper. The edges of the strips must be cut at an angle of 45 degrees on both sides. Bend the strips so that the marked strip remains in the center, and start gluing to the pages. All pages must be glued evenly so that the album also comes out even, and not skewed.

You can determine the number of pages yourself. After the middle of the album is ready, we start binding. To do this, take gauze or bandage, cut a strip along the height of the album and at the same time 1.5-2 cm more width. Now you need to take a piece of braid or tape and stick it on the top and bottom edges of the binding. The lace will make the edges look aesthetically pleasing, and the binding will also be more durable.

From thick paper, make a spine that completely closes the binding and protrudes 1-1.5 cm. Attach it to the album, and glue the cover on top of the folds of the spine.

Do not glue the spine itself to the binding, otherwise the pages of the album will not open freely. Open the cover and glue the protruding layer of bandage or gauze and the ends of the braid to it. The most convenient way to do this is not with PVA glue, but with a transparent “Moment”.


Everyone who wants to make a photo album plans to make it interesting, beautiful and original. Sometimes the volume of the album does not allow to place a large number of photos in it, so we offer a unique idea for its design.

Secrets is a way of arranging inscriptions, drawings or photos, which is known to every schoolgirl who had a “girl's album”. There are several options for their design for a photo album.
- Secrets on the basis of a postcard. Make a postcard in the background color of the album page. Glue the main photo on the front side, and a secret inside. The flip page can be secured with tape, a clasp, or a cord.
- Secrets in pockets. Think in advance where such a pocket will be located and make it in the color of the page. Paste the main photos on top and decorate the page. Do not forget to put a secret photo in the pocket. In the photo, it is better to make a loop or make a hole for the grommet so that it is convenient to pull it out. You can decorate the pocket in such a way that additional pictures are pasted on it and visually hidden.

Thanks to the secrets on one page of the photo album, it is easy to stick a vertical and horizontal photo. Also, the photo itself can become a pocket for another one. You can stick a photo on a postcard and glue a few more photos inside. “Sandwiches” made of photos and paper look original, thanks to which you can hide a few surprises on the page.

Do you want to stick a large photo in the album, but feel sorry for the place? Glue the photo on a piece of paper in the background color so that it is convenient to stick the fold to the base of the album. Now the large photo can open, and paste other photos under it. Secure a large photo with thread or a lock. In the same way, it is easy to stick many more photos, if instead of a large photo you use a few small ones, and save the technology for secrets.

To make your album look creative, cut off the vertical or horizontal parts of individual pages and decorate them as if they were a continuation of the next page. Do not forget that it is permissible not only to stick a photo, but also to sew it on. This will add flair to ready product. Sew some photos with an accordion and fasten to a cord.

If it seems that some photos do not fit into the plot, hide them behind a decorative door. For children's albums, use drawings of flowers or animals, behind which secrets will also be hidden.

Also watch the video: Scrapbooking: DIY Wedding Photo Album
It all depends on the preferences of the owners of the future family heirloom and the style of execution. See more crafts in this.
At one time, I wrote a lot of interesting articles, and now I decided to slowly spread them. I start with this one - MK "Sekteretiki" - it was published in the magazine "Scrap-Info" No. 3 for 2011.
When we plan to make an album, we usually want the album to be roomy, beautiful and interesting. How to cram more photos into the album so that the quality of the page design does not suffer, so that the composition is beautiful and the decor fits?
I will try to tell you about my experience and show examples of what ways I found a way out of the situation:
The secrets are completely hidden.
This is when the photos are hidden so that they are not at all conspicuous, or in order to find them, you need to specifically know about this secret (one of my customers laughed that she found all my secrets only after the fourth viewing).
We decide on the main composition of the page and the photos that are located on it. Next, we take the same sheet as our background, and cut out a rectangle from it so that at the edges it completely coincides with the background image. We glue on it that part of the composition that falls on the cut out part. I make out the inside according to the principle of a postcard - I cut out a substrate that matches the color and folds it in half. The hinged part closes either on an anchor or on a cord.
Lined pocket. You can think over such a pocket in advance, and glue or sew the backing only along the edges. And you can make it cooler - make the whole page to the end (glue and sew everything), then, with a knife, make a cut where you would like to make a pocket. On the reverse side of the page, put a sheet of paper (any, even ordinary office paper) in the size of the pocket, and glue it around the edges (so that the photo put in the pocket does not run to the sides). After that, the page can be glued to the base (it is necessary to fasten the edge of the cut from the inside with adhesive tape so that it does not tear further). Glue the attached photo to the base and make a loop so that you can pull it out. In this version, this photo will never be found until you yourself say so ...

In this case, this is the previous version with a backing pocket, only additionally disguised with a decor that fits on the pocket. The decor is boldly cut with a knife - we must save the composition and provide a place for storage!

Secrets are hidden.
The basis of this type of secrets is the photograph itself.
Let's say you have a horizontal photo and you want to place a vertical photo underneath it. To do this, we cut off a part of the backing to the size of the photo that we need to hide, and glue it with the photo that is on top. Inside it is made out according to the principle of a postcard. It closes on an anchor.

The photo is attached to a contrasting substrate that opens like a postcard. Closes with an anchor or cord

Making a sandwich external photo+ lining from paper for drawing + internal photo (or place for journaling), all this is attached to a strip of paper folded lengthwise, coinciding with the background - one fold is glued to the background, the second is laid between the layers of the sandwich.

Large photos or blocks of photos.
Who said you can't use in albums big photos? It is possible and even necessary - if there are beautiful landscape photos - it is a sin to grind them down.
The photo is also reinforced with a substrate - in this case it is better to take thin cardboard or cardstock - when the basis of a dense photo looks even and does not bend. It is also attached to the background on a strip of the same paper as the background, one part of the strip is glued to the background, the other is laid between the photo and the substrate. The insides are made to your taste - it turns out that the page is almost doubled - this is how many photos can be glued! Closes with an anchor or cord.

Instead of a large photo, several photos can be arranged in a block. In this case, I did the opposite - a large photo is hidden inside. This folding part is attached to the loops of the cord, which are fixed brads. The loops themselves through the holes in the background of the page are glued on the reverse side with adhesive tape. I came up with this method out of necessity - I stitched the folding part and forgot to insert a strip for fastening with a background!

Page inserts.
Well, this is not even a secret, but a secret… We just cut the page in half horizontally or vertically.
Again, we collect a page from the main photos. We glue everything and sew. We cut where we need. Of course, the composition should provide that the page will be cut. We make a sandwich from the folding part, and supplement the trimmed base to a normal size with suitable paper. It is necessary to provide that in width this attached piece is 1.5-2 cm wider than our base - by a bend. We glue this fold into the hinged part between the substrates. The interior can be completely independent in color and design.


Accordions.
This is generally a mega-option for placing a large number of photos - after all, an accordion can be glued on both sides! Or on the other hand, you can leave room for journaling! You can attach the accordion to the cord.

Use of decorative elements.
I understand that these solutions are purely individual, but suddenly this will lead you to some of your own solutions!
Part of the page is hidden under an opening "door" made of tracing paper and cardboard. Behind the door there are photos that are a little “out of the story”, but should be located right here - this is how the way out was found. The door is made in Japanese style and fastened with real metal loops.

The composition on this page did not imply the presence of a second photo at all, but it was necessary to insert it exactly here - there was such a way out - to remove the photo into a tulip!

Origami is ancient art paper folding of various objects, animal figurines, flowers, etc. Both children and adults like to work with paper. Making crafts contributes to the development of fine motor skills of hands and fingers, thinking, memory and attentiveness, perseverance and accuracy. During work, step-by-step manufacturing schemes are often used, so you need to be able to read them, understand the sequence of folds. At the same time, the ability to navigate in space, visual memory, and logical thinking develop.
Origami lessons with a child can be started as early as 3-4 years old. It is most interesting for children to make toys, so we will devote our article to studying the simplest schemes that children can make. Parents can also try their hand at folding paper figures, so that later they can show a pattern to their children.
How to make origami is shown in detail in the diagrams, and step-by-step instructions will help you complete the task correctly.
paper boat
Boys love to play with boats, launch them either into the river or into a simple puddle after the rain. At any time, if you wish, you can do the most for the game, using improvised materials, such as an old newspaper or magazine sheet. The paper must be rectangular.
- Making origami from paper with your own hands begins with folding the sheet in half.
- Then the fold corners are rotated at right angles to the center of the sheet.
- The lower bifurcated ends of the paper are wrapped exactly up, in one direction and the other.
- The corners sticking out at the edges must be carefully bent. It turns out the shape of a triangle.
- How to make origami next? You need to take the figure by the edges and connect them together. Thus, the triangle is transformed into a square.
- The lower corners of it are bent up so that again a triangle is obtained. For the corners, a similar connection of the edges in the center is performed.
- It remains with a slight movement to push the upper edges in opposite directions and open the finished boat.
The origami technique for beginners is quite simple, so any child can handle the task. The main thing is to smooth all the folds well with your fingers. You can play with crafts immediately after manufacturing. And if the child wants, you can color the craft with markers or pencils.
Dog
This is the easiest origami. A child can do this job. junior group kindergarten in the application class. First, the kid behind the teacher folds the paper, and then sticks small details - eyes and nose. You can make a mouth and a forelock from black stripes.
The teacher prepares for each child a square sheet of paper. When showing an origami master class to children, it is necessary to explain how important it is to accurately align the edges when bending and rub the folds with your finger.

- You need to turn the sheet with the corner down and wrap the paper so that you get a triangle.
- The corners of the figure on the left and right are bent down the same distance. These will be the ears for our dog.
- It remains to lift the bottom corner and make an even fold. This is how the nose of the dog is formed.
- How to make origami, the children have already understood, it remains to be done by gluing small parts on the muzzle of the beast. For small children, the teacher independently cuts out the elements for the lesson, and the children only stick them according to the model and oral explanation.
Older children already know how to use scissors and are able to cut out the necessary details themselves.
A more complex version of the dog
Step-by-step instruction origami will help to cope with this version of the dog:
- The sheet is also prepared in a square shape, and the first stage is similar to the previous option, that is, the blank is turned upside down and the paper is folded until a triangle is formed.
- Dog ears are made by folding the paper several times. First, the corners on the left and right are wrapped inward with an overlap. Then they turn in opposite directions and the sharp corners hide inward.

- Then the craft is turned over with the back to the master, and the two lower corners open in different directions.
- The outer layer of paper is folded up, and the bottom layer is folded over to the back of the craft.
- The edges of the triangles are wrapped inward, and the lower part of the muzzle takes the form of a trapezoid.
The dog will look spectacular if it is made of colored thick paper, and the bend of the mouth remains white, as in the picture in the article. After doing paper origami with your own hands, all that remains is to draw the nose and eyes of the pet with a marker.
Chanterelle
To show a table theater, you can make such a fox out of paper:
- A square sheet in a familiar way is folded in half by the corners.
- The upper part descends to the level of the lower side of the triangle.
- The side corners, on the contrary, rise up.
- The craft is turned over to the other side and the fox is painted.
You have already learned how to make origami. It's not difficult at all. The main thing is to be careful and carefully smooth the folds.

Origami master class: fish
For this work, you need to take a square sheet of thick paper and fold it in half once, then fold it again. It turns out again a square, only smaller. Then you need to act, exactly following the step-by-step origami instructions:
- With a slight movement, the upper layer is pulled towards itself and the lower corner is lifted up. It turns out a triangle.
- The workpiece is turned upside down and a similar action is performed.

- The tail of the fish is performed as follows: first, the triangle is turned with the apex forward and the upper edge is lowered so that the sharp corner peeks out from behind the body of the fish; the lower one, on the contrary, is lifted up in the same way.
- The crossed corners act as a tail fin.
- The craft is turned over to the back, and the fish is ready.
- Small details can be glued from colored paper or simply drawn with wax crayons.
birdie
Origami lessons teach children mindfulness and perseverance, which is why it is so important to complete the task with children. preschool age because the acquired skills will be useful in further studies at school.
The following sample work shows how to quickly make a three-dimensional bird. Having assembled a silhouette from paper, you can create a figurine of a rooster or a hen, a sparrow or any other bird by gluing additional elements.

Step-by-step instructions for origami birds will help you complete the task with ease:
- To get started, you need a square sheet of thick paper, you can take colored double-sided.
- The sheet is folded diagonally and angled down.
- Further, the left upper and left lower sides are wrapped inward so that they are connected along the center line together.
- The workpiece is turned over to the back side, and work continues by bending the figure in the center.
- In the diagram at number 6, you can see that the sharp corner is wrapped down and smoothed well.
- Then the workpiece is returned to its original position and folded in half.
- Then you need to act with light movements so as not to tear the paper. At the same time, both edges are lifted up, that is, the tail of the bird and its head. The neck of the bird should be inside the craft.
- Everything is carefully smoothed again.
- It remains to indent a small edge to shape the head and the work is finally done.
Decorating crafts
If you want to make a cockerel or hen, you will need to cut out a comb and two wings. The comb has a double construction. It will be more convenient to attach it to the slot on the head of the origami bird. To do this, double-sided red or orange paper must be folded in half and draw waves on the top. After cutting with scissors, glue is applied to the fold from the outside and pressed down with fingers in the center of the head.
To make the wings the same size, you can cut out two wings at once from a sheet folded in half along the drawn contours. Eyes can simply be drawn with a marker.
How to make volumetric origami, you already know. Decoration depends on the type of bird. Depending on the main color of the birds, the color scheme of the paper is also selected.
Origami swan from napkins
Such original swans can be instructed to make a child in anticipation of the arrival of guests. While mom is preparing delicious holiday meals, the baby can help set the table beautifully. This activity will distract him from running around, and for a while the family will become a little quieter.

- The napkin has a square shape. The corner where the center of the paper is located will be the beak after the work is done.
- Start bending from a given point. The beak is located on the left, and the napkin is folded diagonally in half.
- Then the extreme corners are bent inward so that the sides are located along the center line of the fold.
- Further, the bent triangles are folded a second time. The sharp edge turns down and rises to upper level napkins, the item folds in half.
- Then the head and tail of the bird move apart in opposite directions.
- The sharp edge is additionally crushed to make a pointed beak.
- On the opposite side, all layers of paper gently lift up and straighten beautifully.
The origami swan is ready, you can arrange crafts on plates.
Conclusion
The secrets are completely hidden.
This is when the photos are hidden so that they are not at all conspicuous, or in order to find them, you need to specifically know about this secret (one of my customers laughed that she found all my secrets only after the fourth viewing).
We decide on the main composition of the page and the photos that are located on it. Next, we take the same sheet as our background, and cut out a rectangle from it so that at the edges it completely coincides with the background image. We glue on it that part of the composition that falls on the cut out part. I make out the inside according to the principle of a postcard - I cut out a substrate that matches the color and folds it in half. The hinged part closes either on an anchor or on a cord.
Lined pocket. You can think over such a pocket in advance, and glue or sew the backing only along the edges. And you can make it cooler - make the whole page to the end (glue and sew everything), then, with a knife, make a cut where you would like to make a pocket. On the reverse side of the page, put a sheet of paper (any, even ordinary office paper) in the size of the pocket, and glue it along the edges (so that the photo put into the pocket does not run to the sides). After that, the page can be glued to the base (it is imperative to secure the edges of the cut from the inside with adhesive tape so that it does not tear further). Glue the attached photo to the base and make a loop so that you can pull it out. In this version, this photo will never be found until you yourself say so ...
In this case, this is the previous version with a backing pocket, only additionally disguised with a decor that fits on the pocket. The decor is boldly cut with a knife - we must save the composition and provide a place for storage!
Secrets are hidden.
The basis of this type of secrets is the photograph itself.
Let's say you have a horizontal photo and you want to place a vertical photo underneath it. To do this, we cut off a part of the backing to the size of the photo that we need to hide, and glue it with the photo that is on top. The inside is designed like a postcard. Closes with an anchor.
The photo is attached to a contrasting substrate that opens like a postcard. Closes with an anchor or cord
A sandwich is made - an external photo + a lining of drawing paper + an internal photo (or a place for journaling), all this is attached to a strip of paper folded lengthwise, coinciding with the background - one fold is glued to the background, the second is laid between the layers of the sandwich.
Large photos or blocks of photos.
Who said you can't use large photos in albums? It is possible and even necessary - if there are beautiful landscape photos - it is a sin to grind them down.
The photo is also reinforced with a substrate - in this case it is better to take thin cardboard or cardstock - when the basis of a dense photo looks even and does not bend. It is also attached to the background on a strip of the same paper as the background, one part of the strip is glued to the background, the other is laid between the photo and the substrate. The insides are designed to your taste - it turns out that the page is almost doubled in size - this is how many photos you can stick! Closes with an anchor or cord.
Instead of a large photo, several photos can be arranged in a block. In this case, I did the opposite - a large photo is hidden inside. This folding part is attached to the loops of the cord, which are fixed brads. The loops themselves through the holes in the background of the page are glued on the reverse side with adhesive tape. This method was invented out of necessity - I stitched the folding part and forgot to insert a strip for fastening with a background!
Page inserts.
Well, this is not even a secret, but a secret… We just cut the page in half horizontally or vertically.
Again, we collect a page from the main photos. We glue everything and sew. We cut where we need. Of course, the composition should provide that the page will be cut. We make a sandwich from the folding part, and supplement the trimmed base to a normal size with suitable paper. It is necessary to provide that in width this attached piece is 1.5-2 cm wider than our base - by a bend. We glue this fold into the hinged part between the substrates. The interior can be completely independent in color and design.
Or we cut the page vertically. In this case, the inside is framed according to the principle of a postcard.
Accordions.
This is generally a mega-option for placing a large number of photos - after all, an accordion can be glued on both sides! Or on the other hand, you can leave room for journaling! You can attach the accordion to the cord.
Use of decorative elements.
I understand that these solutions are purely individual, but suddenly this will lead you to some of your own solutions!
Part of the page is hidden under an opening "door" made of tracing paper and cardboard. Behind the door there are photos that are a little “out of the plot”, but should be located right here - this is how the way out was found. The door is made in Japanese style and is mounted on real metal hinges.
The composition on this page did not at all imply the presence of a second photo, but it was necessary to insert it exactly here - there was such a way out - to remove the photo into a tulip!
Well, here is such a decorative tag - simple, but it looks perky. Fastened from below to the corners, from above to the anchor.
Hello, our dear readers!
Do you like making albums? What are yours? Dressy with a lot of jewelry or minimalistic, where all the attention is in the photo ..?
And our designer Olga Busova
albums are functional, and she will share with you the secrets of how to make such an album.
Olga's word:
Hello! With you Olga Busova . I love making mini-albums, and especially functional mini-albums, one might say interactive - stuffed with various secrets, openers and folding beds. If you are a fan of such secrets like me, then stay here, it will be interesting!
All those things that I want to talk about are suitable, first of all, for travel books, children's albums - where there are a lot of motley photographs, commemorative papers and small cute things. My whole family and guests love to look at such albums, the children are already completely delighted with their baby stories. And I think that these are priceless things!
I created my first such album with the help of Tatyana Berseneva's master classes. I constantly use the acquired knowledge, but, for obvious reasons, I cannot give out its secrets, I will show in detail only those things that I created myself.
So, what kind of designs do I like to create and which are really easy to use?
These are various pockets.
Pockets can be used for photos or tags, notes. Pockets can be flat, for a couple of photos, or voluminous, where you can put a whole stack. For a master class on a voluminous pocket - to Zhanna Khusnulina.
The pocket can be made large for the whole page or small, you can make a cascade of pockets, or a pocket from the photo itself.
But a complex pocket - on both sides of the page and inside the page itself is also a large pocket. It is done very simply - we make two pages - each with a pocket, fold them with their backs together and sew / glue them on three sides.
There are actually a great many options, you can experiment and invent endlessly. When I created my last album, I was inspired by such a fashionable phenomenon as an organizer at the moment.Page with one large pocket and three small ones. The edges of the pockets are finished with decorative stitching.
1. I cut off a strip with a height equal to the height of my album - 20 cm from a sheet of scrap paper.
2. I have a pocket on the left edge, so I measure the desired page width (15 cm) from the right edge and make a scoring.
3. I divide the rest of the sheet in half and again do the scoring.
4. At this stage, I cut out pocket holes - on the middle part of the sheet. From the slots to the edges must be left at least 1 cm.
5. I make a decorative stitch around the slots (optional).
6. On the reverse side, I hide the ends of the threads - with the help of adhesive tape.
7. I sew the bottoms of the pockets - the top two and make a line along the perimeter of the opening element. Small pockets are already functioning. Then there are two options - leave the element open or, as I did, sew a large pocket.
8. The color of the chanterelles did not suit me and I glued a suitable sheet to the bottom of the page and then stitched the edges of the pocket - top and bottom.
Our page is ready!
Envelopes.
Without envelopes, nowhere - the first curl, a tag, a label from clothes, etc. Envelopes small and large, homemade and ready-made. The envelope may just be a decoration after all.
Opening elements.
Here I mean various sashes, folds.
The sash can be single
sash pocket
Folding sash several times. The album is small, but there is a lot of information on such a page
Clamshells.
A very capacious thing - a strip of paper is folded like an accordion and the base is glued to the page. Photos can be glued on both sides of the sheet, and it is convenient to fix it with a string.
Hidden pockets.
Such pockets can be made with any content - a photo, a tag, any piece of paper. Such a pocket can be masked on the page and this will be a real secret.
In my last album, I inserted notepads into such pockets - using the last sheet.
How to make it so
a) if it's a single tag, it wouldn't fall through, and
b) the back of the page could be glued to the back of the next page without violating the functionality of the pocket.
Just a few simple steps:
1. We make a cut in right place the width is 1 cm more than the width of the tag (in my case, the notepad).
2. on the reverse side of the cut edges we fix with adhesive tape - so as not to tear.
3. cut out a rectangle a couple of centimeters larger than our object from any sheet.
4. carefully glue the leaf by the edges to the back of the page, making sure that the place where the object will be placed does not get glue.
5. Our secret is ready, you can use it!
In the event that you really want to place more photos On the page, cascade - irreplaceable item!
In this case, the cascade is attached with decorative tape. The sticking surface of the adhesive tape is quite large and the design turned out to be quite reliable.
And these are just a few of the possible designs in the albums, the ones that I use most often!
Do you like functional albums? Share links to your albums, show your interesting designs, I will definitely visit you, I'm very interested!
-
 Children's electronic presentations and clips Children's electronic presentations for preschoolers
-
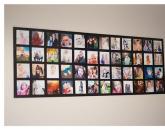 How to make a do-it-yourself collage of photos: ideas, methods and design examples Funny do-it-yourself photo collage
-
 How to make a collage of photos with your own hands on the wall: create home comfort Collage of family photos with your own hands
-
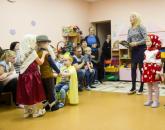 Funny fairy tale scene about a turnip Fairy tale turnip for the new year for children
Popular
- Prom theme: how to choose and what ideas do you have?
- Batman comics: where to start reading?
- Remember everything: how to organize graduation at school
- Scenario of the holiday Victory Day in kindergarten Name of the holiday on May 9 in kindergarten
- Scenarios of the holiday Defender of the Fatherland Day for adults
- Thematic entertainment "Spring" (for children of the middle group) Entertainment on the theme of spring
- Agraphia is a complex disorder of speech and writing.
- Presentation on the topic "the development of speech of preschoolers in games and exercises"
- Scenario of a theatrical fairy tale in the senior group
- Writing impairment and correction in left-handed schoolchildren Articles writing impairment in visually impaired schoolchildren