3 d photos. Three-dimensional (3D) photos
Often the stereoscopic effect is created with the help of unusual tricks of the photographer, but today we will achieve it by editing an already finished photograph. The first part of the article tells about how to take a simple 3D photo, even a beginner can handle it. The second part is for more professional users, it will show you how to make the picture more vivid.
Part one. For beginners: simple 3D effect
There is a special technique for making 3D images - anaglyph, which usually consists in shooting an object from different angles and then combining the images. But today we will achieve the same effect using the color channels of the photo. Open a suitable photo, let's get started.

You can use any image, but you definitely need to switch to RGB Color mode. If you are in Grayscale, Indexed Color or CMYK mode, then you need to go to RGB (Photoshop: Image> Mode> RGB Color).
Note: This method is suitable for those image editors that allow you to tinker with color channels, such as Photoshop or GIMP. Photoshop Elements and Paint.NET do not support this method of photo editing.

First, make some copies of the photo (left screenshot). The easiest way to do this is to right-click on "Background Layer" and click on "Duplicate Layer". After making 2 copies, select the top one and go to the channels panel. You can see it by clicking Window> Channels. In the channels panel, select the Red channel as shown in the right screenshot.

Press Ctrl + A (in both Photoshop and GIMP) to select the entire canvas. The photo should turn out in gray tones, if your photo looks like in the picture, then you are moving in the right direction.

Press V to select the Move Tool (in GIMP press M) and move the red channel layer to the left as shown.
Move the channel layer to make sure the background is black as shown on the left. You can set the background color by clicking on the switch in the toolbar.
GIMP has similar tools in Toolbox, much like Photoshop.

In Photoshop CS5, the keyboard shortcut Ctrl + 2 will return you to RGB mode. In other versions, just go back to the layers panel and select the new active layer. You can stop there, since you already got a decent 3D image, but you can work a little more and add depth to it.
Part two. Add depth to your photo
At this point you should have several copies of your original photo, return to the top layer where we created the 3D effect.

Create a mask as shown in the screenshot on the right by selecting the layer and clicking on the button at the top of the layers panel. In GIMP, right-click on the layer and select "Add Layer Mask" and "White for Full Opacity".

Use a soft brush to mask some areas in the top layer. The goal is to return part of the background to its original appearance.

Here is a before and after photo. In a layer with a 3D effect, the background is from a layer without a 3D effect.

In the picture you can see what the mask looks like.

Now go to the bottommost layer and edit it. Let's select a red channel for this layer.

Now let's do similar things. Select the entire canvas (Ctrl + A), but apply a slightly different effect to the background.

Press Ctrl + T to select the "Free Transform" function. And freely change the layer of the red channel. You can distort, enlarge, rotate, in general, you need to make the foreground and background differ from each other.
In GIMP, this tool is called "Scale Tool", hotkeys: Shift + T.

That's all! The photo is ready. Put on your 3D glasses and enjoy the result! And if you don't have them, then look Youtube video on how to make 3D glasses yourself.
One of the components of business success is the provision of a product that will be of interest to consumers and in demand by them. And if your product is also an unusual novelty, then the interest in it will certainly be increased (at least at the first stages, and then everything depends on you).
But it is not necessary to dwell on any particular innovation. There are many ideas and products that have been invented for a long time, but they are not commonplace for most people. Therefore, it is possible and necessary to do business on them - it will be profitable and promising! We have already written about how to start or,. All these ideas are categorized as “not overused”. Another such is the production of three-dimensional photographs.
3D photos
Modern technology provides tremendous opportunities in terms of photographing. Now many people know how to take high-quality, clear, bright photos. But this is still a 2D image, that is, two-dimensional. Probably many are already familiar with 3D films, but what about 3D photos? With the help of new technology, this is now possible!
First on domestic market This was started by the company "Dance Heads", previously known for its sensational project of the same name "Dancing Heads". The studio for creating "live photos" from this company started working about a year ago. And while this business has not yet spread around the cities, and has not become too widespread, you have a chance to implement this idea in your own way and start making money on it!
3D Photo Creation
Let's take a step-by-step look at how a 3D photo is created. A client comes into the studio and is offered a variety of backgrounds to choose from. The background that suits his taste will become the basis for future 3D photography. The photographer takes a picture of the client, for example, against the background of nature, wild animals, cars or any other objects and phenomena. Children can choose backgrounds that will be of interest to them - cartoon characters, fairytale castles, and so on. Then the photo is printed (of course, high quality printing is used), and placed in a special frame, the front part of which is made of embossed glass. With this, the same 3D effect is achieved.
The photo is then ready to be sent to the client. Unfortunately, it is impossible to convey how such a photograph looks in real life using a computer screen or phone. You just have to visit the 3D photo studio on your own and see everything with your own eyes.
But that's not all. Studio "Dance Heads" offers its clients a service that surprises and captures even more than the above photographs. If 3D photography is easy volumetric images, then the service, which will be discussed below, is almost a real photo coming to life!
In order to get a photo coming to life with yourself in the lead role, you need to install an application on your smartphone, developed by the "Dance Heads" company. In the running application mode, you need to point the device's camera at the 3D photo that you have already taken. And the following will begin to happen on the screen of your smartphone: fantastic animals will start to break through your photo, sharks will swim around you, and cute dinosaurs will try to hug you :). There are quite a few scenarios for the development of the plot and they depend on the background that you chose for your photograph at the very beginning.
This service is aimed more at children, since it will still be much more interesting for them to watch a photo come to life than for adults. It all looks like this:
Everything necessary equipment for such a business is sold by the manufacturing company "Dance Heads". On the company's website, you can place a purchase order, and after the purchase, start your own business on 3D photos and unusual videos. You can place such a studio in any mall or an entertainment complex. It does not require a lot of space, which pleases in terms of rent. And interested people, especially those with children, will certainly not pass by!
3D figurines from photography
We want to tell you about one more original idea which can also be a great business for you. Like the previous one, it is based on 3D technology, but its implementation has gone much further. You just need to take a few pictures and you will get ... a small figurine of yourself! How does this happen:
1. You are submitting some full-length front and back photographs and close-ups of your face. A couple more photos from different angles also do not hurt. All photos must be of high quality.
2. Having received your images, the specialist begins to 3D modeling your image. Upon completion of the model, it is usually shown to the client so that he can point out the individual parts that need to be corrected, or else to approve the work.
3. The final stage is directly printing a 3D figure using a special printer. A 3D printer is significantly different from a conventional printer, and it takes a long time to print. A figurine with a height of 15-25 centimeters will be printed for several hours.

Considering that 3D modeling is a laborious and long process, and the cost of using equipment for printing is quite high, making a miniature figurine of oneself is not cheap, and for some it is even unimaginably expensive ($ 200-350). Nevertheless, there is a demand for such unusual figurines, and it is not going to fall.
Everything you need to start such a business, in fact, is clear from the above. This is high-quality photographic equipment, equipment for 3D modeling (a computer with an installed software) and a 3D printer. Miniature figurines made in this way are very popular as a gift for loved ones and friends, children, and a boss from subordinates. Therefore, without hesitation, you can start in this business, but also about a good advertising strategy don't forget to always be at your peak of success!
Given the increased interest in 3D photography, the production of these products can become very profitable business... However, in order for the business to develop, it is necessary to master the technology of making such photos.
- How do three-dimensional photos differ from ordinary ones?
- 3D photography technology
- Additional services
- 3D photography technology

One of the most important components of any business is a product or service that can interest consumers. In our time, people are offered so many interesting things that it is very difficult to surprise them. But still, there are unusual novelties for attracting customers. An entrepreneur should choose a suitable option for himself and beat it correctly, because everything new rather quickly becomes commonplace.
Sometimes it is not at all necessary to take the most the latest technology... In some cases, you can use modern advances, but in a new format. This will allow you to use already proven and successful options, but earn more on them. 3D photography is a prime example of this type of business. Three-dimensional images in a new and interesting form will be in demand, since nowadays such technologies are popular and have many fans.
How do three-dimensional photos differ from ordinary ones?
Modern technologies and special equipment makes it possible to create interesting and high-quality photographs, which, with the presence of special devices, come to life and become three-dimensional.

Such products will be in demand, since so far there are few offers in this niche, but customers are interested in similar technologies. Three-dimensional photos are ordered for themselves either as a gift, they will be a good surprise for the holiday or just a decoration.
The first creation of live photos was started by the specialists of the Dance heads company several years ago. The project began working not so long ago and its followers are currently quite small. Therefore, entrepreneurs who plan to profitably invest in an interesting business have every chance to firmly gain a foothold in this niche.
There will be many clients, because everyone is tired of ordinary two-dimensional images, and three-dimensional is something new and interesting.
3D photography technology
As for 3D photographs, the production of these products will require the master to master a certain technology. To do this, you need to be at least a confident PC user, and it is better if the businessman has a special technical education. And yet, even in the absence of special skills, they can be acquired if the entrepreneur is really interested in this process.
The procedure for creating a 3D photo begins with the fact that a client contacts the salon. The master offers him various backgrounds, which will then be used in the image. The photographer takes a picture of the customer himself or uses a ready-made one if the customer plans to make a surprise for a gift.

There can be a lot of options for designing a photo. For children, a cartoon image can be used, men prefer cars and yachts, and women like to feel like queens. It all depends on the wishes of the client. The photo should correspond to the chosen background and the general idea. It should be done after the client has decided on the background image.
Next, you need to connect 2 images as it was originally intended. For this, the master must have creative potential and certain skills in working with computer programs. After that, the finished image is printed on a printer with high quality printing.
We get a picture with a slightly blurry image. A similar procedure can be carried out independently by any person at home if he has a special program and good printer... But here the main secret will be a special frame. It is she who allows you to see the image in three-dimensional format. That is, it will act like 3D glasses in a movie theater. Frames are made using a special technology.
The finished product is handed over to the client, and the master receives money for this. The effect of such a photo is difficult to convey. Even on a phone or computer screen, it is impossible to understand how interesting three-dimensional photos actually look.
Moreover, if you look at the image through a special application on your smartphone, the picture will come to life. This is a unique technology, but it exists and works well. Therefore, 3D photos are in great demand.
Additional services
In addition to making three-dimensional images, you can offer customers other interesting services and products. For example, you can make a three-dimensional image from photographs.
It is printed out on a special printer. In a few hours, you can get a finished figurine 20 centimeters high, which will be an accurate, but only three-dimensional copy of the photograph. That is, the client can get his own figurine, which will be created on the printer.
This technology is new, but very interesting. However, it is designed only for wealthy customers. The thing is that the equipment and materials for the work are very expensive, so the price of one figure will be about $ 300. But now they are in demand among a certain category of the population, as this is something original and impressive.
To work on the manufacture of three-dimensional products, including photos, you will need high-quality equipment and software. All this is not cheap, so the business of making 3D photos will require a lot of investment. However, all this will quickly pay off, since such products are in demand, especially among families with children who are ready to spend decent amounts on memorabilia.
3D photography technology
3D photography technology relies on binocular vision and the ability to see the world with two eyes, that is, from two angles. In this case, the obtained images and objects on them are displaced relative to each other, and the brain processes them and a three-dimensional picture comes out.
Stereo shooting involves shooting an object from two points, the distance between which is called a stereo base, and its value depends on the distance to the subject. For photography from two points, you can use two cameras installed in the desired positions, or use only one that is available, moving it to the desired distance for repeated photography. It is recommended to use a tripod, which will help prevent skewing and simplify further processing of photographs. One camera is enough for the process of shooting high-quality 3D photos. It is impossible to shoot only those subjects that are in motion.
After receiving two photographs of the same object from different angles, you need to align and combine them into a single 3D photo. Two formats of stereo photography are used: stereo pair and anaglyph. You can align photos in different graphic editors, and to merge the angles, you need to acquire special software that will allow you to make high-quality image with minimal distortion and smooth viewing angles.
When the photo is ready, you need to print it. Printing must be done on high quality printers. Viewing this kind of photos is possible with the use of 3D glasses, both in cinemas, and with the installation of a photo in a special frame, the front part of which is made of special embossed glass. The best effect can be obtained on a smartphone screen using a special program.
I have been photographing spherical or 3D panoramas for several years now. But he turned to 3D subject photography relatively recently. As in the case of panoramic photography, special equipment is required to photograph a subject in 3D. And here you can meet almost any budget: by independently assembling a turntable or by purchasing a fully ready-to-use mechanical table at an affordable price. Modern manufacturers also offer automated platforms and / or installations for 3D surveying. If a photographer is just starting to master 3D photography, the choice of equipment does not really matter.
In order to take a three-dimensional photo, the object is placed on a platform movable relative to the camera, which allows it to be rotated 360 degrees around its axis. Further viewing of the sequence of frames made is carried out using a special program that allows the viewer to get the illusion of the volume and three-dimensionality of the image. The viewer can view the object from any side and even enlarge certain parts of it. The more angles / frames are taken, the smoother the rotation of the subject will be and the more details can be seen.
It is this kind of shooting for many objects that is uncontested, since it is able to convey those characteristics of the subject that cannot be photographed in the usual way. 3D photography can show, for example, what a printed embossed case looks like for mobile phone, the skill of cutting the stone, will give a specialist the opportunity to "turn" the detail from all sides. At the same time, unlike 3D modeling, multi-angle 3D photography is 100% realistic and obtaining high-quality 3D photography takes much less time and costs less than rendering the desired model.
Everything seems to be simple: to get a 3D photograph, you just need to place the object in the center of the turntable, take the required number of angles and get a ready three-dimensional image. If not for a few nuances ...
Let's consider the key points that are responsible for the quality of the resulting photo.
Recognition of the subject
The proportions of the subject must be correct. Here it is worth remembering the effect of the peephole. When a person stands very close to the door, his head looks disproportionate, and certain facial features are hypertrophied (huge nose, eyes, etc.)
When using any wide angle lens photographers experience this effect to a greater or lesser extent (depending on the distance to the subject). In other words, to avoid possible geometric distortions, you need to choose a suitable lens. The most versatile (in this case) will be a macro lens with a focal length of 90 to 105 mm.
The angle or point of view will also affect the recognition of the subject. The smaller the object, the higher the camera should be mounted. So the jewelry is removed practically from the top. And the larger the subject, the lower the shooting point.

Object lighting
In my example, I used two "main" sources and one "auxiliary" to illuminate the object. The names are enclosed in quotation marks simply to distinguish one source from another in terms of degree of involvement. To avoid unnecessary glare, one "main" monoblock shone from top to bottom, at an angle of almost 90 degrees to the plane of the platform. This approach was required because the photo being shot was glossy, which means there was a high probability of getting unnecessary shine in unnecessary places.

In other words, by choosing the right shooting point, the right angle, setting a competent lighting scheme, you will save yourself or the designer from the subsequent many hours of post-processing.
In our example, we used only light-color correction and cropping. It took about 10 minutes to create a 3D projection (excluding shooting). The most picky photographer, of course, will notice that the brightness in the upper left corner "walks" a little against the background, but in this case it did not matter to me, since first of all it was necessary to quickly shoot the object and put the image on the site for illustration commercial proposal... For photography, I used a mechanical table with 72 sectors and a turntable with a diameter of 60 cm. The turntable model is made of two sheets of laminated plywood or chipboard and looks very solid.

No backlashes or chips were found. The packing of the table is simple but reliable. On my copy, the rotary part of the table is sealed with a paper sheet of the required diameter and, if necessary, can be replaced with a piece of plastic, or with another sheet cut from whatman paper.
On the lower part of the structure, marks are applied that allow you to evenly rotate the table, and therefore the object itself, fixed at the desired angle, when shooting from different angles. The rotation is carried out by touch, in blind mode. Due to the sufficient mass of the entire table, it is almost impossible to accidentally move its stationary part relative to the camera. Shooting one series of 72 frames takes a couple of minutes. A radio cable will be a good helper, so as not to run from the camera to the platform every time.
I have no complaints about the product itself. Yes, the automatic platform will certainly be more convenient and the shooting will probably go a little faster, but the automation of the process does not affect the quality of the shooting itself, therefore, if in the near future you do not need to photograph very large objects (for example, mannequins), a model from the mechanical series - great choice.
Before diving into 3D photography, there are a few more things to consider.
- Manufacturers who make software for assembling 3D panoramas offer software for assembling 3D object photographs. From the advantages of this offer - you will have access to many settings, all files will be located directly with you. Of the minuses - the price of a software license is quite high.
- Alternatively, you can use a special script, the code of which you place on your site. The main advantage of such a solution is that you do not need to pay for it. The downside is that you need to understand HTML at least for entry level to embed the code into the site algorithm.
- Using the Megavisor service (which, by the way, I also used). The advantage is speed. Creation of a 3D projection and its adjustment are carried out almost instantly. The service allows you to view 3D photos not only on a computer, but also on a smartphone or tablet. Disadvantages: all files are stored on a remote service and in case of failure, your photos may not be available. But at the first stage, especially with non-commercial use, this can be neglected.
Most photographers now give finished photos v in electronic format, many of our customers have forgotten what a printed photograph looks like. In my photo project, I print one of the best shots for a client on special paper and roll onto foam board. A simple image does not convey the details of the work and only gives a general impression to potential customers. But the multi-angle 3D projection allowed my future customers to see the work in detail.
All site visitors liked this opportunity and even had a positive financial response. In other words, if you are a practicing photographer or a keen amateur photographer, but you do not have orders for such shooting right now, the new tool may come in handy in the most unexpected way, not to mention that it will simply expand your horizons and increase your versatility as a professional!
-
 How to register a company abroad?
-
 How the passenger pays for the trip Benefits of travel for corporate orders
-
 Organization of a paid extended day group as an idea for a private business!
-
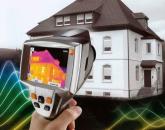 Own business: using thermal imaging cameras to inspect houses Thermal imaging cameras as a business can you make money
Popular
- Technology and timing of installation work
- Serbia - the life of Russian emigrants in the Balkans Cost and terms of company registration in Serbia
- Hospitality - by whom to work, a list of professions, in which universities to study, what to take for a specialty Enter the hotel restaurant business
- Job description of the deputy head of the shop Submits to the head of the shop
- Examples of personal qualities of an employee for a resume
- Business idea: auto parts store
- Profitable business in serbia
- What to write about yourself, how to describe yourself in your resume: example, employee qualities that employers value
- How to start a business in Israel and not screw it up
- Electronic submission of reports: in what case is it obligatory, what can be sent, services and their cost Program for electronic reporting to the tax