Puzzle templates for kids. Sublimation printing on puzzles
An article from the developers of the free service for creating puzzles Pazlodrom. Service is really interesting. I recommend that you familiarize yourself with it, especially for those users who have small children.
A good way to keep your child busy and entertained is to do puzzles together. How can the Internet help us in this matter?
There are online puzzles. But the recommendations of doctors and teachers do not recommend getting too carried away with them at an early age. The reasons are the lack of development of fine motor skills of the hands, plus the negative impact of the monitor on the still developing vision of the child.
On the net you can find many ready-made drawings with ready-made markup that can be printed and cut. The disadvantages include a fixed puzzle plot and primitive markup. In this option, it’s better to find a picture that your child likes and cut it to your taste.
Use Photoshop. Any search engine will give you many articles that describe in detail the technique for creating and printing a puzzle using Photoshop. For people who have not worked with the data software product this process takes a significant amount of time.
So, what can Pazlodrome offer us.
Make a puzzle from the picture you like. You can skip this step by choosing from the catalog of puzzles in the service itself.

Select the configuration of the puzzle elements. You can always change it later.

Select the number of puzzle pieces.

We press print and we get a version of our puzzle already broken and adapted for printing.

Next, using the browser's print functions, we can adjust our puzzle on the print page.

It remains only to print our puzzle. On Google Chrome, you can even save as a PDF and store it electronically.
As you can see, in a short time and without the skills of working in Photoshop, we got a puzzle with a fairly decent quality of execution. At the same time, there are practically no restrictions in the formation of the puzzle.
And finally, a little advice. It is best if the child takes an active part in the process of creating and cutting puzzles. In addition to toys, any child appreciates attention to himself. Children especially like to participate in the process together with mom and dad. Wish you luck.
Everyone loves puzzles, or at least they know what they are. This is a wonderful puzzle game for the whole family, an enjoyable pastime and a useful workout for the mind, memory and attention. Historically, jigsaw puzzles were created specifically as a learning tool. They were invented in England by the merchant John Spilsbury in the middle of the 18th century. These were black and white geographical maps pasted on a wooden base and cut into pieces. different shapes. Each piece contained certain information, and by putting them together one by one, it was possible to study geography.
The first puzzles were very expensive, but, nevertheless, they quickly gained popularity in England and other European countries. V XIX century puzzles "leaked" to America. Enterprising Americans began to use cardboard sheets instead of a wooden base, thereby significantly reducing the cost of puzzles and making them accessible to most people. Since then, puzzles have become not only study guide but also enjoyable entertainment. They began to be produced on the basis of reproductions of art paintings.
Puzzles became wildly popular during Prohibition in America. In addition to reproductions of paintings, photographs of natural landscapes, cars, celebrities, as well as pictures from films and cartoons, first in black and white, and then in color, began to be used. Puzzle lovers gathered in teams and organized entire tournaments to collect huge paintings from several tens of thousands of pieces.
 In Russia, before the revolution, puzzles were fashionable salon entertainment and were called "puzelya". Unfortunately, puzzles were almost never produced in the USSR. In Russia, the modern “puzel” has gained popularity again, now this hobby is available to everyone, including online.
Puzzles are multifunctional: adults often use the collected pictures to decorate the interior, and puzzles are useful for children both as a toy and as a simulator that develops logical thinking, imagination and attention. And besides, a cardboard puzzle is a great gift for any holiday, you just need to choose the right size, picture and wrap it up nicely.
Online puzzles: making out a picture
Puzzles are a fun activity for all ages. Modern manufacturers offer loose pictures of any complexity and for every taste: from cartoon stories to reproductions of masterpieces of world art. The variety of themes is striking - still lifes, landscapes, portraits, genre scenes. If you wish, you can collect a whole collection, for example, fairy-tale characters or castles.
Puzzles are a universal gift. They can be collected by one and the company, they will help pass leisure time in bad weather or brighten up "house arrest" in case of illness. It would not be superfluous to recall that puzzles are useful for children: they develop perseverance, attentiveness and accuracy, and with minimal effort from adults, they also develop the imagination of children.
There are, however, circumstances that limit the enthusiasm of puzzle lovers. First, it takes a lot of space and time to assemble large paintings. Agree, not all family members will be delighted with the two-week occupation of your masterpiece of the dining table or the crown place on the carpet in front of the TV. And for the puzzles themselves, such an arrangement is fraught with losses. Secondly, when the picture is assembled, the question usually arises - "What's next?". Not to break the work of art again into 2-3 thousand pieces?
We will try to suggest you how to solve these problems.
So, where to collect puzzles? For example, you were presented with a loose picture with a gorgeous view of New York, a window to the world that is only 86x116 cm in size. Of course, special mats for assembling puzzles are sold, but, frankly, they are a little expensive and do not cover all sizes of paintings. Our advice - do not look all over the city or the Internet for a store to buy such a rug, but rather go to the nearest construction supermarket. And buy there 2 (!) Pieces of the thinnest fiberboard, each in size, in our case, 100x130 cm. Yes, it’s heavy, but incomparably (or rather, comparable - about 10 times) cheaper than a rug. As you understand, the format of the sheet is the dimensions of the picture plus allowances on each side of about 5 cm. This is your desktop / floor - in short, a springboard for action. On one sheet you collect the picture, on the second you cover the assembled part for the duration of the breaks. In this form, you can safely shove your masterpiece for a week or two under the sofa, under the carpet or put it on the closet, for reliability, grabbing the edges of the sheets in several places with tape. And be calm - your cat will not make any adjustments to the work, everything will remain in place.
So, slowly, for a week, a month, a year, you have collected a picture. And now what? How to issue it? Our recommendations will again send you to the hardware store. What for? For self-adhesive film, moldings (yes, yes!), Glue, paint and varnish. What for? We tell.
We turn the assembled picture face down - with two sheets of fiberboard it is not difficult to do this, according to the “tails-eagles” principle for a coin. We apply a corresponding sheet of self-adhesive film with a protective layer on the wrong side. We begin to carefully glue it - peeling off the protective layer a few centimeters. To make it easier, start moving from the short side of the picture. Take your time, carefully press each glued piece with a rigid ruler, avoiding the formation of air bubbles.
The picture glued in this way is glued with universal glue to a fiberboard sheet with markings of symmetrical fields. We advise you to immediately make holes on the sheet for hanging the picture - it is better not one, but two at a fairly large distance from each other. Now let's start making the frame.
A baguette frame for a picture from puzzles is a great luxury. We offer to replace a real baguette with foam moldings. Firstly, they are much cheaper, secondly, they are easier, and thirdly, they are easier to work with. Construction stores offer the widest selection of them - of different widths and profiles, with all sorts of ornaments. Choose the molding to your liking, in accordance with your vision of the finished masterpiece. Your picture will have a strict or artsy frame - you choose how and what color it will be. Think in advance where your work will hang, this will facilitate your choice, suggest the right design solution.
First, paint the moldings with your chosen paint or metallic pigment using a brush or spray can. When they are dry, use a knife to cut the frame parts to the desired length and carefully glue them with all-purpose glue to the sheet with the picture. If the margins left are wider than the selected baguette, cut them to the desired width before gluing the frame. Opposite the holes for the nail, carefully use an awl to select the foam so that it does not burst when you hang the picture.
If desired, the finished picture can be varnished - with a brush or from an aerosol can. In the latter case, the coverage will be more uniform and you will be able to avoid smudges. At this stage, you can be more sophisticated using various effects of crackle or aging of the coating - the main thing is to have a sense of proportion, because this decor is not suitable for all plots.
And one more little tip. In pictures from puzzles, you can combine the beautiful with the useful. For example, on a puzzle with the image of the seasons, you can place a room thermometer or a tear-off calendar on the side. Under the picture with a fairy-tale palace, you can make a pocket for keys, and hooks for children's clothes will be a good addition to the picture with cartoon characters. Think over the composition and calculate the dimensions of the base sheet - and go ahead, get to work!
Making puzzles with your own hands for children is very simple, and most importantly - profitable. If the child is tired of collecting some puzzles, you can always make new ones for him - with a different image.
On this page we offer you for children to make puzzles with their own hands from 9 parts.
The pictures show: animals, fairy princesses, favorite cartoon characters, cars. These puzzles will be interesting to collect for both boys and girls.
How to make puzzles with your own hands
- At the end of the article you will find a link to download all the 9-piece puzzles for kids in the archive. Unzip the archive and print the puzzles you like on a color printer.
- Print out 2 puzzle sheets.
- Glue one sheet with a picture - puzzles on cardboard, then cut the cardboard along the lines into pieces.
- Lay out the puzzle pieces and the whole image in front of the child and explain how to put the pieces together to get the whole picture.
- After that, you can already invite the child to collect puzzles on their own.
The child will be happy to collect these bright and colorful pictures. Such puzzles can be made several pieces at once if you are planning a children's birthday. Then each of the little guests will have something to do.
On our site you will find a lot that you can do with your own hands.
Puzzles for children to print

Puzzles for children to print

Puzzles for children to print

Puzzles for children to print

Puzzles for children to print

Puzzles for children to print

Puzzles for children to print

Puzzles for children to print

Puzzles for children to print

Puzzles for children to print

Puzzles for children to print

Puzzles for children to print

Puzzles for children to print

Puzzles for children to print

Puzzles for children to print

Puzzles for children to print

Puzzles for children to print

Puzzles for children to print

Puzzles for children to print
The site also contains puzzles for children of all ages:
- For very young children
- Puzzles based on folk tales
- Big puzzles
In contact with
classmates
The term "puzzle" comes from the English. "puzzle", which means "puzzle", "mystery". The origin of puzzles is associated with the name of the English cartographer John Spilsbury, who pasted a map of Europe onto a wooden base, sawed it along the contours of European states, and began to use the sawn map to teach geography. Gradually, cut pictures began to be used not only and not so much for educational purposes, but for entertainment in fashion salons. "Salon" puzzles were an expensive pleasure, as they were made from precious woods. The peak of popularity of puzzles came in the 30s of the twentieth century, when they began to use cardboard instead of wood for their manufacture. Puzzles received a new round of their development with the advent of sublimation printing.
Currently popular sublimation printing on puzzles grows exponentially, as a colorful, exclusively designed game can be a great gift for children and adults, as well as a great business souvenir for business partners and regular customers companies.
Sublimation printing allows you to apply high-quality color images, photographs, drawings, inscriptions and logos to puzzles. Such images are distinguished by bright colors and smooth color transitions, they are resistant to ultraviolet rays and mechanical abrasion. Thanks to the development of sublimation printing technology, any puzzles can be easily made at home.
To print a colorful image on puzzles ourselves, we need: puzzle blanks, an inkjet printer with piezoelectric printing technology, sublimation ink, sublimation thermal transfer paper, heat-resistant tape, several sheets of white office paper and a heat press.
Puzzle blanks
Puzzle blanks can be rectangular, square, round, heart-shaped or any other non-standard shape.
The most widespread are the classic rectangular blanks for puzzles, the options for which are presented below.
 |
 |
|
| 4x5 | 6x5 | 5x8 |
 |
 |
 |
| 6x8 | 10x5 | 6x10 |
 |
 |
 |
| 8x10 | 12x10 | 15x10 |
Popular types of rectangular puzzle blanks for sublimation printing
Puzzles are made of cardboard and polyurethane, on a regular and magnetic basis. The most economical and affordable for customers are cardboard blanks, the surface of which is treated with a polymer composition. The polymer layer serves to fix the sublimation dyes and ensures the resistance of the puzzles to abrasion.
An interesting solution for sublimation printing on puzzles are magnetic blanks made of polymer-coated magnetic vinyl. Magnetic puzzles can be attached to any metal surface, whether it is a refrigerator door, a computer system unit or a washing machine side panel.
Most often blanks for puzzles are white, but there are also colored specimens. On white blanks, the color is not distorted, it looks natural and clean. If the workpiece has an extraneous color or shade, then the color scheme of the finished puzzles will differ from their image on the screen.
Printer and printing technology
For sublimation printing on puzzles, you need a conventional inkjet printer with a piezoelectric print head. The cartridges of such a printer are equipped with a piezoelectric crystal, which sets in motion a metal plate that pushes microscopic drops of ink through nozzles onto the media. The drop flies out of the nozzle like a core from a catapult, while the ink does not heat up.
As for the thermal inkjet printing method, it is not suitable for sublimation ink, which, when heated to 160 ° C, pass into a gaseous state. In a cartridge with thermal inkjet printing technology, which involves boiling the ink, the coloring matter will evaporate when heated and settle on the inner walls of the cartridge without getting on the media.
sublimation ink
For sublimation printing on puzzles, special sublimation ink containing dyes that are insoluble in water. Such inks, similar in physical properties and functional characteristics with pigment inks, produce bright and colorful prints that are resistant to sunbeams and friction. Puzzles printed with sublimation ink will last a very long time, will not fade or be erased even with intensive use.


Various types of sublimation ink
sublimation paper
Sublimation printing uses a special sublimation paper with a polymer coating. Getting on the media, the ink is fused into the polymer layer and fixed in it, without penetrating into the deeper layers of the paper. When the paper with the ink print enters the heat press, the ink with polymers will safely transfer to the surface of the puzzles, leaving only a faint imprint on the paper from the image that once resided on it.


Some types of sublimation paper
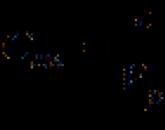
The forums are actively discussing the possibility of using office paper or matte photo paper for sublimation printing. Such types of paper do not have a special layer of polymers, therefore, part of the ink, falling on their surface, penetrates deep into the intermediate medium, and subsequently does not transfer to the printed puzzles. The figure shows a good example of fixing sublimation ink on various types of paper.

Attaching sublimation ink to various types paper
Legend:
left - sublimation paper,
in the center - matte photo paper,
right - plain paper
It can be seen from the figure that only special sublimation paper provides reliable fixation of ink in the layer of molymers. On matte photo paper, the ink spreads, and on plain paper it is absorbed deep into the media, therefore, it is impossible to obtain high-quality sublimation puzzles using non-specialized paper.
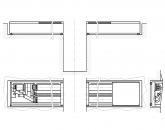
Thermopress
Used for sublimation printing thermopress- an apparatus equipped with two thermal soles, between which the future puzzle with an intermediate carrier is clamped.
The following figure shows some models of heat presses for sublimation printing on flat blanks.


Heat presses for sublimation printing
The heat press heats up the workpiece, and the ink sublimes, passes into a gaseous state, fixing itself on the surface of the puzzle.
Sublimation Printing Technology
Having prepared all the necessary materials and tools, we proceed to image processing. In any graphic editor, we adjust its size, brightness, contrast, rotate it horizontally so that it is displayed in a mirror image.
We print the processed image on an inkjet piezoelectric printer. We use sublimation ink and sublimation paper for printing. We carefully dry the resulting picture and put it on the future puzzle, fixing it on four sides with thermal tape or ordinary masking tape.
We heat the heat press to a temperature of 190 ° C. We cover the bottom sole with clean sheets of paper, on which we lay out the workpiece. From above, we close the workpiece again with clean sheets of paper and lower the upper sole of the heat press. We perform two sessions of warming up for 20 s.
A few words about the time and temperature of sublimation transfer. Some sites indicate that the workpiece should be kept in a heat press at a temperature of from 190 ° C to 220 ° C for 40 to 90 seconds. Where these values are taken from remains a big mystery, since in most cases, after 90 seconds of being in the press, the surface of the puzzles bubbles or goes in waves from overheating. Using such an extreme mode, you can ruin more than one workpiece.
We recommend doing this: close the heat press for 20 seconds, then open the plate and alternately lift all four corners of the sublimation paper, evaluating the print quality. Here, the adhesive tape will serve us well - we will be able to evaluate the quality of sublimation printing on puzzles and, if necessary, place the workpiece in a heat press for another 20 seconds. The picture will not move or move.
We move the upper sole of the heat press, remove our workpieces from under it. Carefully remove the top layer of paper, separate the sublimation sheet from the puzzles, on which the image was. Let's consider the result. If your puzzles turned out bright and colorful, and the image on the intermediate medium is pale and lifeless, then you did everything right. It remains only to slightly cut the lines along the edges of the puzzles.
Now let's talk about where ready-made sublimation puzzles are used.
Children's puzzles
Children's puzzles are a great toy designed to develop the logic and fine motor skills of a child. Playing puzzles, the child not only enjoys meeting with the characters of his favorite cartoons, but also gets acquainted with new colors and shades, develops fine motor skills of his hands.

Popular
- Program for changing the angle of attack and pitch
- Actual output speed Calculation of closed gear train
- What is the procedure for the use of official transport by an employee
- aircraft fuel system
- Agreement for the evacuation of a vehicle Standard agreement for the evacuation of a vehicle
- Bulldozer performance and how to improve it Basic information about bulldozers
- Toyota Production System (TPS) and Lean Manufacturing
- Examination tickets by profession line pipe fitter
- What to do if you don't feel like doing anything
- Globus - shops for the whole family